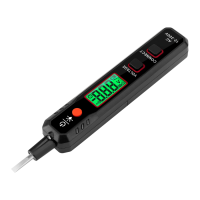
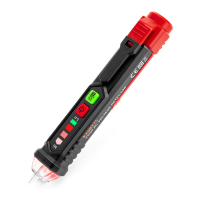
The KAIWEETS ST100 is a multifunction voltage tester designed for various electrical measurements and diagnostics. It is a handheld device with an LCD display and several function keys, making it suitable for both professional and DIY use.
Function Description
The ST100 is capable of performing a wide range of measurements, including:
- DC Voltage Test: Measures direct current voltage.
- AC Voltage Test: Measures alternating current voltage.
- Resistance Test: Measures electrical resistance.
- Continuity Test: Checks for the presence of a complete electrical path.
- Capacitance Measurement: Measures capacitance.
- Frequency Test: Measures the frequency of an AC signal.
- Diode Measurement: Tests diodes.
- Live Wire Detecting: Identifies live electrical wires.
- Non-contact Phase Sequence Detection: Determines the phase sequence of a three-phase system without direct contact.
- NCV (Non-Contact Voltage) Measurement: Detects AC voltage without physical contact.
- Smart (AUTO) Measurement: Automatically identifies and measures DC voltage, AC voltage, resistance, and continuity.
Important Technical Specifications
General Specifications:
- Environment Condition: CAT. III 600V, Pollution level 2, Altitude < 2000m.
- Working Temperature and Humidity: 0~40°C (<80% RH, <10°C non-condensing).
- Storage Temperature and Humidity: -10~60°C (<70% RH, remove the battery).
- Temperature Coefficient: 0.1x accuracy /°C (<18°C or >28°C).
- MAX. Voltage between terminals and earth ground: 600V.
- Sampling: Approximately 3 times/second.
- Display: 4000 counts.
- Over Range Indication: "OL".
- Low Battery Indication: A battery symbol.
- Input Polarity Indication: Display "-".
- Power Requirement: 2 x 1.5V AAA batteries.
Accuracy Specifications (within one year after calibration, reference condition: 18°C to 28°C, relative humidity no more than 80%):
DC Voltage Test:
- Impedance: Approx. 10MΩ
- Measurable Voltage: 0.8V~600V
- Ranges & Resolution:
- 4V: 0.001V
- 40V: 0.01V
- 400V: 0.1V
- 600V: 1V
- Accuracy: ±(0.5% +3)
AC Voltage Test:
- Impedance: Approx. 10MΩ
- Frequency Response: 40Hz~1kHz; TRMS
- Measurable Voltage: 0.8V~600V
- Ranges & Resolution:
- 4V: 0.001V
- 40V: 0.01V
- 400V: 0.1V
- 600V: 1V
- Accuracy: ±(0.8%+3)
Resistance Test:
- Ranges & Resolution:
- 400Ω: 1Ω
- 40KΩ: 0.01KΩ
- 400KΩ: 0.1KΩ
- 4MΩ: 0.001MΩ
- 40MΩ: 0.01MΩ
- Accuracy:
- ±(1.0%+5) for 400Ω, 40KΩ, 400KΩ, 4MΩ
- ±(1.5%+10) for 40MΩ
Capacitance Test:
- Ranges & Resolution:
- 40nF: 0.01nF
- 400nF: 0.1nF
- 4µF: 0.001µF
- 40µF: 0.01µF
- 400µF: 0.1µF
- 4mF: 0.001mF
- Accuracy: ±(3.0%+5)
Frequency Test:
- Ranges & Resolution:
- 40Hz: 0.01Hz
- 400Hz: 0.1Hz
- 4KHz: 0.001KHz
- 40KHz: 0.01KHz
- 400KHz: 0.1KHz
- 4MHz: 0.001MHz
- Accuracy: ±(1.0%+3)
Usage Features
Power On/Off:
- Press and hold the "U" key for about 2 seconds to turn the device on or off.
Function Selection:
- Press the "FUNC" key to cycle through different functions.
- Press and hold the "FUNC" key for about 2 seconds to return to NCV measurement mode.
- The device defaults to NCV function mode upon power-on.
Data Hold / Flashlight:
- Press the "H/*" key to toggle data holding on or off.
- Press and hold the "H/*" key for about 2 seconds to turn the flashlight on or off.
Auto Power Off:
- The meter automatically shuts down after about 15 minutes of inactivity to save battery energy. A "U" symbol on the display indicates auto power off is enabled.
NCV Measurement:
- Press the "U" key to enter NCV measurement mode.
- Gradually bring the NCV sensing area close to the conductor.
- A weak electric field signal ("---L") will cause a slow buzzer sound and a green light.
- A strong electric field signal ("---H") will cause a quick buzzer sound and a red light.
Smart (AUTO) Measurement:
- Press the "U" key to power on, then press "FUNC" to select "AUTO" gear. "Auto" will display.
- Insert the red probe into the "INPUT" jack and the black probe into the "COM" jack.
- Contact the probes with the measured subject or resistance. The meter automatically recognizes and measures DC voltage, AC voltage, resistance, or continuity.
- For resistance measurement, if the value is less than about 50Ω, the buzzer will sound.
Diode Measurement:
- Press the "U" key to power on, then press "FUNC" to select the diode gear.
- Insert the red probe into "INPUT" and the black probe into "COM".
- Connect the red probe to the anode and the black probe to the cathode of the diode.
- Read the forward bias value. If the probes are inversely connected, "OL" will be displayed, which helps distinguish anode and cathode.
Live Wire Detecting:
- Press the "U" key to power on, then press "FUNC" to select "LIVE" gear.
- Insert the red probe into "INPUT" and remove the black probe.
- Use the red probe to contact the conductor.
- Weak signal ("---L") results in a slow buzzer and green light.
- Strong signal ("---H") results in a quick buzzer and red light.
Non-contact Phase Sequence Detection:
- Press the "U" key to power on, then press "FUNC" to select "PA" symbol.
- The letter "A" will flash. Stick the sensing probe to the first phase line and wait for a beep.
- "PAB" with "B" flashing will display. Stick the sensing probe to the second phase line and wait for a beep.
- "PABC" with "C" flashing will display. Stick the sensing probe to the third phase line and wait for a long beep.
- The display will show the detection results: "P---L" for a left-handed phase sequence, "P---R" for a right-handed phase sequence.
- Note: Detect all three wires within 1 minute to avoid a detection timeout error.
Maintenance Features
Cleaning:
- Turn off the meter and remove the probes.
- Wipe the case with a damp cloth or mild detergent.
- Do not use abrasives or solvents.
- Wipe the contacts in each input socket with a clean swab soaked in alcohol.
Battery Replacement:
- Turn off the meter and remove the probes.
- Remove the screw fixing the battery cover and then remove the battery cover.
- Remove the old battery and replace it with a new one of the same specification (2 x 1.5V AAA batteries), paying attention to the battery polarity.
- Install the battery cover back to its original position and secure it with screws.