Do you have a question about the Kargo Master 40649TL and is the answer not in the manual?
Always check for wires, fuel tanks, brake lines and other vehicle functionality items before drilling.
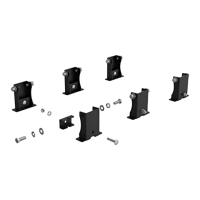
Lists the required tools for installation, including various wrenches, drill bits, and drivers.
Instructions to read all guidelines and ensure product readiness before starting installation.
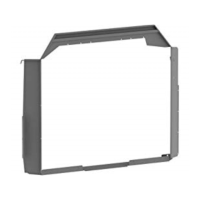
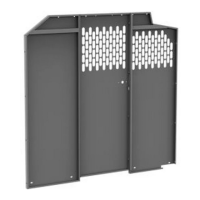
Bolting the passenger and driver side wings to the partition using specified hardware.
Securing the top panel to the partition with bolts and lock nuts.
Fastening the bottom plate to the partition panels using bolts, lock washers, and washers.
Loosely bolting the roof support to the partition using provided hardware.
Removing the slider doorway handle and preparing to install the handle mount.
Removing D-rings and any necessary wall liner for installation access.
Positioning, marking, and drilling the partition for floor mounting, ensuring clearance.
Securing the partition to the floor using bolts, washers, and optional spacers.
Attaching the driver's side wing to the van siding using specified hardware options.
Mounting the roof support to the van siding by installing a plus nut and bolting.
Bolting the factory handle to the handle mount and passenger side wing.
Screwing the passenger side wing to the "B" pillar using sheet metal screws.
| Brand | Kargo Master |
|---|---|
| Model | 40649TL |
| Category | Automobile Accessories |
| Language | English |