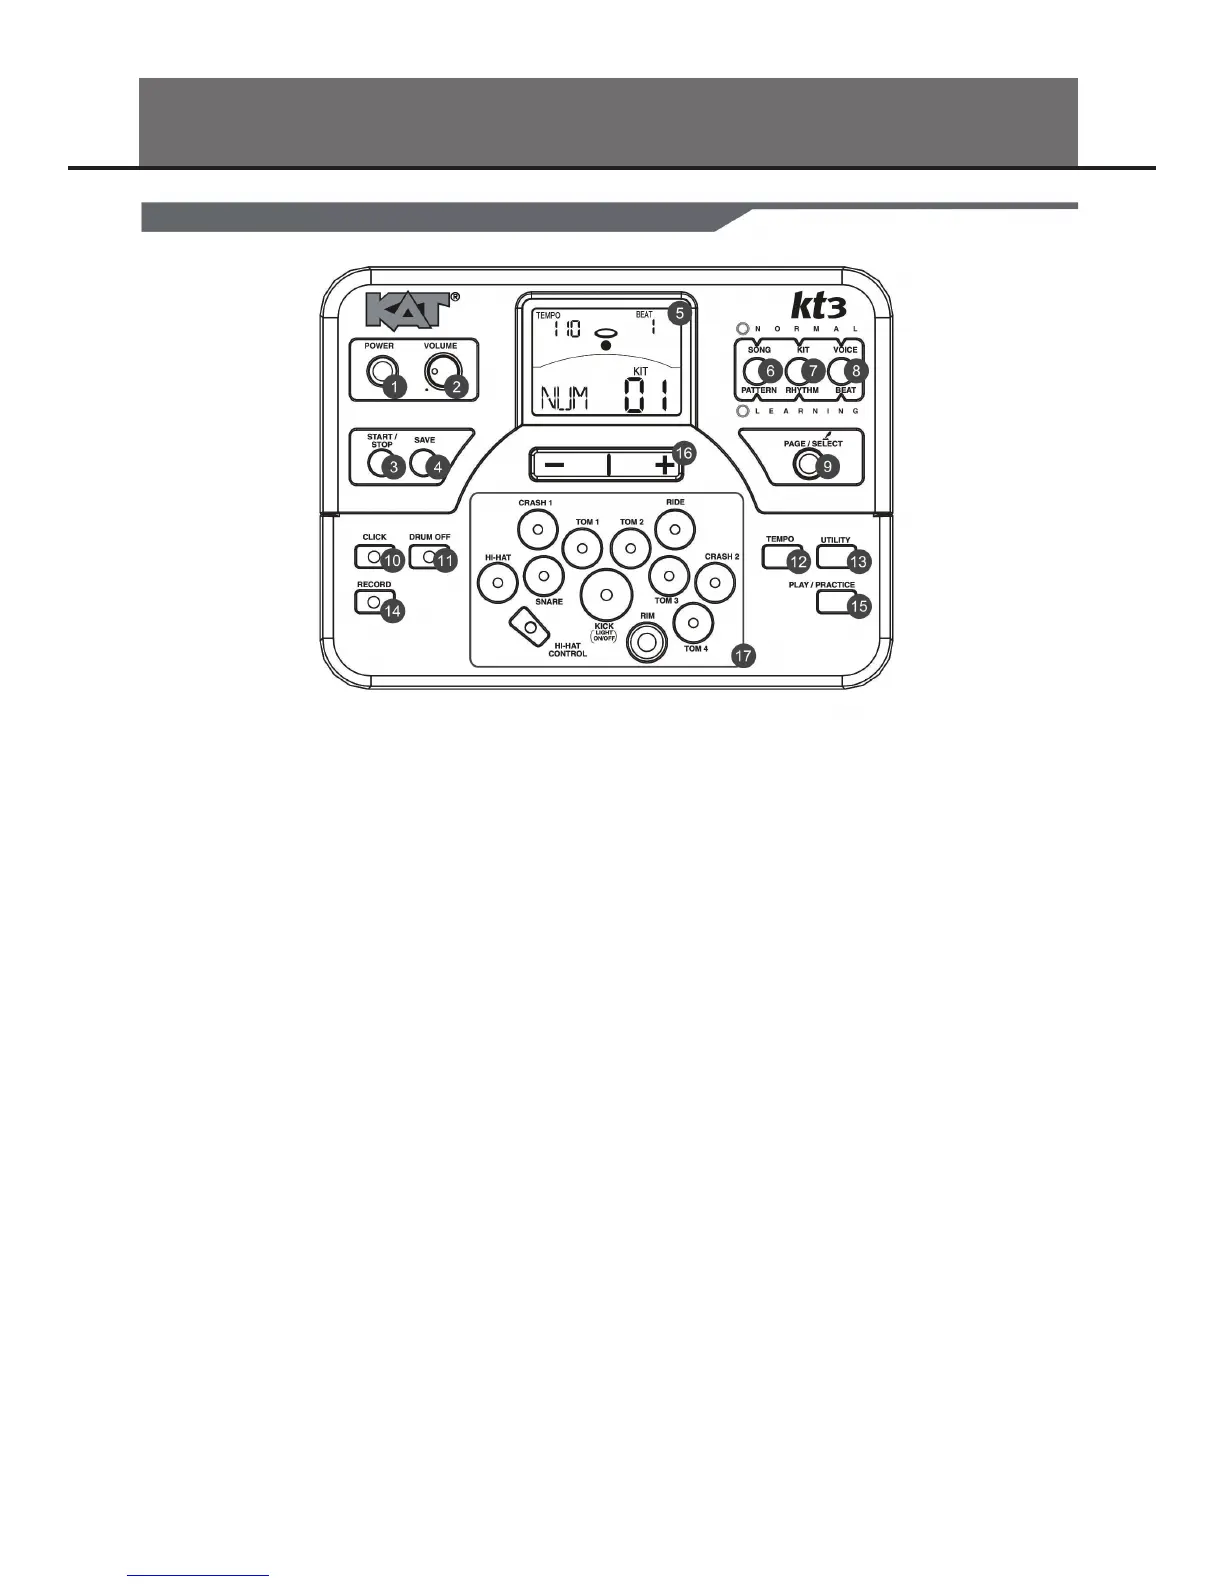
1. POWER Button
This button turns the power on and o.
2. VOLUME Knob
Adjust the volume of phone and line output.
3. START/STOP Button
Start or stop playing.
4. SAVE Button
This button is used to save the current kit settings in a
user kit and save the trigger settings under the Utility
menu pages.
5. LCD Display
Please refer to the LCD Display section.
6. SONG/PATTERN Button
Enter the Song menu in NORMAL mode or enter the Pat-
tern Practice menu in LEARNING mode.
7. KIT/RHYTHM Button
Enter the Kit menu in NORMAL mode or enter the
Rhythm Practice menu in LEARNING mode.
8. VOICE/BEAT Button
Enter the Voice menu in NORMAL mode or enter the Beat
Practice menu in LEARNING mode.
9. PAGE/SELECT Button
Scroll through the menu pages. Press and hold it for 1
second to switch modes between NORMAL and LEARN-
ING.
10. CLICK Button
Turn the metronome on or o and enter the Click menu in
NORMAL mode.
11. DRUM OFF Button
Mute the drum part of the pattern.
12. TEMPO Button
Adjust the current tempo.
13. UTILITY Button
Enter the Utility menu in NORMAL mode.
14. RECORD Button
Enter the Record menu in NORMAL mode.
15. PLAY/PRACTICE Button
Play back your recording in NORMAL mode. Start practicing
following sample practice patterns in LEARNING mode. Press
and hold it for 1 second to play back your practice in LEARN-
ING mode.
16. [ + ] Button and [ - ] Button
Pressing the [ + ] button increases and pressing [ - ] button
decreases the current parameter.
17. PAD/SELECT Buttons
These buttons play the pad voices of the current kit. In Voice
menu and Utility menu, they select the pad to be edited.
PANEL DESCRIPTION
FRONT PANEL
4