EasyManua.ls Logo

KaVo ORTHOPANTOMOGRAPH OP 3D - User Manual

KaVo ORTHOPANTOMOGRAPH OP 3D
221 pages
Print Icon
To Next Page IconTo Next Page
Loading...
ORTHOPANTOMOGRAPH
OP 3D
User and Installation Manual
ENGLISH
212972 rev. 19
0.805.4913
D519207, 19
Copyright © by Palodex Group Oy. All rights reserved.
See PDM system to determine the status of this document. Printed out 2019-10-07 09:30:50
Approved
Reviewed Suuronen Esa 2019-09-19 12:21
Approved Lassinen Juuso 2019-10-02 14:37

Table of Contents

Other manuals for KaVo ORTHOPANTOMOGRAPH OP 3D

Questions and Answers

  • S
    Shawn DunlapAug 19, 2025
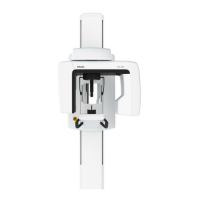
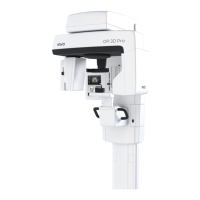
    Why are the Calibration and QC program date- and timestamps incorrect on my KaVo ORTHOPANTOMOGRAPH OP 3D Medical Equipment?
    • A
      Amanda DavisAug 19, 2025
      The incorrect date and timestamps in the Calibration and Quality Control programs are because the device didn't receive the correct system time from the network during start-up. To fix this: 1. Restart the device and rerun a calibration or QC program to see if it gets the time correctly this time. 2. Check that the system time is correct on the acquisition workstation, or any other computer that may operate as network time server in the local network. 3. Make sure the acquisition workstation has UDP port 123 opened in the firewall and the NetTimeservice is installed and running.
  • A
    Ana PetersAug 21, 2025
    What to do if there is no connection to KaVo ORTHOPANTOMOGRAPH OP 3D Medical Equipment device?
    • B
      briannanunezAug 21, 2025
      If there's no connection to the device, here's what you can do: * Make sure the device is powered on. * Check the Ethernet cable connections on both the workstation and the device. * Restart both the device and the workstation.
  • C
    Candace OconnorAug 23, 2025
    What to do if the image is not transferred to the workstation from KaVo ORTHOPANTOMOGRAPH OP 3D Medical Equipment?
    • T
      Timothy BakerAug 23, 2025
      If the image isn't transferring to the workstation, it's likely due to a disrupted local network connection, which causes data loss. The good news is the device stores the latest image until it confirms a successful transfer. Re-establish the local network connection, and the image data will transfer automatically. Important: do not power off the device, or the image will be erased.
  • A
    Alyssa ChangAug 26, 2025
    What to do if KaVo Medical Equipment device cannot be driven upwards or downwards?
    • A
      Amber MoralesAug 26, 2025
      If the device won't move up or down, it could be due to a few reasons: * The up/down slider is in safe mode. * The mechanical safety device on the driving motor has activated. * The patient positioning panel isn't working. To address this: 1. Clean the patient positioning panel and wait for the safe mode to clear. 2. Contact service.
  • B
    Brenda WilsonAug 28, 2025
    What to do if KaVo ORTHOPANTOMOGRAPH OP 3D Medical Equipment GUI shows 'Detach carpus holder' when it is not attached?
    • H
      Hector RhodesAug 28, 2025
      The 'Detach carpus holder' message appearing when the carpus holder isn't attached indicates an issue with the CEPH head support calibration. To resolve this, you'll need to re-calibrate the CEPH head support (service technician only).
  • N
    nmartinezAug 30, 2025
    What to do if the taken image is not transferred to the modality workstation with KaVo ORTHOPANTOMOGRAPH OP 3D Medical Equipment?
    • S
      Steven JonesAug 30, 2025
      If a taken image is not transferred to the modality workstation with your KaVo Medical Equipment, it's likely due to a disruption in the local network connection, causing data loss. The device stores the latest image until successful transfer confirmation. Re-establish the local network connection, and the image data will transfer automatically. Important: do not power off the device, or the image will be erased.
  • V
    victor49Sep 1, 2025
    What to do if there is no connection to the KaVo Medical Equipment?
    • T
      tnelsonSep 2, 2025
      If there is no connection to your KaVo Medical Equipment, try the following: 1. Power the device on. 2. Check the Ethernet cable connections on both the workstation and the device. 3. Restart both the device and the workstation.
  • V
    vgarzaSep 4, 2025
    What to do if KaVo Dental equipment shows error message about disabled modalities?
    • E
      Emily JenkinsSep 4, 2025
      If the KaVo Dental equipment displays an error message about disabled modalities, it indicates an issue with some of its functions. While you should contact service for assistance, you can continue using the device with the functions that are still enabled in the meantime.
  • A
    Antonio MedinaSep 6, 2025
    How to fix image transfer issues with KaVo Dental equipment?
    • S
      Stephen GallegosSep 7, 2025
      If the image isn't transferring to the workstation, the local network connection may be disrupted, causing data loss. The good news is that the device stores the latest image until it confirms a successful transfer. Re-establish the local network connection, and the image data will transfer automatically. Important: do not power off the device, or the image will be erased.
  • J
    Joe JohnsonSep 9, 2025
    What to do if KaVo Dental equipment has no connection?
    • M
      Margaret HawkinsSep 9, 2025
      If you're experiencing no connection to the KaVo Dental equipment, here’s what you should do: 1. First, ensure the device is powered on. 2. Then, check the Ethernet cable connections on both the workstation and the device. 3. Finally, restart both the device and the workstation.

Summary

ORTHOPANTOMOGRAPH OP 3 D User and Installation Manual

User and Installation Manual

Identifies the document as a user and installation guide.

2 Introduction

ORTHOPANTOMOGRAPH OP 3 D Device Overview

Describes the ORTHOPANTOMOGRAPH OP 3D device and its capabilities.

General Warnings and Precautions

Provides crucial safety information and precautions for using the device.

Installation Warnings and Precautions

Details safety measures and precautions necessary during device installation.

Connection Requirements

Specifies requirements for connecting the device to external systems.

Device Modification Guidelines

Instructs users against unauthorized modifications to the device.

3 Overview

Emergency Stop Switch Operation

Explains the function and operation of the emergency stop switch.

4 User Interfaces

Graphical User Interface (GUI) Overview

Provides a comprehensive overview of the device's Graphical User Interface.

Scout Image Program and SMARTVIEW Interface

Explains scout imaging and the SMARTVIEW interface for adjustments.

Device Settings and Quality Control Access

Accesses device settings and initiates quality control programs.

Device Calibrations Menu

Lists available user-performable device calibrations and their status.

Detailed Device Settings Configuration

Details settings for friendly name, MAR, language, and scout default.

Device Information and Service Mode Access

Accesses software versions, notices, exposure counters, and service mode.

5 Imaging Programs

Panoramic Imaging Programs Overview

Details the standard and pediatric panoramic imaging programs.

Cephalometric Imaging Program Details

Explains the lateral and pediatric lateral cephalometric imaging programs.

3 D Imaging Programs and FOV Sizes

Introduces 3D programs and lists available Field of View sizes.

3 D Resolution Options and Recommendations

Explains 3D resolution settings and their recommended uses.

6 Using the Device

General Imaging Workflow

Outlines the overall process for capturing images with the device.

Device Power On and Preparation for Imaging

Details the steps for powering on the device and preparing it for imaging.

Patient Positioning for Panoramic Imaging

Provides instructions on how to position patients for panoramic imaging.

Patient Positioning for Cephalometric Imaging

Provides instructions on how to position patients for cephalometric imaging.

Patient Positioning for Carpus Imaging

Provides instructions on how to position patients for carpus imaging.

Patient Positioning for 3 D Imaging

Provides instructions on how to position patients for 3D imaging.

Taking Panoramic and Cephalometric Images

Guides through the process of taking panoramic and cephalometric images.

Taking Scout and 3 D Images

Guides through the process of taking scout and 3D images.

7 Maintenance

Cleaning and Decontamination Procedures

Details the procedures for cleaning and decontaminating the device and its parts.

User Calibrations and Frequency Guidelines

Explains when and how often user calibrations should be performed.

Calibration Preparation Steps

Outlines the necessary steps before starting device calibrations.

Device Calibration Programs and Status Overview

Shows available calibration programs and their completion status.

Calibration Procedures: 3 D Pixel and PAN Pixel (3 D Sensor)

Details the steps for 3D pixel and PAN pixel (3D sensor) calibration.

Calibration Procedures: 3 D Geometry

Provides instructions for performing 3D geometry calibrations.

Quality Control Programs and PAN QC

Explains QC programs and details the optional PAN QC procedure.

8 Troubleshooting

9 Installation

Pre-Installation Requirements and Location Selection

Covers necessary preparations and requirements for the installation site.

Installation Space Requirements

Specifies the minimum space needed for device installation and operation.

Device Installation Sequence

Provides a general sequence for installing the device.

Column Installation Procedure

Details the steps required to install the main device column.

Carriage Installation Process Steps

Provides step-by-step instructions for installing the carriage assembly.

Cephalometric Unit Installation Procedure

Guides on how to install the cephalometric unit onto the device.

Communication Link Configuration Steps

Explains how to establish and configure the communication link.

Complete Device Calibration Process

Outlines the process for performing a complete device calibration.

Accessing Calibrations via Service Mode

Details how to access calibration programs by unlocking Service Mode.

Acceptance Tests Overview and PAN QC

Explains acceptance tests and accessing PAN QC programs.

Final Inspections Before User Handover

Lists checks and tasks before handing the device to the user.

Mains Power Configuration Steps

Details how to configure the mains power for the device.

Mains Voltage Configuration and Fuse Replacement

Covers changing fuses for different mains voltages.

Exposure Tests for Radiation Measurements

Explains how to perform exposure tests for measurements.

9.11 Mechanical Adjustments

PAN;3 D Collimator Adjustment Steps

Guides on adjusting the PAN/3D collimator if calibration fails.

CEPH Primary Collimator Adjustment Procedure

Details how to adjust the CEPH primary collimator if calibration fails.

CEPH Secondary Collimator Adjustment Procedure

Guides on adjusting the CEPH secondary collimator if calibration fails.

2 D;3 D Sensor Height Adjustment Process

Explains how to adjust the sensor height if geometry calibration fails.

2 D Sensor Height Adjustment Steps

Details the steps to adjust the height of the 2D sensor.

2 D Sensor Tilt Adjustment Procedure

Guides on adjusting the tilt of the 2D sensor.

2 D Sensor Position Adjustment Steps

Explains how to adjust the position of the 2D sensor.

10 Technical Data

Workstation Minimum Requirements for 2 D;3 D Imaging

Lists minimum specifications for workstations used with the device.

KaVo ORTHOPANTOMOGRAPH OP 3D Specifications

General IconGeneral
Detector TypeFlat panel detector
Cephalometric ArmOptional
Patient PositioningStanding or sitting
TypeCone Beam Computed Tomography (CBCT)
Imaging ModalitiesPanoramic, Cephalometric, 3D
Imaging ModesPanoramic, Cephalometric, 3D
Imaging TechnologyDigital
3D Dose Reduction TechnologyYes
DimensionsVaries depending on configuration
CompatibilityDICOM
Power Requirements220-240 V, 50/60 Hz

Related product manuals