EasyManua.ls Logo

KeeNetic SPRINTER - User Manual

KeeNetic SPRINTER
2 pages
Print Icon
To Next Page IconTo Next Page
Loading...
10:00
Mesh Wi-Fi
System
Acquire
4
5
10:00
Welcome to
Your Keenetic
Next
3
4
3
6
A
B
2
1 023
1
2
1 023
1
KEENETIC
SPRINTER
Quick Start Guide
AX1800 Mesh Wi-Fi 6 Gigabit Router/Extender
with a 4-Port Gigabit Smart Switch
Model: KN-3710
Creating a New or Extending
an Existing Network
Keenetic routers deliver reliable, continuous, and secure Wi-Fi
throughout your home. Starting with one main Keenetic router,
as your demands increase, you can add more Keenetic devices
to act as Wi-Fi extenders to create a centrally-managed multi-node
Mesh Wi-Fi System.
If you are creating a new network and this Keenetic Sprinter
(hereinafter ‘Keenetic device’) is going to be your Main Router,
use the switch position A H.
If you are extending an existing network and this Keenetic device
is to act as a Wi-Fi extender, turn the switch to position I B.
A H — Connecting Your Keenetic Sprinter
to the Internet
1. Set the physical Operating Mode Switch located on the side panel to position
А HRouter Mode.
2. Position your Keenetic device within cable lengths of Ethernet and power
outlets. Place your Keenetic device in an unenclosed space for better wireless
coverage. Connect your Keenetic device to a power source. Check that both the
Status LED C and Wi-Fi LED D are illuminated and not blinking.
3. Сonnect a mobile device to your Keenetic device via Wi-Fi. The default Wi-Fi name
(SSID) and the Wi-Fi password are printed on your Keenetic devices back label
along with a QR code that will automatically connect your mobile device to the
Keenetic device’s Wi-Fi when scanned. Alternatively, сonnect a computer to any
of the gray Ethernet ports on your Keenetic device using the included Ethernet
cable.
4. Once connected, an Initial Setup Wizard window will appear on your
mobile device / computer. If the Wizard does not appear, using a browser
go to my.keenetic.net and follow the setup instructions.
Note: If the Initial Setup Wizard still doesn’t appear, please refer
to the Frequently Asked Questions section below.
I B — Extending Your Existing Network Coverage
1. On the Keenetic device you wish to be a Mesh Wi-Fi Extender, set the Operating
Mode Switch located on the side panel to position I BExtender Mode.
2. Connect your Keenetic device to a power source. Check that both the
Status LED C and Wi-Fi LED D are illuminated and not blinking.
3. Make sure your Keenetic Main Router is active and has an Internet connection.
Connect the 'Extender' Keenetic device to your Keenetic Main Router using
an Ethernet cable (as supplied). Alternatively you can connect Keenetic
devices wirelessly by placing them near to each other and simultaneously
pressing the Wi-Fi Control Buttons D on both devices. Check that the
Internet LED A on the 'Extender' is illuminated.
4. Сonnect a mobile device / computer to your Keenetic Main Router network.
5. Launch a web browser and go to my.keenetic.net and log in to the Main Router
or launch the Keenetic Mobile Application. Then choose the Wi-Fi System section
and click Acquire to add an extender candidate to your Wi-FiSystem. Wait for the
process to complete.
6. Disconnect the acquired Extender from the Main Router and place the Extender
where you want to expand your Wi-Fi network in your home. A Keenetic Mesh
Wi-FiSystem supports both wireless and wired connections between the Main
Router and Extenders. To maximize your network performance, use wired
connections where possible. The Internet LED A on the Extender will
illuminate when it has connected successfully to your network.
For technical support and other information, please visit
help.keenetic.com
Question and Answer IconNeed help?

Do you have a question about the KeeNetic SPRINTER and is the answer not in the manual?

Summary

Connect Keenetic Sprinter to Internet

Set Operating Mode to Router

Set the physical switch to position A (Router Mode) for internet connection setup.

Connect Device and Verify LEDs

Position the device, connect to power, and check that Status and Wi-Fi LEDs are illuminated.

Connect Client and Launch Setup

Connect a mobile device or computer and access the Initial Setup Wizard or my.keenetic.net.

Extend Network Coverage

Set Operating Mode to Extender

Set the physical switch to position B (Extender Mode) to extend network coverage.

Connect Extender and Power On

Connect the extender to power and verify that Status and Wi-Fi LEDs are illuminated.

Link Extender to Main Router

Use Ethernet or Wi-Fi (WPS) to connect the extender to your main Keenetic router.

Add Extender to Wi-Fi System

Connect a client device to the main router and add the extender via the app or web interface.

Keenetic Sprinter Hardware Details

Operating Mode and Antennas

Details on the router's operating mode switch and four fixed Wi-Fi antennas.

Power and Network Ports

Information on the DC power socket and the function of network ports 0, 1, 2, and 3.

Status and Control Buttons

Overview of the Reset button, Status LED, Internet LED, FN1/FN2 LEDs, and Wi-Fi Control Button.

Management and Troubleshooting

Management Options

Learn about the Keenetic web interface, mobile app, and remote management system.

Frequently Asked Questions

Solutions for common issues like setup wizard access, internet connectivity, and forgotten passwords.

General Information and Safety

Includes box contents, operating conditions, warranty, safety instructions, and disposal.

Overview

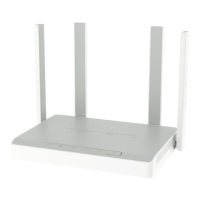
The Keenetic Sprinter is an AX1800 Mesh Wi-Fi 6 Gigabit Router/Extender with a 4-Port Gigabit Smart Switch, designed to provide reliable, continuous, and secure Wi-Fi throughout your home. It can function as a standalone main router or as an extender to an existing network, forming a centrally-managed multi-node Mesh Wi-Fi System.

Function Description:

The device operates in two primary modes: Router Mode (A) and Extender Mode (B), selected via a physical switch on the side panel. In Router Mode, it acts as the main gateway for your home network, connecting to the internet and distributing Wi-Fi. In Extender Mode, it expands the coverage of an existing Wi-Fi network, whether it's a Keenetic Main Router or a non-Keenetic main router.

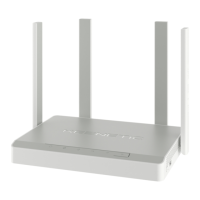
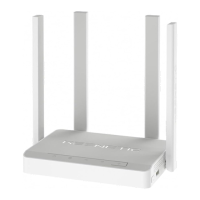
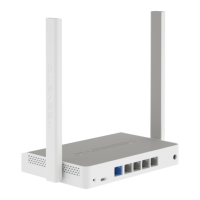
The Keenetic Sprinter features four fixed precision printed dipole Wi-Fi antennas with 5 dBi gain, which are recommended to be kept in a vertical position for optimal wireless coverage. It includes a DC Power Socket for continuous operation with the supplied power adapter. The device is equipped with multiple network ports: three gray ports (1, 2, & 3) intended for home devices, and one blue port (0) preconfigured for Internet connection in Router Mode. In Extender Mode, the blue port also functions for home or office network connection. Each port has an LED that indicates connection status and data transfer.

The device incorporates a Reset Button that restores original factory settings and resets the administrator password. This is useful for troubleshooting or reconfiguring the device.

Several LEDs provide visual feedback on the device's status:

  • Status LED: Solid green indicates readiness; blinking green indicates startup or OS update; rapid blinking followed by continuous illumination signifies a Wi-Fi Control Button function has started; rapid blinking followed by no illumination means a Wi-Fi Control Button function has stopped.
  • Internet LED: Solid green indicates an established Internet connection; off means no connection.
  • FN1 LED: By default, this LED displays the operating mode: on for Extender Mode, off for Router Mode. Its purpose can be changed in settings.
  • FN2 LED: By default, this LED indicates if a KeeneticOS update is available (blinking for available updates, off for no updates). Its purpose can also be changed in settings.
  • Wi-Fi LED: Solid green indicates Wi-Fi network enabled; blinking green indicates data transfer; blinking slowly indicates a quick connection session (WPS) in progress; off means Wi-Fi network disabled.

A Wi-Fi Control Button simplifies adding extenders to a Keenetic Mesh Wi-Fi System or other WPS-compliant devices. A single press starts a quick connection session, while pressing and holding for 3 seconds toggles Wi-Fi on/off. Other functions can be assigned to this button.

Usage Features:

Connecting as a Main Router (Router Mode A):

  1. Set the Operating Mode Switch to position A (Router Mode).
  2. Position the device within cable lengths of Ethernet and power outlets, ensuring it's in an unenclosed space for better wireless coverage.
  3. Connect to a power source and verify that both the Status LED and Wi-Fi LED are illuminated and not blinking.
  4. Connect a mobile device or computer to the Keenetic device via Wi-Fi (using the SSID and password on the back label or QR code) or via Ethernet cable to any gray Ethernet port.
  5. An Initial Setup Wizard will appear on your device/computer. If not, navigate to my.keenetic.net in a browser to follow setup instructions.

Extending an Existing Network (Extender Mode B):

  1. Set the Operating Mode Switch to position B (Extender Mode).
  2. Connect to a power source and verify that both the Status LED and Wi-Fi LED are illuminated and not blinking.
  3. Ensure your Keenetic Main Router is active with an Internet connection.
  4. Connect the 'Extender' Keenetic device to your Keenetic Main Router using an Ethernet cable. Alternatively, for wireless connection, place devices near each other and simultaneously press the Wi-Fi Control Buttons on both devices. Check that the Internet LED on the 'Extender' is illuminated.
  5. Connect a mobile device/computer to your Keenetic Main Router network.
  6. Launch a web browser and go to my.keenetic.net or use the Keenetic Mobile Application. Navigate to the Wi-Fi System section and click "Acquire" to add the extender candidate.
  7. Once acquired, disconnect the Extender from the Main Router and place it where you want to expand your Wi-Fi network. The Internet LED on the Extender will illuminate when successfully connected. A Keenetic Mesh Wi-Fi System supports both wireless and wired connections between the Main Router and Extenders; wired connections are recommended for maximum performance.

Management Options:

  • Keenetic Web Interface: The primary method for managing your device, offering comprehensive features and configuration options. It supports secure, HTTPS-protected remote management via the free KeenDNS service. Access it at my.keenetic.net.
  • Keenetic Mobile Application: Available on iOS and Android, this app provides an easy way to manage your home network, focusing on routine tasks, parental controls, and traffic monitoring.

Maintenance Features:

  • Resetting to Factory Settings: To restore original factory settings and reset the administrator password, press and hold the Reset Button until the Status LED blinks rapidly, then release. The device will restart. Note that this requires reconfiguring the Internet connection and re-adding extenders to a Mesh Wi-Fi System.
  • Troubleshooting Internet Access: If the Internet LED on the Main Router is off, consult your ISP to verify service availability and connection parameters. If the Internet LED is illuminated, check wired or Wi-Fi connections between your Keenetic Main Router and home devices/extenders.
  • Troubleshooting Wi-Fi Password: The default Wi-Fi password is on the back label. If changed and lost, it can be retrieved or reset via the web interface or mobile application.
  • Troubleshooting Extender Addition: Ensure the Operating Mode Switch is set to B (Extender Mode). If issues persist, restore factory settings on the extender and repeat the addition procedure.
  • Connecting Extender to Non-Keenetic Router: Press the Wi-Fi Control Button on the Keenetic Extender (in Extender Mode). Within two minutes, start a WPS session on the non-Keenetic main router. The Extender will adopt the main router's wireless network name and password. The Internet LED will illuminate upon successful connection. To configure repeater settings, determine the Extender's IP address from the main router's interface, then access the Extender's web interface via that IP address.

Safety Instructions:

  • For indoor use ONLY.
  • Remove protective labels and ensure vents are unblocked.
  • Never use in an enclosed space.
  • Ensure the Keenetic-supplied power adapter is easily accessible and use ONLY the supplied adapter.
  • Do not open the device or its power adapter, as they contain no user-serviceable parts.
  • Keep away from water, excessive humidity, heat, and direct sunlight.
  • Can be wall-mounted using two screws, firmly attached, on a wall strong enough to support 4 times the device's weight.

KeeNetic SPRINTER Specifications

General IconGeneral
WAN Ports1 x 10/100/1000 Mbps
Antenna TypeExternal
Antenna Gain5 dBi
Frequency Band2.4 GHz, 5 GHz
FirewallYes
VPNYes
SecurityWPA3
Operating Temperature0 to +40 °C
Storage Temperature-20°C to 70°C
Humiditynon-condensing
ModelSPRINTER (KN-3710)
CPUMediaTek MT7621AT, 880 MHz, 2 cores

Related product manuals