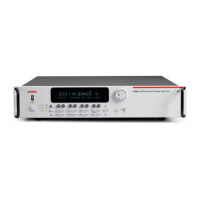
To turn a Series 3700A on and off:
1. Before plugging in the power cord, make sure that the front panel POWER switch is in the off (O)
position.
2. Connect the Series 3700A redundant protective earth (safety ground) on the rear panel.
3. Connect the female end of the supplied power cord to the AC receptacle on the rear panel.
The power cord supplied with the Series 3700A contains a separate protective earth (safety
ground) wire for use with grounded outlets. When proper connections are made, the
instrument chassis is connected to power-line ground through the ground wire in the power
cord. In addition, a redundant protective earth connection is provided through a screw on the
rear panel. This terminal should be connected to a known protective earth. In the event of a
failure, not using a properly grounded protective earth and grounded outlet may result in
personal injury or death due to electric shock.
Do not replace detachable mains supply cords with inadequately rated cords. Failure to use
properly rated cords may result in personal injury or death due to electric shock.
4. Connect the other end of the power cord to a grounded AC outlet.
5. To turn your instrument on, press the front panel POWER switch to place it in the on (I) position.
6. To turn your instrument off, press the front panel POWER switch to place it in the off (O) position.
Line frequency configuration
The factory configures the Series 3700A to automatically detect the power line frequency (either
50 Hz or 60 Hz) at each power-up. This detected line frequency is used for aperture (NPLC)
calculations.
To view the line frequency setting, send the following command:
print(localnode.linefreq)
Fuse replacement
A rear panel fuse drawer is located below the AC receptacle (refer to Rear panel summary (on page
3-24, on page 3-25)). This fuse protects the power line input of the instrument. If the line fuse needs
to be replaced, refer to Fuse replacement (on page 7-1).
Power-up sequence
When the instrument is turned on, it performs self-tests on its read-only memory, nonvolatile memory,
and RAM and momentarily lights all segments and indicators. If a failure is detected, the instrument
momentarily displays an error message and the ERR indicator turns on. Error messages are listed in
Error and status message list.
If there are no errors, the following actions occur when the instrument is turned on:
1. "No Comm Link" is briefly displayed.
2. "Initializing" is displayed for several seconds.
3. Near the end of initialization, the 1588 and LAN status LEDs light.
4. All of the display pixels briefly light.
5. Main display is displayed.
 Loading...