Setting Surface
Controls
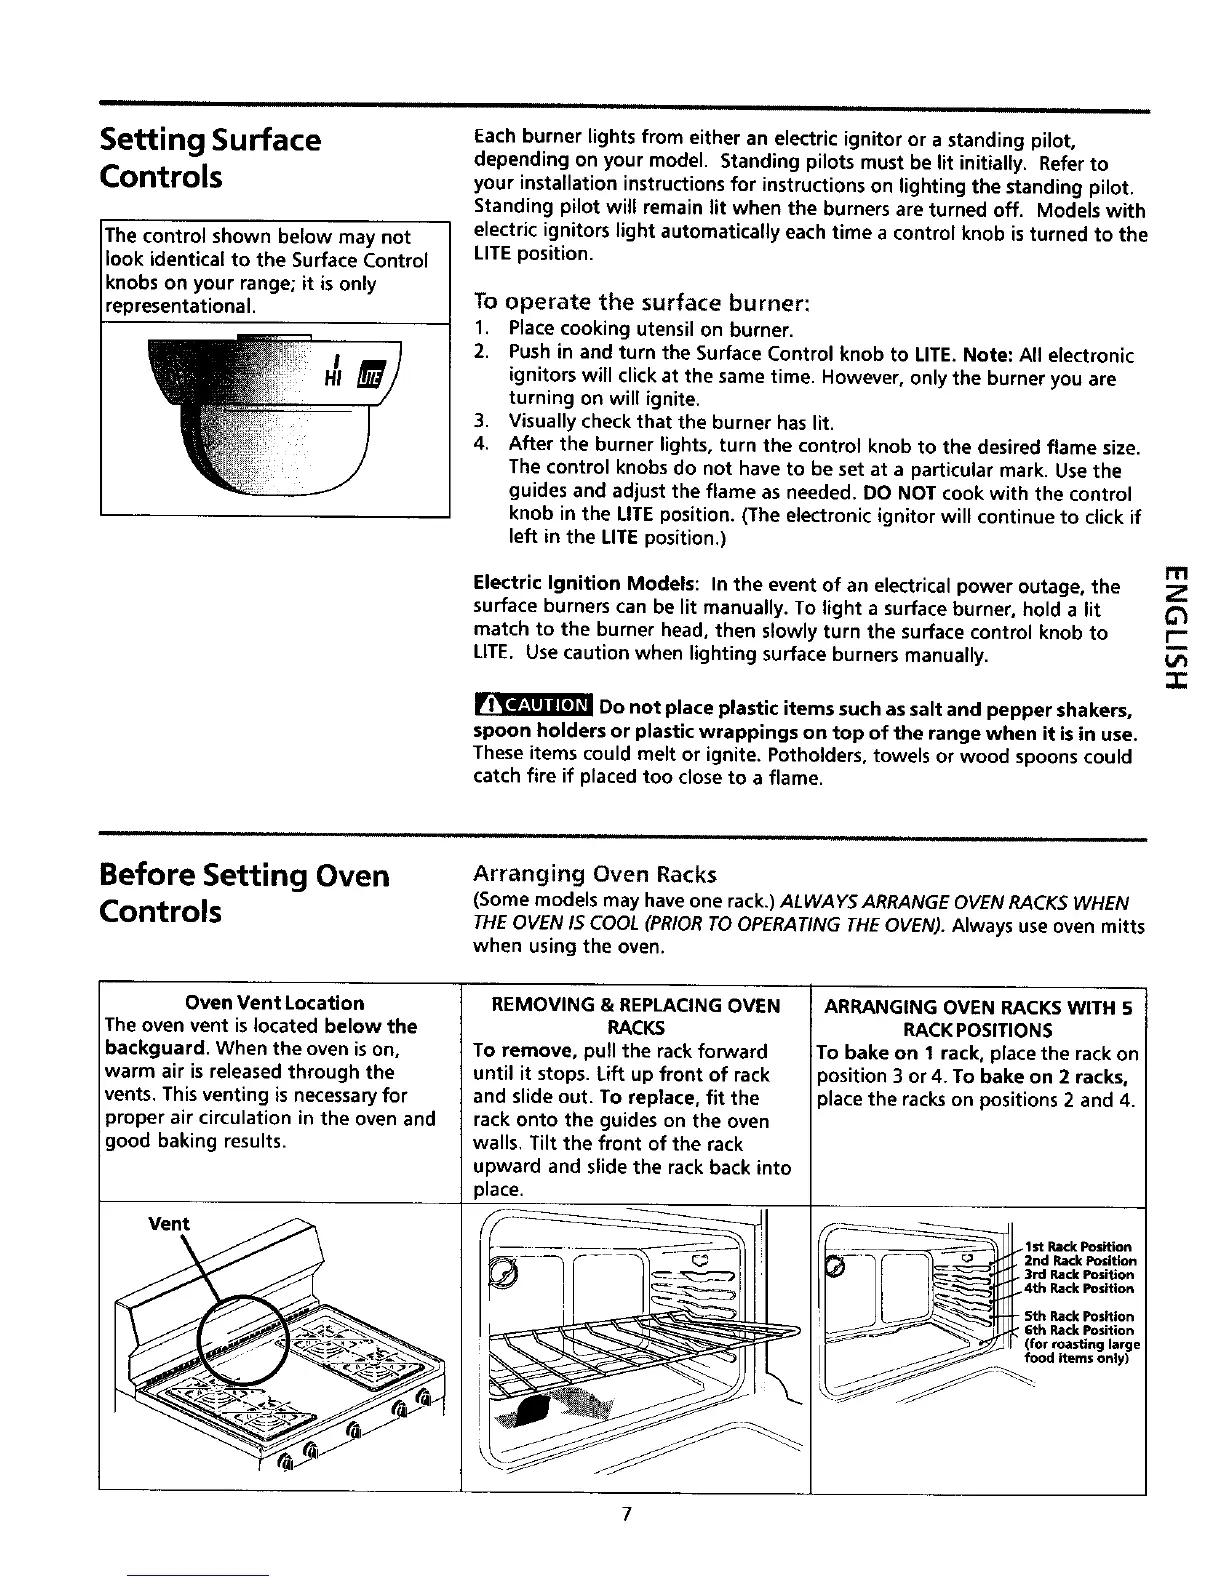
1he control shown below may not
look identical to the Surface Control
knobs on your range; it is only
representational.
Each burner lights from either an electric ignitor or a standing pilot,
depending on your model. Standing pilots must be lit initially. Refer to
your installation instructions for instructions on lighting the standing pilot.
Standing pilot will remain lit when the burners are turned off. Models with
electric ignitors light automatically each time a control knob is turned to the
LITE position.
To operate the surface burner:
1. Place cooking utensil on burner.
2. Push in and turn the Surface Control knob to UTE. Note: All electronic
ignitors will click at the same time. However, only the burner you are
turning on will ignite.
3. Visually check that the burner has lit.
4. After the burner lights, turn the control knob to the desired flame size.
The control knobs do not have to be set at a particular mark. Use the
guides and adjust the flame as needed. DO NOT cook with the control
knob in the UTE position. (The electronic ignitor will continue to click if
left in the UTE position.)
Electric Ignition Models: In the event of an electrical power outage, the
surface burners can be lit manually. To light a surface burner, hold a lit
match to the burner head, then slowly turn the surface control knob to
LITE. Use caution when lighting surface burners manually.
Do not place plastic items such as salt and pepper shakers,
spoon holders or plastic wrappings on top of the range when it is in use.
These items could melt or ignite. Potholders, towels or wood spoons could
catch fire if placed too close to a flame.
m
Z
r--
m
-1-
Before Setting Oven
Controls
Arranging Oven Racks
(Some models may have one rack.) ALWAYSARRANGE OVEN RACKSWHEN
THEOVEN ISCOOL (PRIORTOOPERATING THEOVEN).Always use oven mitts
when using the oven.
Oven Vent Location
The oven vent is located below the
backguard. When the oven is on,
warm air is released through the
vents. This venting is necessary for
proper air circulation in the oven and
good baking results.
Vent
REMOVING & REPLACING OVEN
RACKS
To remove, pull the rack forward
until it stops. Lift up front of rack
and slide out. To replace, fit the
rack onto the guides on the oven
walls. Tilt the front of the rack
upward and slide the rack back into
place.
i,
ARRANGING OVEN RACKS WITH 5
RACK POSITIONS
To bake on 1 rack, place the rack on
position 3 or4. To bake on 2 racks,
place the racks on positions 2 and 4.
_ _ 1st Rack Position
..... rJ . 2nd Rack Position
_ _, .3rd Rack PosiUon
I [ _ _ 4th Rack Position
_ 5th Rack Position
_._'_ __'_._ -Eth Rack Position
" _ _ (for roasting large
J __ food items only)
7