EasyManua.ls Logo

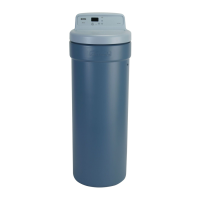
Kenmore UltraSoft 170 User Manual

Kenmore UltraSoft 170
40 pages
To Next Page IconTo Next Page
Page #1 background imageLoading...
Page #1 background image
INSTALLATION
MANUAL
MODEL NOS.
UltraSoft 170
625.388170
UltraSoft 180
625.388180
UltraSoft 275
625.388270
UltraSoft 280
625.388280
Caution:
Read and Follow
All Safety Guides
Before You Start To
Install Your Softener.
If you have questions when
installing, operating or main-
taining your softener, and
when setting the timer, call
this toll-free number...
1-800-426-9345
www.Ken moreWater.com
SAVE THIS MANUAL
UltraSoft Water Softeners
With DELUXE valve
designed for plumbing up to 1 inch
_i, Safety Guides
_i, Unpacking
_i, Where To Install
_i, How To Install
_i, Pressure Testing
-. Tt_ /
Systems Tested and Certified by NSF International
against NSF/ANSl Standard 44for softener performance.
I Sears, Roebuck and Co., Hoffman Estates, IL 60179 USA I
PRINTED IN U.S.A. 7258997 (Rev. F 7/1/05)
Use the plastic bag and tie provided, to hang manuals
nearby the softener for future reference,
Question and Answer IconNeed help?

Do you have a question about the Kenmore UltraSoft 170 and is the answer not in the manual?

Kenmore UltraSoft 170 Specifications

General IconGeneral
BrandKenmore
ModelUltraSoft 170
TypeWater Dispenser
ColorGray/Black
Power SourceElectric
Voltage120V
Temperature SettingsNot applicable
Safety FeaturesNSF Certified

Summary

SECTION 1 BEFORE INSTALLING CHECKS & TESTS

A. SAFETY GUIDES

Read all guides and rules carefully before installing and using your new water softener to prevent injury or damage.

B. UNPACKING THE WATER SOFTENER

Instructions for unpacking the softener, checking for shipping damage, and handling the unit safely.

C. WATER SYSTEM TESTS

Procedures to check water pressure and flow rate to ensure the softener will function correctly.

SECTION 2 PLAN YOUR INSTALLATION

A. WHERE TO INSTALL THE WATER SOFTENER

Considerations for choosing the optimal location for the water softener, including proximity to drains and power.

B. TOOLS, PIPE AND FITTINGS, OTHER MATERIALS NEEDED

Lists necessary tools, pipe types, fittings, and materials required for installing the water softener.

B. PIPE AND FITTINGS, PLAN DRAWING

Guidance on drawing your specific in and out piping plan, referencing diagrams for connections.

C. TYPICAL SOLDERED COPPER (OR PVC) IN AND OUT PIPES TO SOFTENER

Illustrates typical plumbing connections for soldered copper or PVC pipes to the softener valve.

D. TYPICAL THREADED IN AND OUT PIPES TO SOFTENER

Shows typical plumbing connections for threaded pipes to the softener valve, including bypass valve options.

SECTION 3 STEP BY STEP GUIDES TO INSTALL

A. ASSEMBLE INLET-OUTLET ADAPTORS, OR PLASTIC BYPASS VALVE

Instructions for assembling inlet-outlet adaptors or the plastic bypass valve onto the softener.

B. INSTALL 3-VALVE BYPASS

Details on how to install a 3-valve bypass system for the water softener plumbing.

C. LOCATE WATER SOFTENER, AND CONNECT PIPES

Steps for positioning the water softener and connecting the inlet and outlet pipes.

D. CONNECT VALVE AND SALT TANK DRAINS

Instructions for connecting the valve drain hose and the salt tank overflow tubing.

E. PRESSURE TEST / CHECK FOR LEAKS

Procedure for performing a pressure test and checking the installation for any leaks after connecting.

F. GROUNDING / CONNECT TO ELECTRICAL POWER

Guide on installing the grounding wire and connecting the softener to the electrical power supply.

Related product manuals