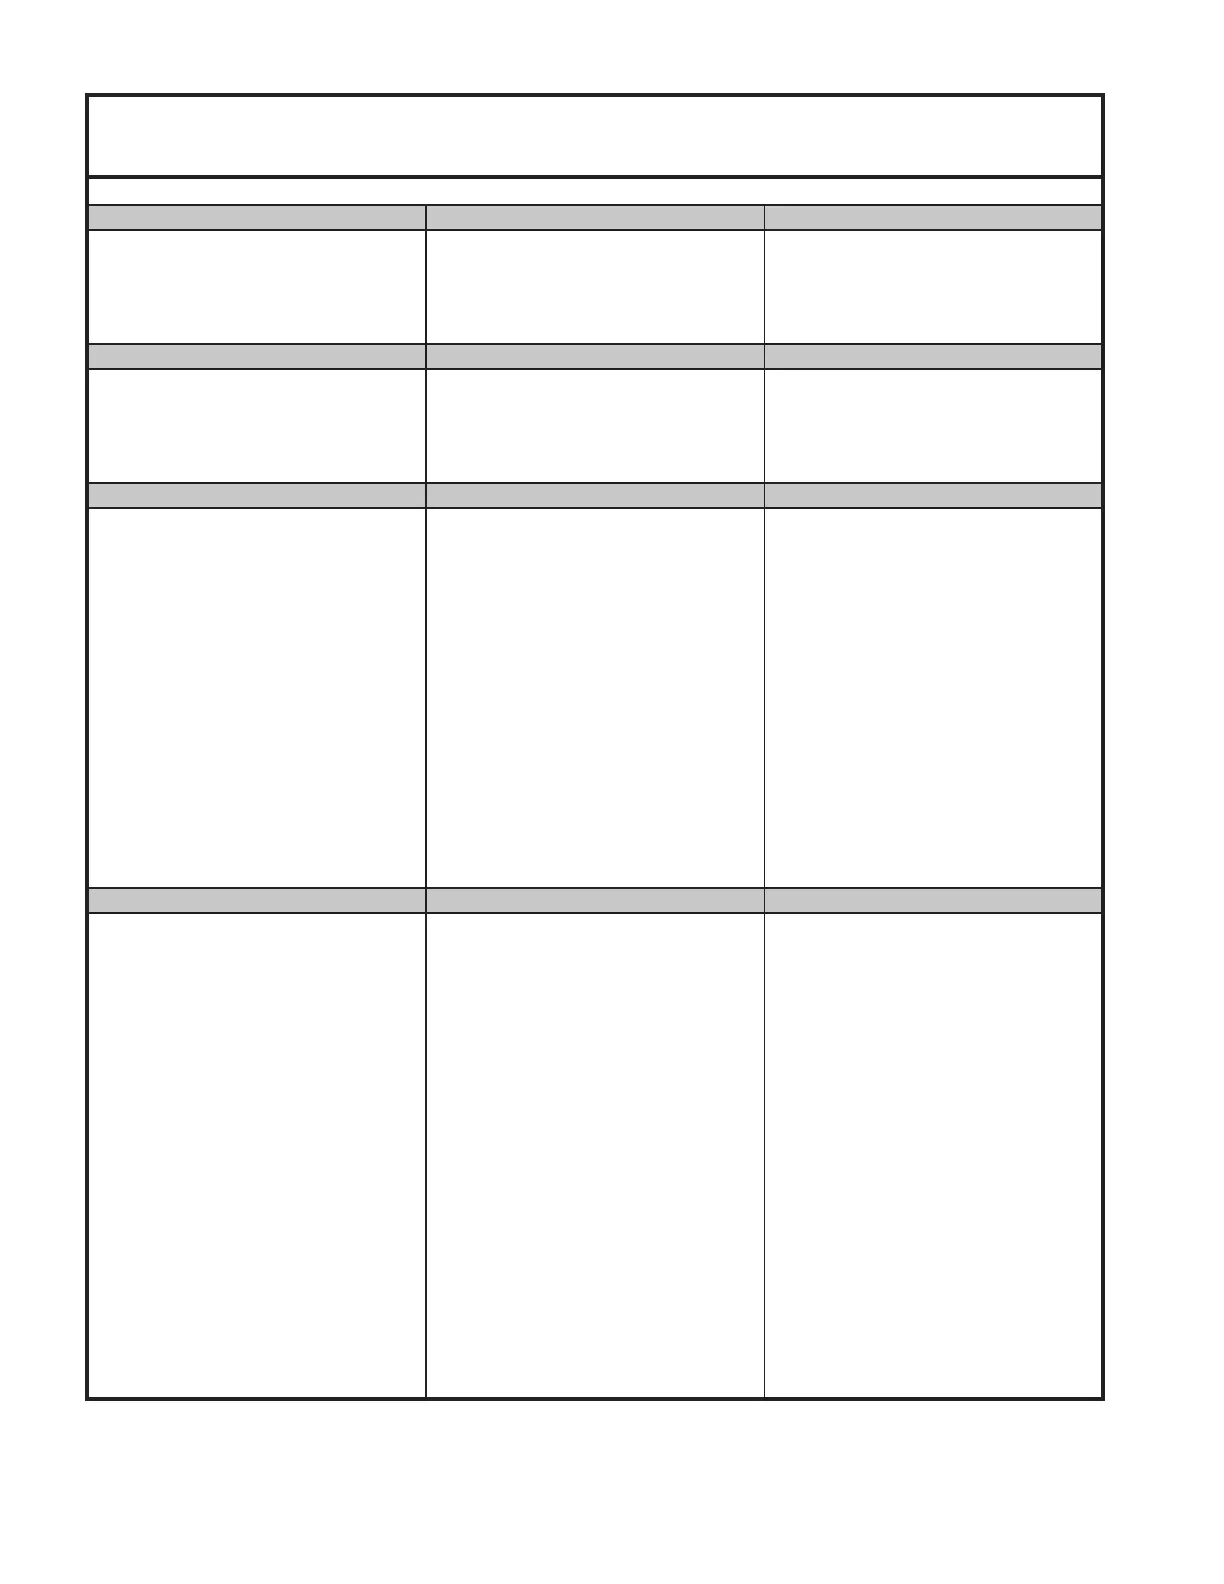
NOITULOSESUAC ELBISSOPMOTPMYS
Excessive Vacuum Motor noise. 1. Worn Vacuum Motor bearings
and / or fan blades.
1. Replace Vacuum Motor. (18007)
(See Repair Manual: Removing
Vacuum and Brush Assembly, and
Replacing Vacuum Motor.)
Burnt motor smell from clean air
exhaust.
1. Worn Vacuum Motor brushes.
NOTE: Excessive sparking may also
occur.
1. Replace Vacuum Motor (18007).
(See Repair Manual: Removing
Vacuum and Brush Assembly, and
Replacing Vacuum Motor.)
All switches are ON, ONLY Vacuum
Motor does not run.
1. Defective Vacuum Motor. 1. TEST: Test Vacuum Motor
(18007) using Vacuum / Brush Motor
Test Cable (7202) . If motor runs,
there is a problem with the electrical
system. NOTE: If motor does not
work, replace Vacuum Motor
(18007). (See Repair Manual:
Removing Vacuum and Brush
Assembly, and Replacing Vacuum
Motor.)
2. Defective Switch . 2. Replace Switch (10108) .
3. Terminals not connected or
defective.
3. Re-connect or replace Terminals .
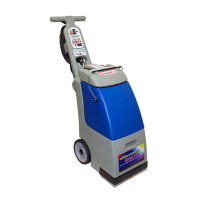
Dirty liquid is being discharged
through the Vacuum Motor Exhaust
Tube (C4:10101 / C4-A: 10608).
1. The cleaning solution was not
poured from the Bucket into the
Solution Tank .
1. Pour the cleaning solution from the
Bucket into the Solution Tank .
NOTE: The solution is being sucked
into the Vacuum Motor
and then
blowing out the Exhaust Tube.
2. Foam is building up in the Bucket . 2. Empty Bucket without refilling the
Solution Tank . If available, add Anti
Foam to the emptied Bucket .
CLEAN UP Step 1: Sit the Bucket
aside. Move the machine to concrete
surface, such as the garage. Leave
the Lid up. Run the Vacuum Motor
only for 1 minute to blow out any
remaining liquid.
3. Too much liquid was added to the
Solution Tank .
3. Empty Bucket
without refilling the
Solution Tank . Do not exceed top Fill
Line of Bucket . Add less water to the
Solution Tank during next cleaning
cycle.
Step 2: Clean the discharged dirty
liquid from carpet immediately ! Spot
Remover or 7 in 1 may be needed.
ALSO: Using the Hand Tool may lift
spot better.
VACUUM SYSTEM CONTINUED
8