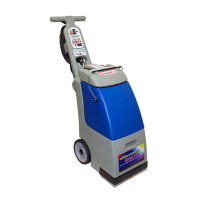
REPLACING THE REAR NOZZLE CLIP (10002)
1. Turn all switches OFF and UNPLUG the unit.
2. Using a #2 Phillips Screwdriver remove (2) 6-32 Bolts (10004) attaching Rear Nozzle Clip to the Brush
Housing (10001).
3. Remove Rear Nozzle Clip (10002) from Brush Housing.
4. Scrape away any remaining silicone from Brush Housing.
5. Apply a bead of silicone to the inside of new Rear Nozzle Clip.
6. Attach to Brush Housing.
7. Add a drop of light-duty thread locker to 2 threaded holes in Brush Housing.
8. Thread (2) Bolts into Brush Housing. NOTE: Be careful not to cross thread Brush Housing.
9. Wipe away any excess thread locker and silicone from the outside and inside of Vacuum Nozzle.
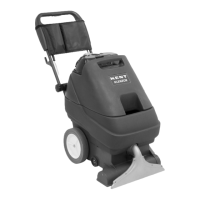
REPLACING THE TRIGGER SWITCH (18207)
1. Turn all switches OFF and UNPLUG the unit.
2. Remove Control Panel (10118). Using a #2 Phillips Screwdriver remove (4) 6-32 Bolts (10026) attaching
the Control Panel (10118) to the Handle (10020).
3. Using a ¼” Nut Driver remove (2) 8-32 Bolts (2037) attaching Switch Mount Bracket (10117) to the
Handle.
4. Reaching inside the Handle, pull out the Switch Mount Bracket while from the outside push the Trigger
Switch into the slotted Handle opening.
5. Remove the Crimp Nuts (10149) and Wire Ties (10158) attached to the Brown and Black Wires.
Disconnect the Red Wire from the Circuit Breaker (10113).
6. Remove Trigger Switch from Switch Mount Bracket. Using ¼” and 11/32” Nut Drivers unscrew (2) 8-32
Bolts (10189) and (2) 8-32 Nuts (10021).
NOTE: Ensure a good crimp when installing new Crimp Nuts.
NOTE: Remember to replace the cut Wire Ties.
NOTE: When attaching Switch Mount Bracket to Handle start threading (2) 8-32 Bolts (2037) into Switch
Mount Bracket by hand to avoid cross threading.
REPLACING THE ROCKER SWITCH (10108) & ROCKER SWITCH CAP (10114), OR
ROCKER SWITCH ASSEMBLY (10308):
1. Turn all switches OFF and UNPLUG the unit.
2. Remove Control Panel (10118). Using a #2 Phillips Screwdriver remove (4) 6-32 Bolts (10026) attaching
the Control Panel to the Handle (10020).
3. Depress molded retention springs on either side of the Rocker Switch (10108), or Rocker Switch
Assembly (10308), while pushing it through the Control Panel opening.
4. Before disconnecting Wire Terminals take note as to which Rocker Switch Terminal each comes from.
Disconnect the Wire Terminals from the old Rocker Switch, and re-connect them to the corresponding
new Rocker Switch Terminals.
5. If the Rocker Switch Cap (10114) from the old Rocker Switch is in good salvageable condition attach it to
the new Rocker Switch, if not attach a new Rocker Switch Cap. A drop of super glue where the Rocker
Switch and Rocker Switch Cap attach will ensure the Rocker Switch Cap stays attached. If installing the
Rocker Switch Assembly (10308) you may skip this step.
6. Install the new Rocker Switch by pushing it through the switch opening in the Control Panel.
NOTE: Inspect all Wires, Terminals, and Crimp Nuts. Replace any defective components.
NOTE: Remember to replace the cut Wire Ties.
NOTE: Rocker Switches should always have a Rocker Switch Cap. Always replace when missing.
14