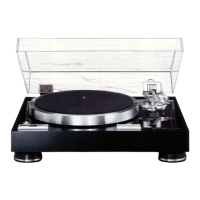
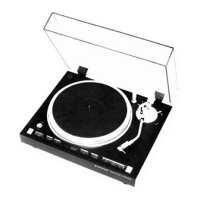
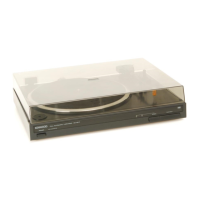
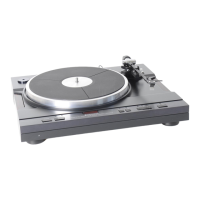
The Kenwood KD-770D is an auto lift-up turntable designed for high-quality sound reproduction. This direct-drive system features a Quartz PLL core and slotless DC servo motor, ensuring stable and accurate platter rotation. The turntable platter itself is a 33 cm (13") diameter die-cast aluminum alloy, providing excellent stability and reducing unwanted vibrations.
Technical Specifications:
- Drive System: Direct-drive
- Motor: Quartz PLL core & slotless DC servo motor
- Turntable Platter: 33 cm (13") diameter, Aluminum alloy, Die-cast
- Speeds: 2 speeds, 33-1/3 and 45 rpm
- Wow & Flutter: Less than 0.02% (WRMS), Less than 0.008% (Direct read-out), Less than 0.03% (DIN)
- Rumble: DIN weighted better than -80 dB, DIN unweighted better than -55 dB
- Tonearm Type: Static-balance type, Straight tubular arm
- Effective Tonearm Length: 245 mm
- Overhang: 15 mm
- Tracking Error: +1.8° to -1.0°
- Tracking Force Range: 0 to 3 grams (0.1 g Step)
- Usable Cartridge Weight: 2.0 to 12 grams (with supplied head-shell)
- Power Requirements: AC 120 V, 60 Hz (U.S.A. and Canada Models), AC120/220-240 V, 50/60 Hz (Switchable for other countries)
- Power Consumption: 22 watts
- Dimensions (W x H x D): 490 mm x 162 mm x 410 mm
- Weight: 11.7 kg
- Supplied Accessory: 45 rpm adaptor, Hexagonal bar wrench
Usage Features:
The KD-770D is designed for ease of use and optimal listening pleasure. Before operation, users must ensure the AC voltage selector switch on the rear panel matches their local line voltage to prevent damage. The unit is shipped without a cartridge, allowing users to install their preferred model. The supplied head-shell accommodates all commercially available cartridges, with a recommended total weight (cartridge + head-shell) of 12-22 g.
Assembly and Setup:
- Unpacking: Carefully unpack all components, including the turntable platter, rubber mat, 45 rpm adaptor, counterweight, head-shell assembly, and hexagonal bar wrench.
- Platter Installation: Place the turntable platter and rubber mat onto the center shaft.
- Counterweight Attachment: Attach the tonearm counterweight, ensuring it moves forwards and backwards by rotating to the right and left.
- Head-shell Installation: Plug the head-shell into the tonearm, aligning the pin with the slot and inserting it securely. Turn the locking screw to lock the head-shell in place.
- Dust Cover: Install the dust cover.
- Connections: Connect the audio cables to your amplifier or receiver and the AC cord to a power outlet. Ensure the amplifier's input selector is set to PHONO.
- Cartridge Installation: Carefully insert head-shell lead connectors onto the cartridge pins, matching lead colors (WHITE for L(+), RED for R(+), BLUE for L(E), GREEN for R(E)). Attach the cartridge to the head-shell with screws, washers, and nuts, then adjust the overhang to 42 mm from the stylus tip point.
- Stylus Pressure Adjustment:
- Turn power on and press the UP/DOWN switch to lower the tonearm elevator.
- Set the anti-skating weight to 1 g and free the anti-skating bar.
- Move the tonearm to the middle between the arm rest and platter.
- Balance the tonearm by turning the counterweight until it is level.
- Return the tonearm to the arm rest and set the counter ring to 0.
- Adjust the counterweight clockwise to set the stylus pressure to the cartridge manufacturer's specified value.
- Adjust the anti-skating force to the same value as the stylus pressure.
- Tonearm Height Adjustment:
- Place a record on the platter.
- Turn power on and press UP/DOWN to lower the stylus onto the record.
- Check the parallelism between the record surface and tonearm.
- Loosen the two tonearm height adjusting screws with the hex bar wrench.
- Adjust the tonearm height using the arm base gauge (2 mm graduation) until the tonearm is parallel to the record surface, then tighten the screws.
- Recheck parallelism.
Record Playback:
- Check stylus pressure, amplifier connections, and amplifier control position.
- Set the POWER switch to ON; the 33 speed indicator lights up.
- Place a record on the platter. Use the EP adaptor for EP records.
- To play at 45 rpm, press the SPEED selector switch; the 45 indicator lights up.
- Manually move the tonearm to the lead-in groove of the record.
- Press the START/STOP switch. The platter rotates, and the QUARTZ LOCK indicator lights up when speed stabilizes.
- Press the UP/DOWN switch; the stylus descends, and playback begins.
- Upon completion, the arm elevator raises, the stylus moves away, and the platter stops.
- Return the tonearm to the arm rest and set the POWER switch to OFF.
- To suspend or stop playback, press the UP/DOWN switch. The tonearm will automatically rise. Pressing it again resumes playback from the same spot.
Note: Turntable operation is unstable immediately after power on; wait a moment before operating.
Maintenance Features:
Regular maintenance ensures the longevity and optimal performance of your KD-770D turntable.
- Cleaning the Cabinet and Dust Cover: Gently clean with a dry cloth or silicone cloth. For stubborn soil, use a cloth dampened with soap suds or mild detergent, well wrung out. Avoid thinners, alcohol, benzine, or other volatile liquids.
- Motor Lubrication: The motor features permanently-lubricated bearings and is designed to operate for over 20,000 hours without needing lubrication.
- Periodic Check-up: As a mechanical device, turntables are subject to wear and misadjustment. A periodic check-up every two years is recommended to ensure a long service life and proper operation. Consult your dealer or authorized service representative for this.
- Stylus Life: The stylus point is delicate and requires careful handling. Remove accumulated dust with a soft brush. A stylus is typically good for playing a 30 cm (12 inch) LP record about 500 times, though this varies with usage. A worn stylus will cause harsh treble tones and should be replaced as soon as noticeable to prevent record wear.
- Transport Notes: When moving the unit, pack it in the original packing materials. If these are discarded, disassemble the unit into the turntable, counterweight, plug-in head (head-shell + cartridge), and dust cover, and pack these components separately.
Troubleshooting:
The manual provides a comprehensive troubleshooting guide for common issues:
- No SPEED indicator light: Check if the power cord is disconnected.
- No sound from one or both channels: Check amplifier connections, head-shell connector, and ensure the amplifier's input selector is set to PHONO.
- Cartridge bottom touching record: Readjust the tracking force.
- Loud hum, no music: Check turntable output cable connections and plug-in head connection.
- Loud hum with music: Separate output cables from AC cord or reverse AC cord plug. Connect the ground wire to the amplifier's GND terminal.
- Buzzing noise with music: Relocate output cord for minimum TV signal pickup.
- Howling drowns out music: Separate turntable from speakers to reduce speaker vibration pickup.
- Turntable platter does not turn: Check AC plug contact and ensure the AC outlet is active.
- Poor tracking: Remove dust from stylus or record. Adjust the tracking force to the specified value.