2 3
➔
EDID Control:
Internal library features 15 default EDID configurations and
native EDID data from Output/Display devices connected via Rx
➔
Hot Plug Detection Control:
Enables integrator to choose if active signal
voltage is forced to connected input devices
➔
Full Buffer System
™
:
Manages TMDS re-clocking / signal re-generation,
HDCP authentication with source & display, EDID Control handshake,
and Hot Plug control
➔
IR Sensor:
Sensor powering via +5V on Rx unit’s IR In port collects line-of-sight
IR from remote(s) without external IR connecting block
➔
Up/Down IR:
Two channels of IR enable control to/from devices connected
to Tx and Rx units
➔
RS-232:
Bi-Directional control to/from Tx and Rx unit on Phoenix connector
➔
Rotary Switch RS-232 Control Mode:
Provides control of Tx unit as well as
connectivity status
➔
3D:
Support for standard 3D stereoscopic signal formats
➔
Lossless compressed digital audio:
Support for Dolby
®
TrueHD,
Dolby
®
Digital Plus, Dolby Atmos
®
, and DTS-HD Master Audio
™
➔
CEC Support:
For inter-device control between input and output HDMI channel
➔
I2C Communication:
EDID and HDCP authentication to Display and Source
➔
Control System Support:
Fully controllable by all RS-232 supported control
systems via open API: Compass Control
®
, AMX
®
, Crestron
®
, KNX
®
, RTI
®
, Savant,
URC
®
, Leviton
®
etc.
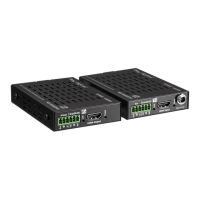
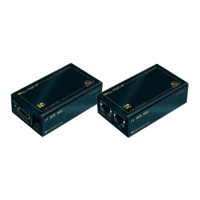
KD-X222 Accessories
➔ (2) 5V 2A DC Power Supplies (Screw-In Type), (2) Mounting Brackets,
(1) IR Emitter, (1) IR Sensor
➔ KD-X222 requires power on both Tx and Rx units
KD-X222PO Accessories
➔ (1) 12V 2A DC Power Supply (Screw-In Type), (2) Mounting Brackets,
(1) IR Emitter, (1) IR Sensor
➔ KD-X222PO only requires power on the Tx unit, which extends power
to the Rx unit
Quick Setup Guide
Step 1: Find a safe and convenient location to mount or place your
KD-X222/KD-X222PO units
Step 2: Begin with the KD-X222/KD-X222PO Tx/Rx units and all
input/output devices turned off with power cables removed
Step 3: Connect your HDMI source to the input port of your
KD-X222/KD-X222PO Tx unit
Step 4: Connect your HDMI displays to the output port of your
KD-X222/KD-X222PO Rx unit
Step 5: Connect KD-X222/KD-X222PO Tx unit to
KD-X222/KD-X222PO Tx with CAT5e/6 cable
Step 6: Connect additional IR/RS-232 control connections and IR sensors
Step 7:
BEFORE
connecting power supply to power outlet,
screw-in the
power supply to the KD-X222/KD-X222PO Tx units and
KD-X222 Rx unit
Step 8:
AFTER all connections are made, plug-in power supplies to
power outlets
Step 9: Power on input/output devices
Installation and Operation
Before permanently securing the unit for final installation, test for proper operation
of the unit and cables in your system. It is recommended that you leave enough
ventilation space to provide sufficient airflow and cooling.
You MUST use the Power Supply provided with your unit or you VOID
the Key Digital
®
Warranty and risk damage to your unit and associated
equipment.