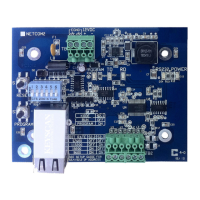
NETCOM2 Rev. B Installation Guide
Switches S1, S2 and S3
The NETCOM2 Rev. B’s switches S1, S2 and S3 are used to configure the device for the
functions outlined in Table 1.
The Steps to Install and Configure the NETCOM2 Rev. B will tell you which switches to set
and when to initiate setting the switches.
Table 1 – S1, S2 & S3 Switch Functions
Resets the embedded device server
to prepare for programming
Sets the device for run mode
(operate) or enables S3 to initiate
program sequence (embedded
firmware)
Configures the NETCOM2 Rev. B for
the specified bit rate/second
processing speed
Embedded
Programming IP
Address
Selection
Configures the NETCOM2 Rev. B
with an embedded programming IP
address for network connection to
program the device.
S2.1 must be on. When pressed
initiates the program sequence for
the embedded firmware.
Embedded Programming IP Address
The NETCOM2 Rev. B has three (3) embedded programming addresses. You select one of
these addresses by setting the DIP switches S2.4 and S2.5 as outlined in Table 2. These
addresses act as a temporary IP to connect the NETCOM2 Rev. B with a server/laptop that
has the Keyscan NETCOM Utility. The NETCOM2 Rev. B and the server/laptop must be on a
local network for programming. The NETCOM2 Rev. B is not programmable via routers.
You must select an embedded programming IP address that matches the first three octets
used by your network. Octets are the series of numbers separated by a period (.).
Example of first three octets in an IP address - 192.168.100.
If you do not use matching octets you will not be able to communicate with the NETCOM2
Rev. B.
Table 2 – Embedded Programming IP Addresses/DIP Switch Settings