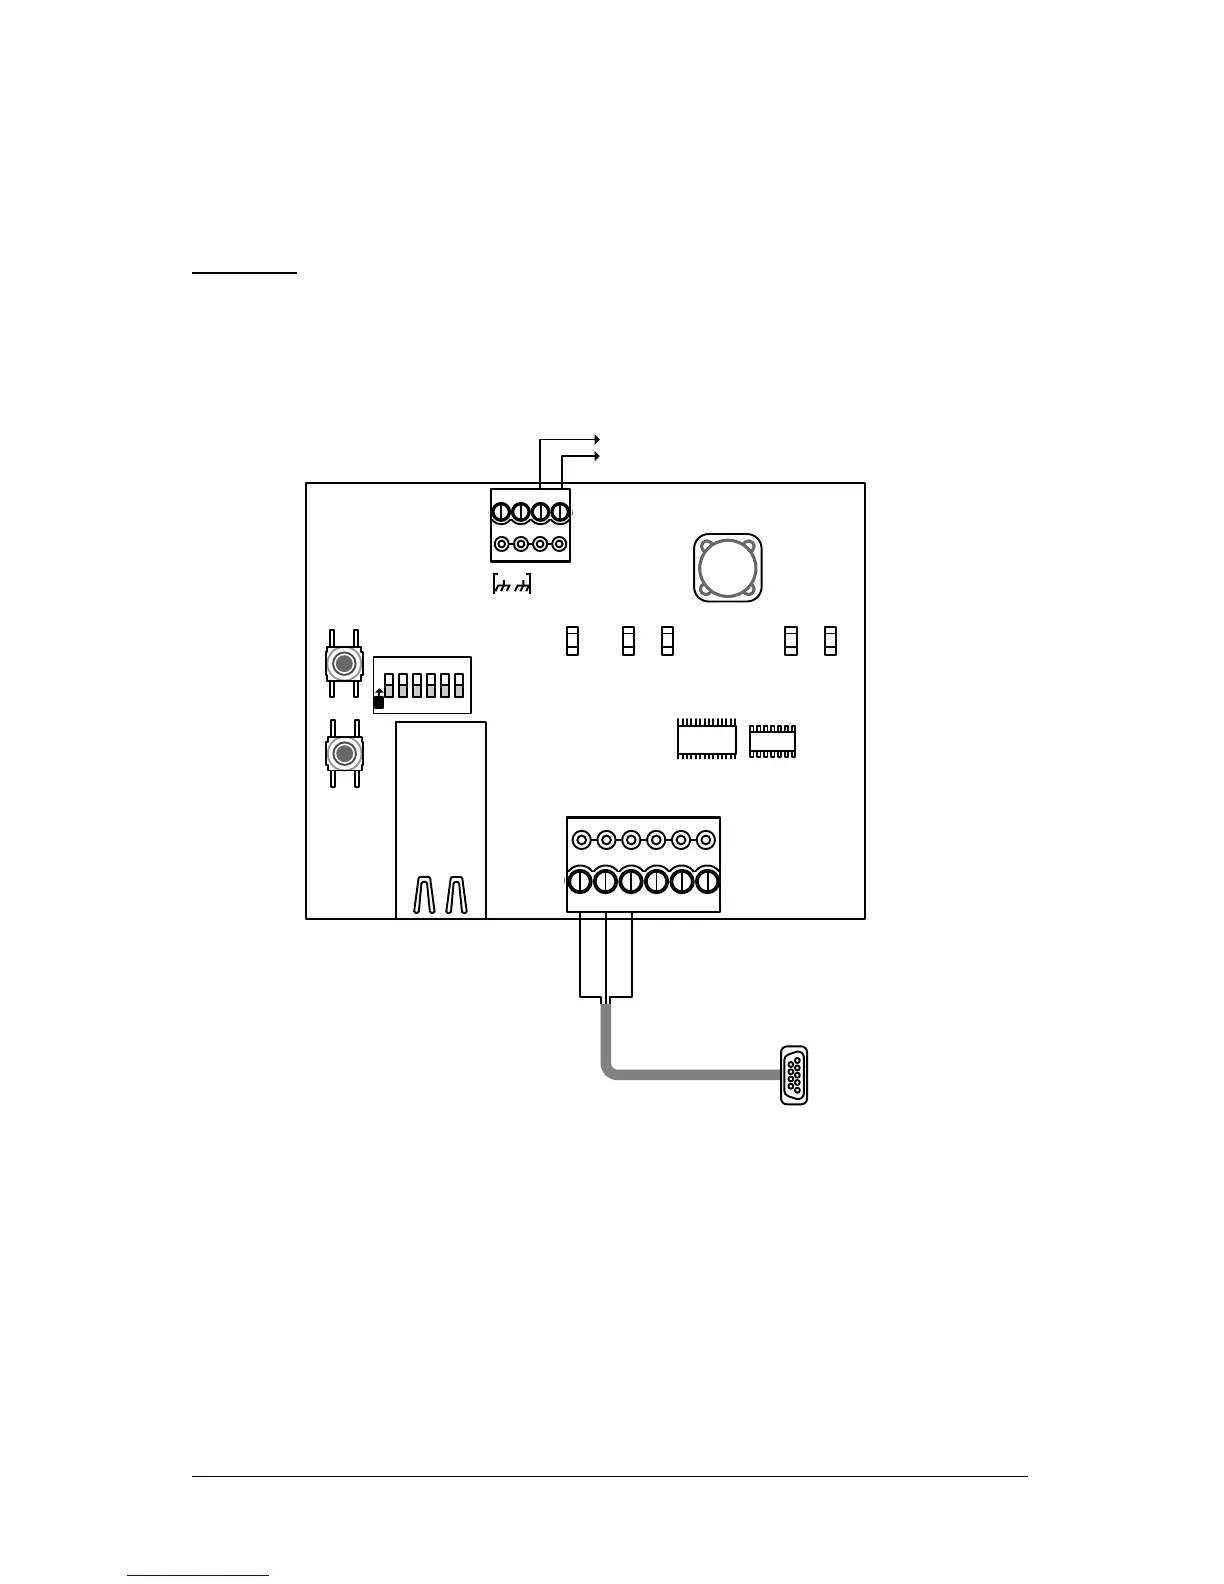
Manually Configure the NETCOM2 Rev. B Serially
These procedures should only be performed in the event that the Keyscan NETCOM Utility
was used to program the NETCOM2 Rev. B in section 2 and the device is still failing to
communicate. These procedures are intended for advanced computer users only. You
require a data serial cable (Keyscan part # 40 – 2322).
Important
Keyscan recommends that you review the setup procedures before performing them so you
are familiar with the steps, some of which are intricate and require quick dexterity.
1. With the serial data cable establish a connection to the server/laptop that has the
NETCOM Program Tool utility.
2. Open the NETCOM Program Tool utility and select the Keyscan Hyper Terminal Button.
3. Set the Comm Port Number if you are connected via a serial port other than
communication port #1.
4. Leave the baud rate set on 9600. Click on the Open Port button.
5. To enter Setup Mode, reset the NETCOM2, either by pushing the reset button or
cycling the unit’s power (power off and back on).
6. Within 1 second of the NETCOM2 reset, enter 3 lowercase x characters—xxx.
Tip—The easiest way to enter Setup Mode is to hold down the x key at the
keyboard terminal while resetting the unit.
7. When the Setup Mode window opens, press the Enter key within 5 seconds to enter
setup mode.