Section 1 – Install/Configure the NETCOM2
Rev. B
This section outlines the procedures for installing and configuring the NETCOM2 Rev. B.
After completing the instructions in section 1, ensure you review and complete the
instructions in section 2.
Keyscan recommends that you review the document first, before beginning the installation.
Important
If you are installing more than one NETCOM2 Rev. B, do not apply power to more than one
NETCOM2 Rev. B at a time until each unit has been programmed with its assigned static IP
address. If you apply power to multiple NETCOM2 Rev. Bs while they are configured with
the same embedded programming IP address, you will create an address conflict on the
network. As a result, you will not be able to program the units.
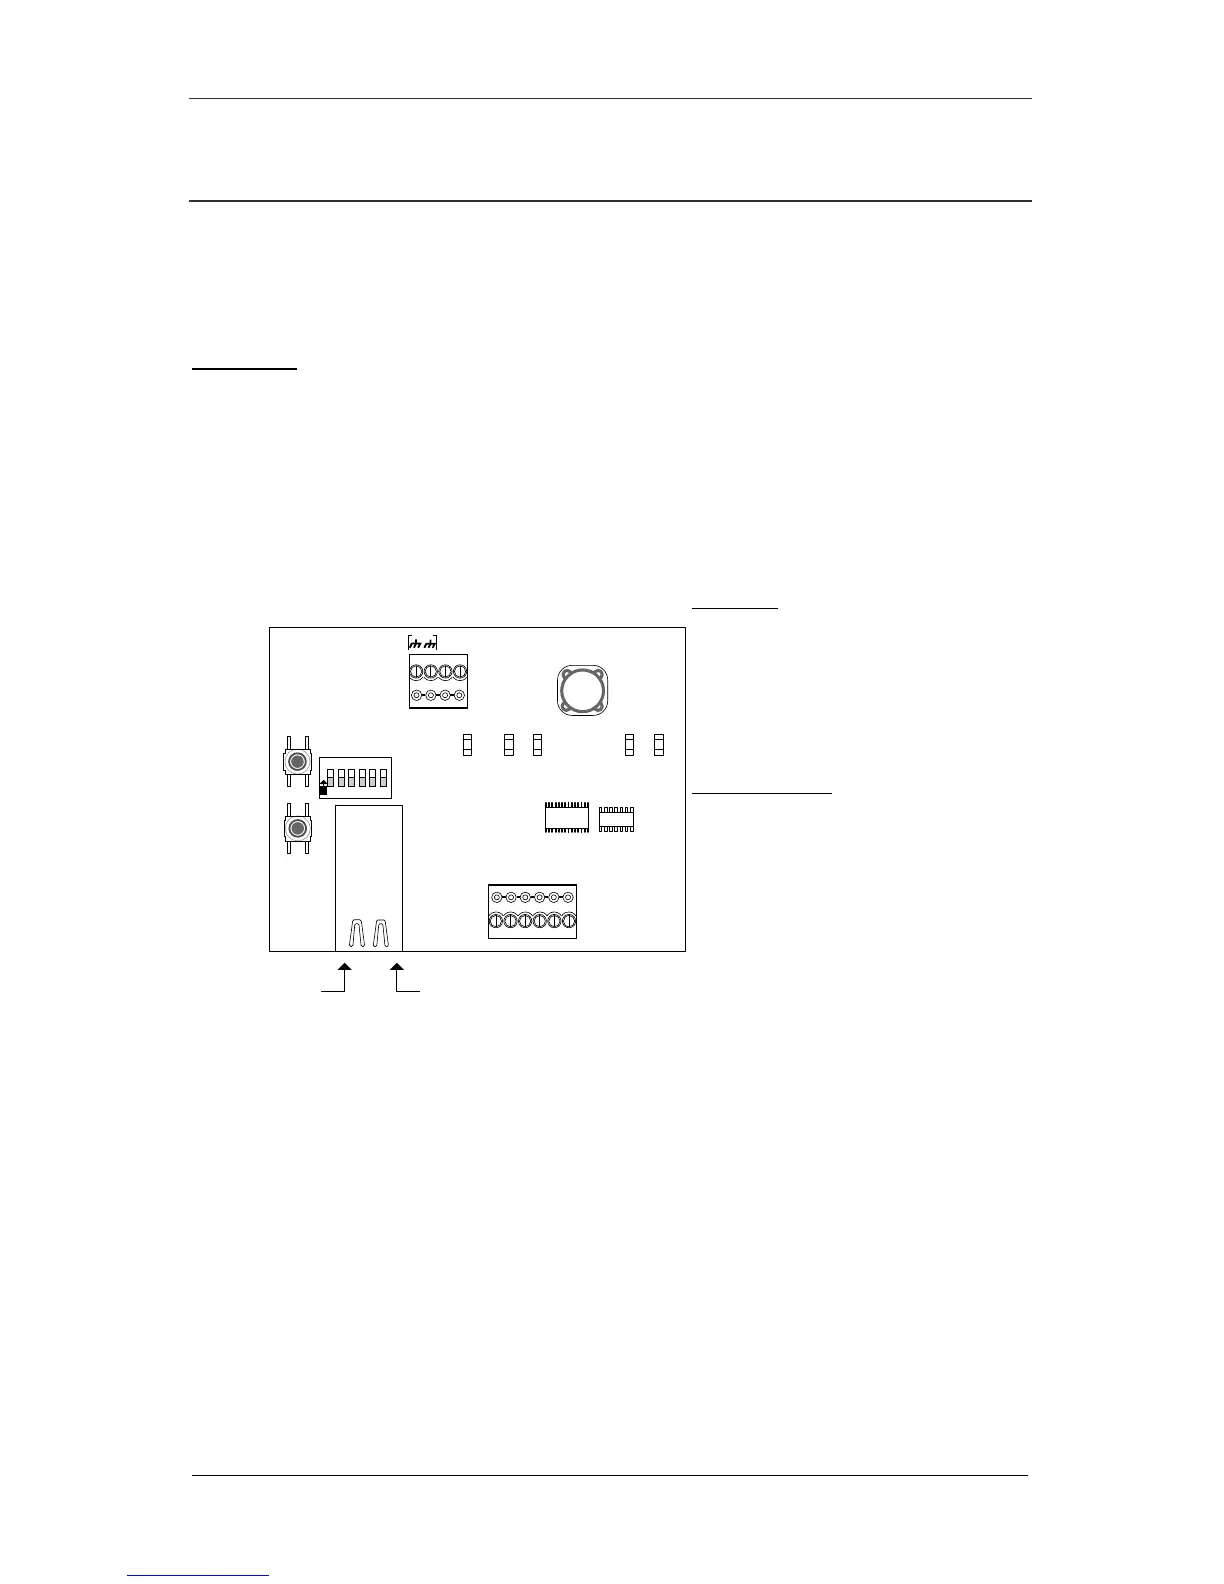
Figure 2 - NETCOM2 Rev. B Circuit Board
12VDC
+
-
RESET
GND
TD RD DTRDCD I/O
Activity
LED
12VDC
from
DPS-15
LED Legend
- RS-232 indicates serial connection
- TD indicates PC polling ACU/ECU
- RD indicates ACU/ECU replying to
PC
- POWER indicates unit receiving
power
- PROGRAM indicates unit is
programming selected IP & bit rate
S1, S2, S3 Switches
- S1 – Reset
- S2.1 – Run/Program Mode*
- S2.2/3 – bits/second selection
- S2.4/5 – IP address selection
- S2.6 – Unassigned
- S3 – Starts program sequence
*Run mode for operating
*Program mode for on-board
programming firmware
Link
LED
KI-00245E-08-13
EGND
RS-232TD RD POWER
LEDsLEDs
PROGRAM
PROGRAM
S1
S3
O
N
1
2
3
4
5
6
S2