EasyManua.ls Logo

KI Matrix - User Manual

KI Matrix
2 pages
Print Icon
To Next Page IconTo Next Page
Loading...
Assemble units as described herein only. To do otherwise
may result in instability. All screws, nuts and bolts must be
tightened securely and must be checked periodically after
assembly. Failure to assemble properly, or to secure parts
may result in assembly failure and personal injury.
Repair & Replacement Instructions
Matrix
®
Chair
Back Replacement - Chairs Manufactured Before July 5, 2005
February 2019
Tools Required
Flat-Head Screwdriver
Lubricant (Dish Soap)
#32 Drill Bit if using
#12.0695.PLAS, #6-19 x
7
/
8
Plastite self-tapping screws
#2 Phillips Driver Bit
Cordless Drill/Screwdriver
Matrix Back Removal &
Replacement
1. Place the Matrix chair upside down
with the seat portion resting on a
sturdy surface (table) (Figure 1).
2. Remove the existing Matrix back
by unscrewing the two attachment
screws located along the bottom
edge of the back (Figure 1).
3. Once screws are removed, pull
the Matrix back free from the back
support rods (Figure 2).
Note: If replacement Matrix back
has spring clips pre-installed in the
two holes located at the bottom of the
back, follow step 4 to remove spring
clips. If clips are not pre-installed in
the two holes located at the bottom of
the back, skip to page 2, step 6.
4. If spring clips must be removed,
place the Matrix back on a hard,
sturdy surface (table). The square
openings on the back should be
facing up as illustrated in Figure 3 &
Detail A.
5. Using a flat-head screwdriver, press
down on each spring clip raised
catch located inside the square
openings of the Matrix back and
pry the clips from the two holes at
the bottom of the back (Figure 3 &
Detail A).
Figure 1
attachment
screw
Matrix
back
Figure 2
back
support
rod
back
support
rod
Matrix
back
Figure
3
Matrix
back
Detail A
flat-head
screwdriver
spring clip
raised catch
snapped into
the square hole
spring clip
(removed)
Matrix
back
flat-head
screwdriver
Question and Answer IconNeed help?

Do you have a question about the KI Matrix and is the answer not in the manual?

Summary

Matrix Chair Back Replacement Procedure

Tools Required

List of tools and hardware needed for chair back replacement, including screwdrivers, lubricant, drill bits, and screws.

Matrix Back Removal

Instructions for safely removing the existing Matrix chair back, including chair placement and screw removal.

Spring Clip Removal

Detailed steps for removing spring clips from the chair back if pre-installed, using a screwdriver.

Matrix Back Installation

Lubrication and Alignment

Guidance on applying lubricant to back support rods and aligning the new Matrix back for installation.

Pilot Hole Drilling

Instructions for drilling precise pilot holes in the new Matrix back for screw insertion.

Securing the New Back

Steps for attaching the new Matrix back using self-tapping screws and ensuring proper fit.

Overview

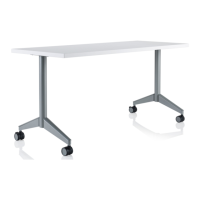
The provided manual details the repair and replacement procedures for the back of a Matrix® Chair, specifically for chairs manufactured before July 5, 2005. This document serves as a comprehensive guide for users to perform maintenance tasks related to the chair's back, ensuring its proper function and longevity.

Function Description:

The Matrix® Chair is designed with a removable and replaceable back, allowing for maintenance and repair rather than full chair replacement. The back component provides ergonomic support to the user and is integral to the chair's overall structure and comfort. The replacement process ensures that the chair can continue to be used effectively even if the back component becomes damaged or worn over time. The design allows for the back to be securely attached to the chair's frame via back support rods and attachment screws, ensuring stability and safety during use. The chair's back is designed to integrate seamlessly with the existing frame, maintaining the original aesthetic and functional integrity of the chair. The process involves careful alignment and secure fastening to ensure the back provides proper support and remains stable during use.

Usage Features:

The Matrix® Chair's design incorporates features that facilitate its maintenance. The back is attached using two attachment screws located along its bottom edge, making them accessible for removal. The back also slides onto back support rods, which guide its placement and provide structural support. This sliding mechanism, when lubricated with a small amount of dish soap, allows for easier assembly and disassembly, reducing the effort required to replace the back. The chair's frame is designed to be sturdy enough to support the back replacement process, allowing it to be placed upside down on a table for easier access to the attachment points. The replacement back may come with pre-installed spring clips, which are designed to secure the back to the frame. If these clips are not pre-installed or need to be removed, the manual provides instructions on how to do so using a flat-head screwdriver, highlighting the modularity of the design. The attachment method using self-tapping screws into pilot holes ensures a secure fit while allowing for future removal if necessary. The design also emphasizes the importance of proper drilling techniques for pilot holes, ensuring that the screws are inserted correctly without damaging the plastic web of the back or creating visible stress marks. This attention to detail in the design ensures that the chair can be maintained without compromising its structural integrity or appearance. The chair's back is designed to rest firmly against the wire frame once installed, indicating a secure and stable attachment. The use of specific screw types, such as #6-19 x 7/8" Plastite self-tapping screws, is a key feature, as these are designed to create their own threads in the plastic, providing a strong and reliable connection. The chair's overall design supports a user-friendly maintenance approach, allowing for component replacement rather than full product disposal.

Maintenance Features:

The manual outlines a detailed maintenance procedure for replacing the chair's back, emphasizing precision and proper technique. Key maintenance features include:

  1. Accessibility of Components: The attachment screws for the Matrix back are located along the bottom edge, making them easily accessible when the chair is placed upside down. This design choice simplifies the removal and reinstallation process.
  2. Lubrication for Ease of Assembly: The recommendation to apply a small amount of dish soap as a lubricant to the back support rods is a practical maintenance tip. This reduces friction, allowing the plastic back to slide onto the rods more easily, preventing damage during assembly and disassembly.
  3. Guidance for Pilot Hole Drilling: For new back installations, the manual provides critical instructions for drilling pilot holes. It specifies the correct drill bit size (#32) and emphasizes the importance of drilling at the correct angle and depth (approximately 1/2" deep) to prevent damage to the plastic web of the back. This guidance helps maintain the structural integrity and aesthetic of the chair. The existing frame holes serve as a guide for drilling, ensuring accurate placement of the pilot holes.
  4. Specific Fastener Usage: The use of #6-19 x 7/8" Plastite self-tapping screws is a deliberate maintenance feature. These screws are designed to create their own threads in the plastic, providing a secure and durable attachment. The manual warns against stripping the threads, highlighting the need for careful insertion.
  5. Spring Clip Management: The manual addresses the presence of pre-installed spring clips on replacement backs. It provides instructions for their removal using a flat-head screwdriver, indicating that these clips are designed to be removable and replaceable, offering flexibility in the assembly process. This feature allows for customization or adjustment based on the specific replacement part.
  6. Tool Requirements: The manual lists specific tools required for the maintenance task, including a flat-head screwdriver, lubricant, #32 drill bit, #2 Phillips driver bit, and a cordless drill/screwdriver. This clear list ensures that users are prepared with the necessary equipment, streamlining the maintenance process.
  7. Safety Precautions: The "CAUTION" notes throughout the manual emphasize the importance of proper assembly and secure tightening of all fasteners. This highlights a critical maintenance feature: ensuring the chair's safety and stability after any repair or replacement. Regular checks of screws, nuts, and bolts after assembly are recommended to prevent instability and potential injury.
  8. Damage Prevention Warnings: The manual includes warnings about potential damage from incorrect drilling (e.g., breaking through surfaces, creating stress marks) and stripping threads. These warnings are crucial maintenance features, guiding users to perform tasks correctly to avoid further damage and ensure the longevity of the chair.
  9. Modular Design for Component Replacement: The entire process underscores the modular design of the Matrix® Chair, where individual components like the back can be replaced rather than requiring the disposal of the entire chair. This promotes sustainability and cost-effectiveness in maintenance.
  10. Visual Aids: The inclusion of figures (Figure 1, Figure 2, Figure 3, Figure 4, Figure 5, and Detail A) provides clear visual guidance for each step of the maintenance process, making it easier for users to understand and follow the instructions accurately. These visuals are invaluable maintenance aids, reducing ambiguity and potential errors.

In summary, the Matrix® Chair is designed with maintainability in mind, offering clear, step-by-step instructions and specific tool requirements to facilitate the replacement of its back component. This approach extends the life of the chair, reduces waste, and ensures continued user comfort and safety.

KI Matrix Specifications

General IconGeneral
CategoryIndoor Furnishing
ManufacturerKI
Product NameMatrix
MaterialSteel
DimensionsVaries by configuration
Weight CapacityVaries by component

Related product manuals