14
9. Wiring / Installation / Activation
NOTE: A dust cover has been installed on the alarm. Keep the dust
cover on until all construction has been completed for at least 24 hours
(drywall, painting, varnishing, mounting plate install, etc). Retain the dust
cover and re-install it to protect the alarm during future construction
projects. Construction dust and chemicals can cause contamination and
false alarms.
WARNING: DUST COVER MUST BE REMOVED FOR ALARM TO OPERATE.
NOTE: To avoid false low battery chirping one of the following steps must be taken to ensure
activation: (Battery activation is confirmed with a beep.)
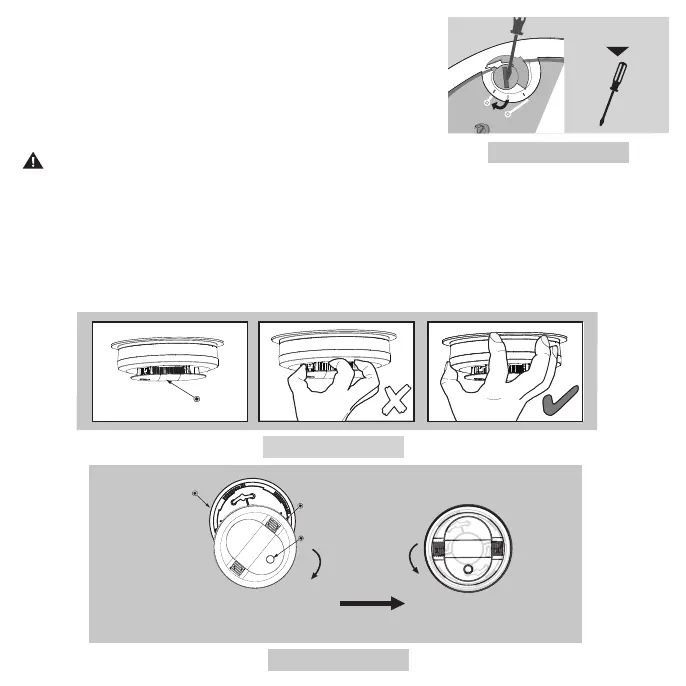
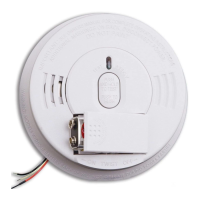
A. Locate the red wheel on the back of the unit - turn the red wheel to the “ON” position using a
standard screwdriver. (see Figure 9-A). Battery will remain active to allow for installation on mounting bracket.
B.
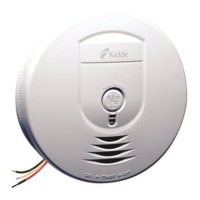
Install the alarm fully on the mounting bracket by rotating the alarm in a clockwise direction. (see Figure 9-C).
To allow for installation, battery will remain active when unit is removed from mounting bracket.
NOTE: Do not grab the shield to install or remove the alarm. Grab the alarm by the outside of the enclosure. (Figure 9-B)
Figure 9 -C
Figure 9-A
PERMANENTLY
DISABLE and
DISCHARGE
ALARM
ON
At End of unit life
or Low battery.
Figure 9-B
Install
Remove
Mounting Bracket
Note orientation
of "A" line.
LED
To ensure aesthetic alignment, orient
the unit as shown on the mounting
bracket and rotate the unit completely until it stops.
After fully installed
(The button should
be at the bottom.)