15
9. Installation And Activation
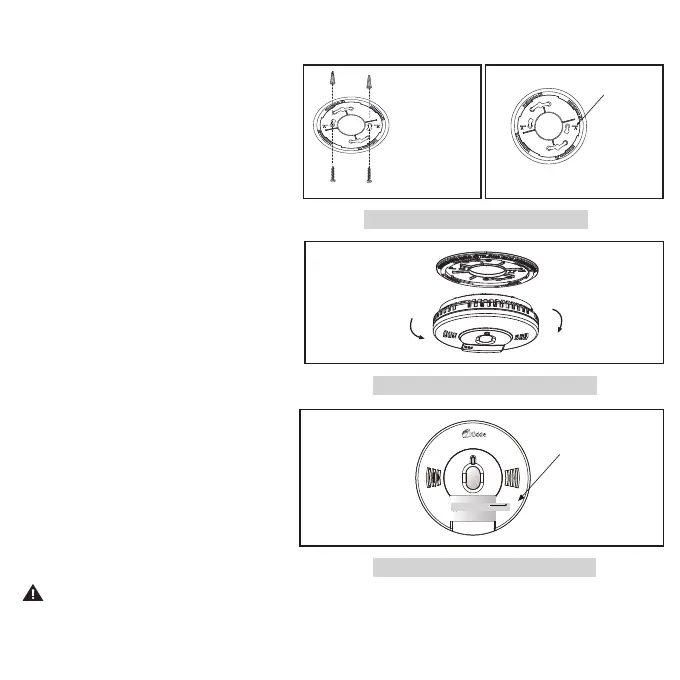
After selecting the proper location for your
alarm, attach the mounting bracket to the wall
or ceiling. To ensure aesthetic alignment of the
alarm with the hallway, or wall, the “A” line on
the mounting bracket should be parallel with
the hallway when ceiling mounted, or
horizontal when wall mounted. (Figure 9-A).
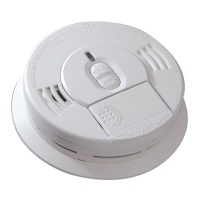
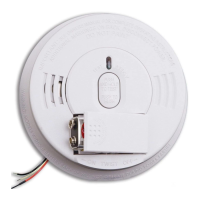
• Install the alarm fully on the mounting
bracket by rotating the alarm in a clockwise
direction. (Figure 9-B)
NOTE : The alarm will mount to the bracket
in 4 positions (every 90 degrees).
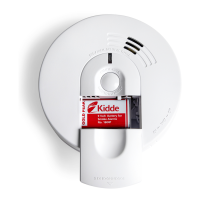
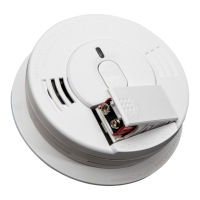
• Pull out the battery pull tab to activate the
battery.(Figure 9-C)
• Battery activation is confirmed with a single
power-on chirp, and a voice prompt to
“Push Test Button.”
• If pulling the battery tab does not result in
the chirp and voice notifications, open and
close the battery compartment once.
Confirm power activation.
• The alarm is now activated! After
installation / activation, test your alarm as
described in Operation and Testing section.
WARNING : FAILURE TO PROPERLY INSTALL AND ACTIVATE THIS ALARM WILL PREVENT
PROPER OPERATION OF THIS ALARM AND WILL PREVENT ITS RESPONSE TO FIRE HAZARDS .
When mounting
in a hallway, the
“A” line should
be parallel with
the hallway.
Alignment Marks
(”A” Line) on
Mounting
Bracket
When wall
mounting, the
“A” line should
be horizontal.
A
Remove
Install
Figure 9-C
Figure 9-A
Figure 9-B
PULL OUT TAB TO ACTIVATE BATTERY
SEE USER GUIDE FO R ADDITIONAL I NFORMATION
Battery
pull tab