Do you have a question about the Kinetico Premier Compact and is the answer not in the manual?
Kinetico recommends installation by a qualified professional to maintain warranty.
Do not exceed 6 BAR (87 psi) without a pressure regulating valve.
Avoid temperatures above 35°C or freezing conditions to prevent damage.
Install a 1/2" I.D. hose to a suitable outlet for cabinet overflow, ensuring gravity flow.
Ensure adequate earth bonding for copper and plastic pipework as per regulations.
Not for micro-biologically unsafe or unknown quality water without prior disinfection.
WRAS approval applies to cold water (below 23°C) installations only.
Refer to the plumbing schematic on page 8 before installation.
Identify all parts before proceeding with installation.
Details on meter disc, hardness, regenerations, and cabinet dimensions.
Diagram illustrating key parts like drain connection, inlet, outlet, and salt compartment.
Check for drain line, mains water, by-pass assembly, and overflow location.
Note the unit's height, width, and depth for placement.
Details on by-pass construction, inlet/outlet connections, and hose requirements.
Locate the unit on a flat surface and remove internal cardboard.
Insert the blanking plate into the unused outlet port.
Test incoming pressure and install a regulating valve if needed.
Plumb pipework to accommodate the by-pass assembly.
Lubricate and connect adapters with screened washers and retaining bracket.
Flush inlet and outlet lines to remove debris before connecting to the softener.
Check pressure setting, drain line security, and airgap compliance.
Ensure overflow is secure and inlet/outlet connections are firm.
Confirm inlet/outlet valves are closed and by-pass valve is open.
Restore water supply and pressurise the softener and pipework.
Fill the brine tank with water to the correct level (approx 25mm over grid plate).
Perform manual backwash cycles using the actuator and indicator.
Add block or tablet/pellet salt, using only softener-specific salt.
Open outlet valve, ensure by-pass is closed, and open a tap to release air.
Replace lids, check plumbing for leaks, completing the installation.
Normal water level is 25mm over salt grid; manual regeneration if absent.
Check brine valve seating and support bar for correct water level.
Varying hardness may occur initially; check by-pass valve is closed.
Take precautions for outdoor or unheated installations; warranty excludes freezing damage.
| Brand | Kinetico |
|---|---|
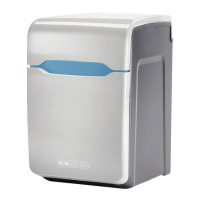
| Model | Premier Compact |
| Category | Water Dispenser |
| Language | English |