Do you have a question about the Kinetico Premier Plus and is the answer not in the manual?
Emphasizes the need for a qualified installer for proper setup and to maintain warranty validity.
Specifies maximum water pressure limits and the requirement for a pressure regulating valve.
Warns against installing the unit in areas with extreme temperatures, either hot or freezing.
Details the critical requirement for an overflow hose connection to prevent potential water damage.
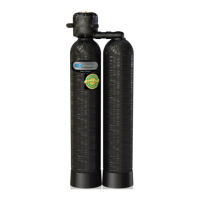
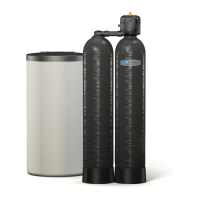
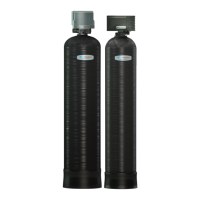
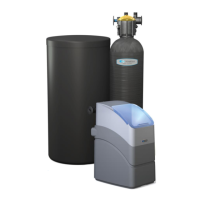
Lists and illustrates the components included in the product packaging.
Provides detailed technical specifications including hardness levels, dimensions, and operating parameters.
Step 1: Manually initiate regeneration to move the XP meter to the home position.
Step 2: Determine the correct XP meter setting by referring to the hardness level chart.
Step 3: Use a screwdriver to adjust the hardness setting knob.
Steps 4 & 5: Confirm the arrow position and release the adjuster knob.
Important note: Avoid setting the XP meter in the black section of the meter disc.
Details factors to consider when determining the optimal location for the softener unit.
Outlines essential plumbing components and connections needed for installation.
Step 1: Ensure the unit is on a flat surface and consider a pre-filter if needed.
Step 2: Test pressure and install a regulating valve if it exceeds 6 bar.
Step 3: Plumb pipework to accommodate the by-pass assembly.
Step 4: Flush inlet and outlet lines before connecting the softener to remove debris.
Step 5: Fit O-rings, connect adapters to hoses/pipework, and secure with bracket/pin.
Verify that the pressure regulating valve is correctly set to a maximum of 6 bar.
Ensure the drain line is secure, free of kinks, uses an air gap, and complies with codes.
Confirm overflow is secure and gravity-fed, and inlet/outlet connections are firm.
Ensure the by-pass assembly is correctly set to the 'by-pass' position.
Restore water supply and move the assembly to the 'in service' position.
Allow the brine tank to fill with water to approximately 50mm over the grid plate.
Manually start a backwash cycle using the actuator and repeat for subsequent cycles.
Instructions for adding tablet/pellet salt and important warnings about salt types.
Final step: Replace lids, check plumbing for leaks, and confirm installation is complete.
Troubleshooting: Check brine valve seating if water level is higher than recommended.
Explanation for initial varying hardness and advice on checking the by-pass valve.
Confirms it's normal to see water at 50mm above the salt grid.
Procedure to fill the salt bay and conduct manual regeneration if water is not present.
| Brand | Kinetico |
|---|---|
| Model | Premier Plus |
| Category | Water Dispenser |
| Language | English |