18
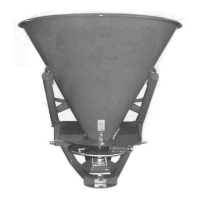
ATTACHING TO TRACTOR
STEP 1 Slowly back tractor up to the Seeder/Spreader while using tractor’s
3-point hydraulic control lever to align hitch holes in lower arms with lower
hitch pins.
STEP 2 Engage tractor park brake, shut tractor engine off, and remove key before
dismounting from tractor.
STEP 3 Ensure that the lower hitch arms are blocked to prevent excessive side
movement.
STEP 4 With tractor’s lower hitch arms aligned and positioned correctly, attach
arms to hitch pins and secure with linchpins.
STEP 5 Connect top center link to upper pivot hitch using customer supplied clevis
pin and linchpin.
STEP 6 Return to tractor and slowly operate controls up and down to make sure
the spreader clears tractor tires, frame and drawbar. Move or remove the
drawbar if it interferes with the spreader.
STEP 7 Adjust 3-Point hitch so that the spreader disc is horizonal.
STEP 8 Manually adjust length of top-link to level Seeder/Spreader from front to
rear.
STEP 9 Determine if the PTO shaft needs to be shortened.
NOTE: Due to the many variations in the tractor hitch points and distances between
equipment gearbox input shaft and tractor PTO out put shafts, some combinations
may require PTO shafts to be shortened as described by the following steps.
WARNING
Never stand between tractor
and seeder while backing up
tractor to the hitch.