24
13. Verify that the anti-tip bracket is installed and engaged.
� Use a flashlight to look underneath the bottom of and
behind the range.
� Visually check that the rear range foot is inserted into the
slot of the anti-tip bracket.
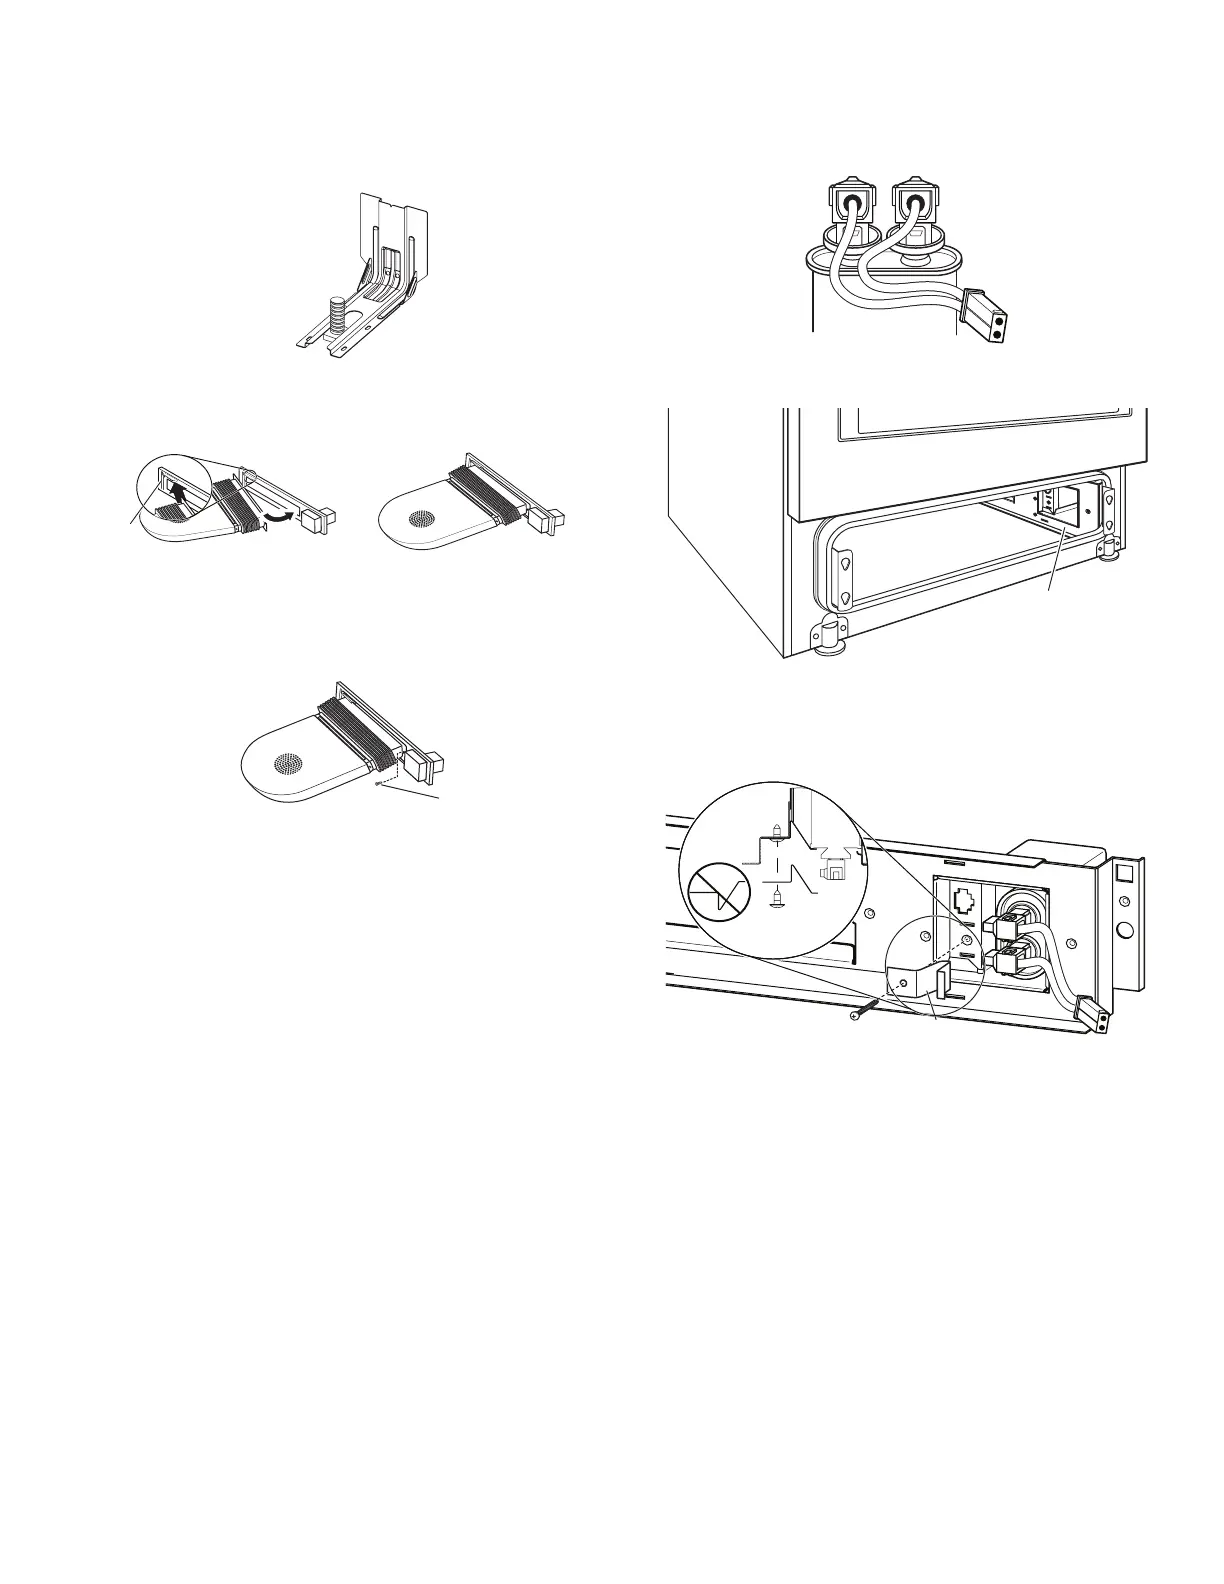
14. Rotate blower motor cover so the bellows are in their final
position. Ensure the rear of the bellow flange is engaged in the
retaining bracket.
A. Retaining
bracket
Final Position
15. Secure the front of the blower bellow flange to the range frame
with the supplied #8–18 x 3/8" screw.
A. Screw
Connect Blower Electrical Parts
1. Locate the capacitor (in Blower Motor Kit).
NOTE: The capacitor is supplied with a small harness that
terminates in a two-pin connector as shown.
2. Locate the capacitor storage tray in front of the blower bellow
connection point in the lower right side of the range.
A. Capacitor storage tray
3. Place capacitor in tray.
4. Secure the capacitor with the capacitor retention bracket, then
install the bracket screw.
A. Retention bracket