D
GB
26
6. INBETRIEBNAHME DER MASCHINE
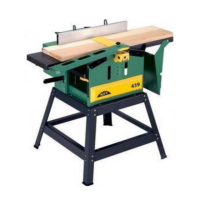
1. Montage des Bohrfutters (11)
2. Montage des Langlochsbohreinrichtung (12)
g. Montage des Sonderausrüstung
6. PUTTING THE MACHINE INTO OPERATION
1.Fitting the chuck (11)
- Mount the thicknessing table (D) by means of the hand
wheel (M
1)through the holes of the housing until the 2 holes
across in relation to the mortiser appear.
- Insert the 2 axles of the mortising attachment into the 2 holes
of the thicknessing table (D).
- Fasten the mortising attachment by slightly tightening the 2
bolts from underneath the thicknessing table, in order not to
damage the under side of the table (see detail).
- Remove the drill spindle cover by releasing the bolt (I).
- Remove the nut (J) of the motor spindle of the drill chuck.
- Fix the chuck (L) on the motor spindle (by unscrewing it).
(12)
Note : the washer (K) must remain on the motor spindle.
2. Fitting the mortiser (12)
g. Fitting the optional equipment
- Entfernen Sie die Bohrspindelabdeckung durch Lösen der
Schraube (I).
- Entfernen Sie die Mutter (J) des Motorpindels des
Bohrfutters.
- Befestigen Sie das Bohrfutter (L) auf den Motorspindel
(durch Aufschrauben). (12)
Bemerkung : Die Scheibe (K) muß unbedingt auf dem
Motorspindel bleiben.
- Fahren Sie den Dickentisch (D) mithilfe des Handrades (M
1)
hoch, bis die 2 Löcher quer zum Langloch erscheinen.
- Fügen Sie die 2 Achsen der Langlochbohreinrichtung in die
2 Löcher des Dickentisches ein (D).
- Befestigen Sie die Langlochbohreinrichtung durch leichtes
Anziehen der 2 Schrauben, die sich unter dem Dickentisch
befinden, um die Tischunterseite nicht zu beschädigen (siehe
Detail).