Section 9
High Pressure Water System
20412997
8-2012/Rev 12
9-30
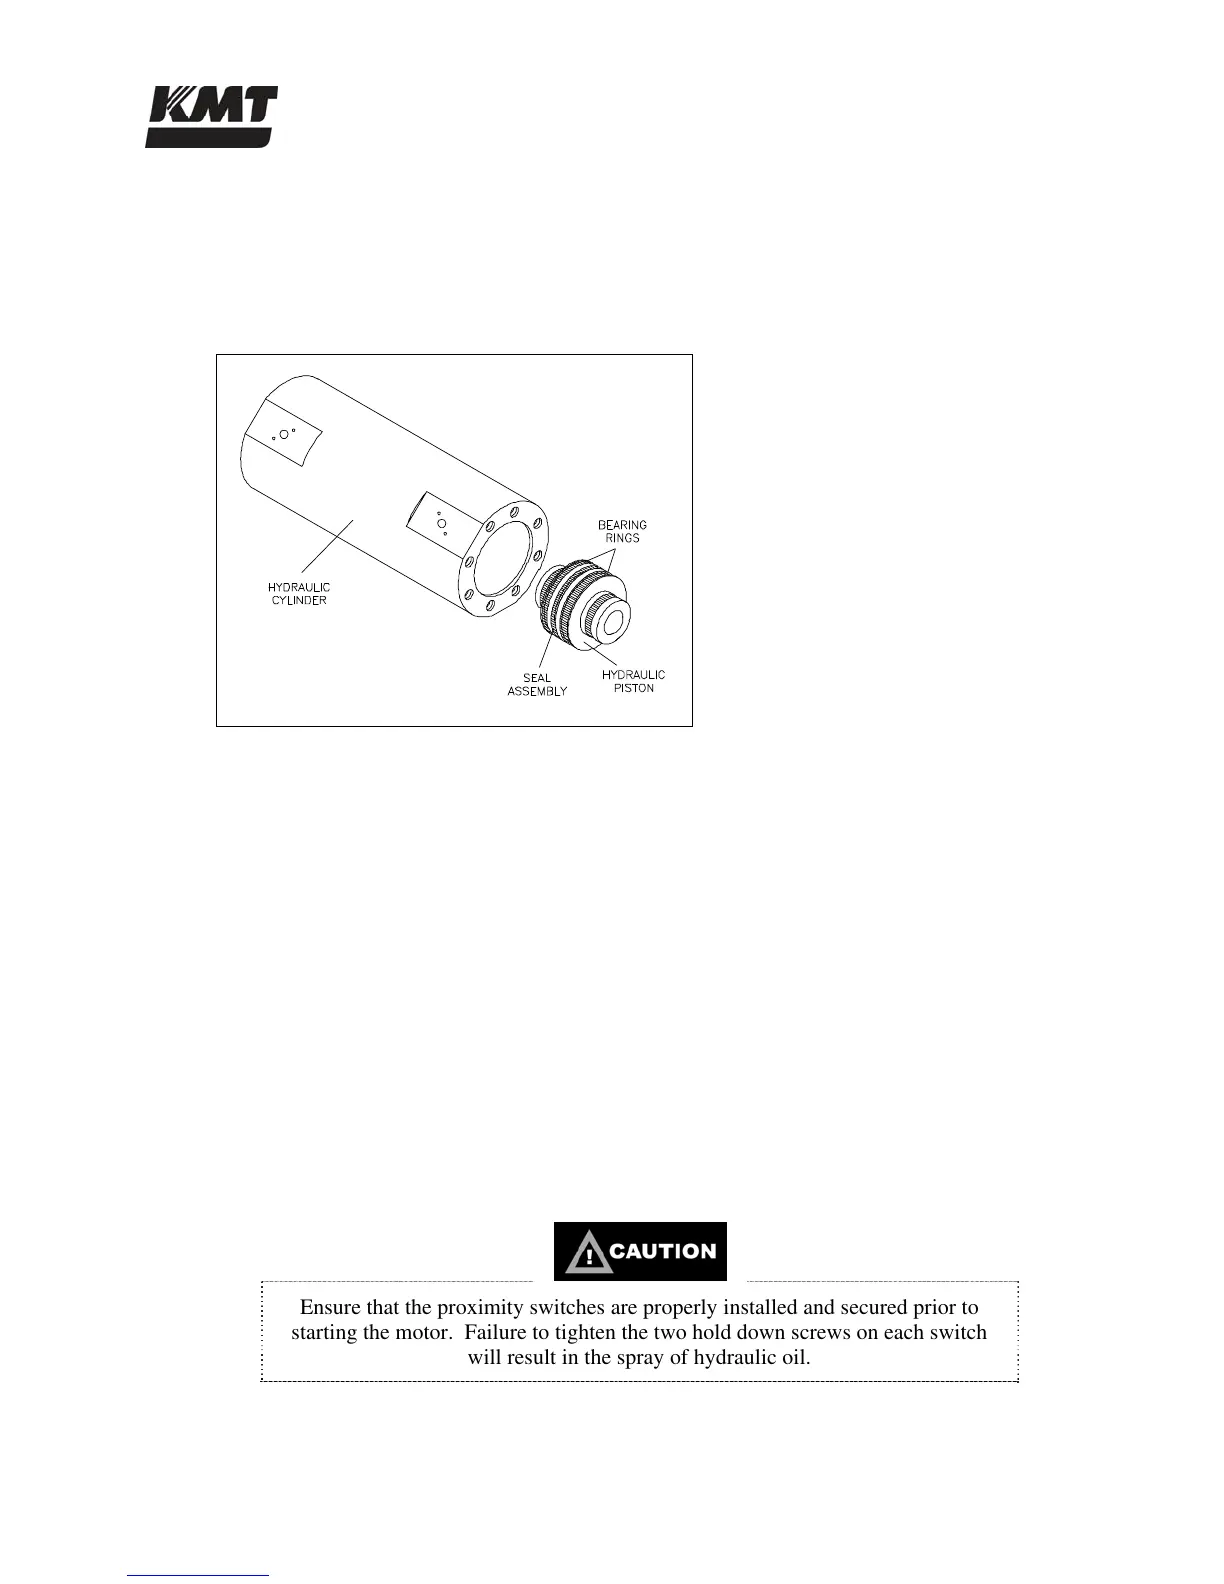
Hydraulic Piston Installation
1. Ensure that the hydraulic cylinder bore is free of grit or contamination.
2. Lubricate the bearing rings and seal assembly, and lightly lubricate 2-3 inches of the
cylinder bore with FML-2 grease.
Figure 9-22: Hydraulic Piston Installation
3. Install the piston into the hydraulic cylinder bore. If necessary, use a plastic head hammer
to drive the piston into position between the holes for the proximity switches.
4. Install the plungers and check the snap-in feature of the plunger attachment. Use the
plunger removal tool to ensure the pins retract to release the plunger, and close to retain
the plunger in a uniform manner.
5. Verify that the o-ring and backup ring are properly positioned in the groove on both
hydraulic cylinder heads, and that they are sufficiently lubricated with FML-2 grease.
6. Position the cylinder heads in the ends of the hydraulic cylinder. Apply JL-M grease to
the threads on the socket head screws. Install the screws in each hydraulic cylinder head
and tighten, following the torque specifications in Table 9-1.
7. Replace the hydraulic cartridge seal, bushing retainer flange and retaining ring in both
hydraulic cylinder heads.
8. Replace the proximity switches by positioning the o-ring spacers and the switches. Apply
JL-M grease to the threads on the socket head screws and tighten, following the torque
specifications in Table 9-1.
Ensure that the proximity switches are properly installed and secured prior to
starting the motor. Failure to tighten the two hold down screws on each switch
will result in the spray of hydraulic oil.
 Loading...