Section 2
Installation
20412922
8-2012/Rev 10
2-15
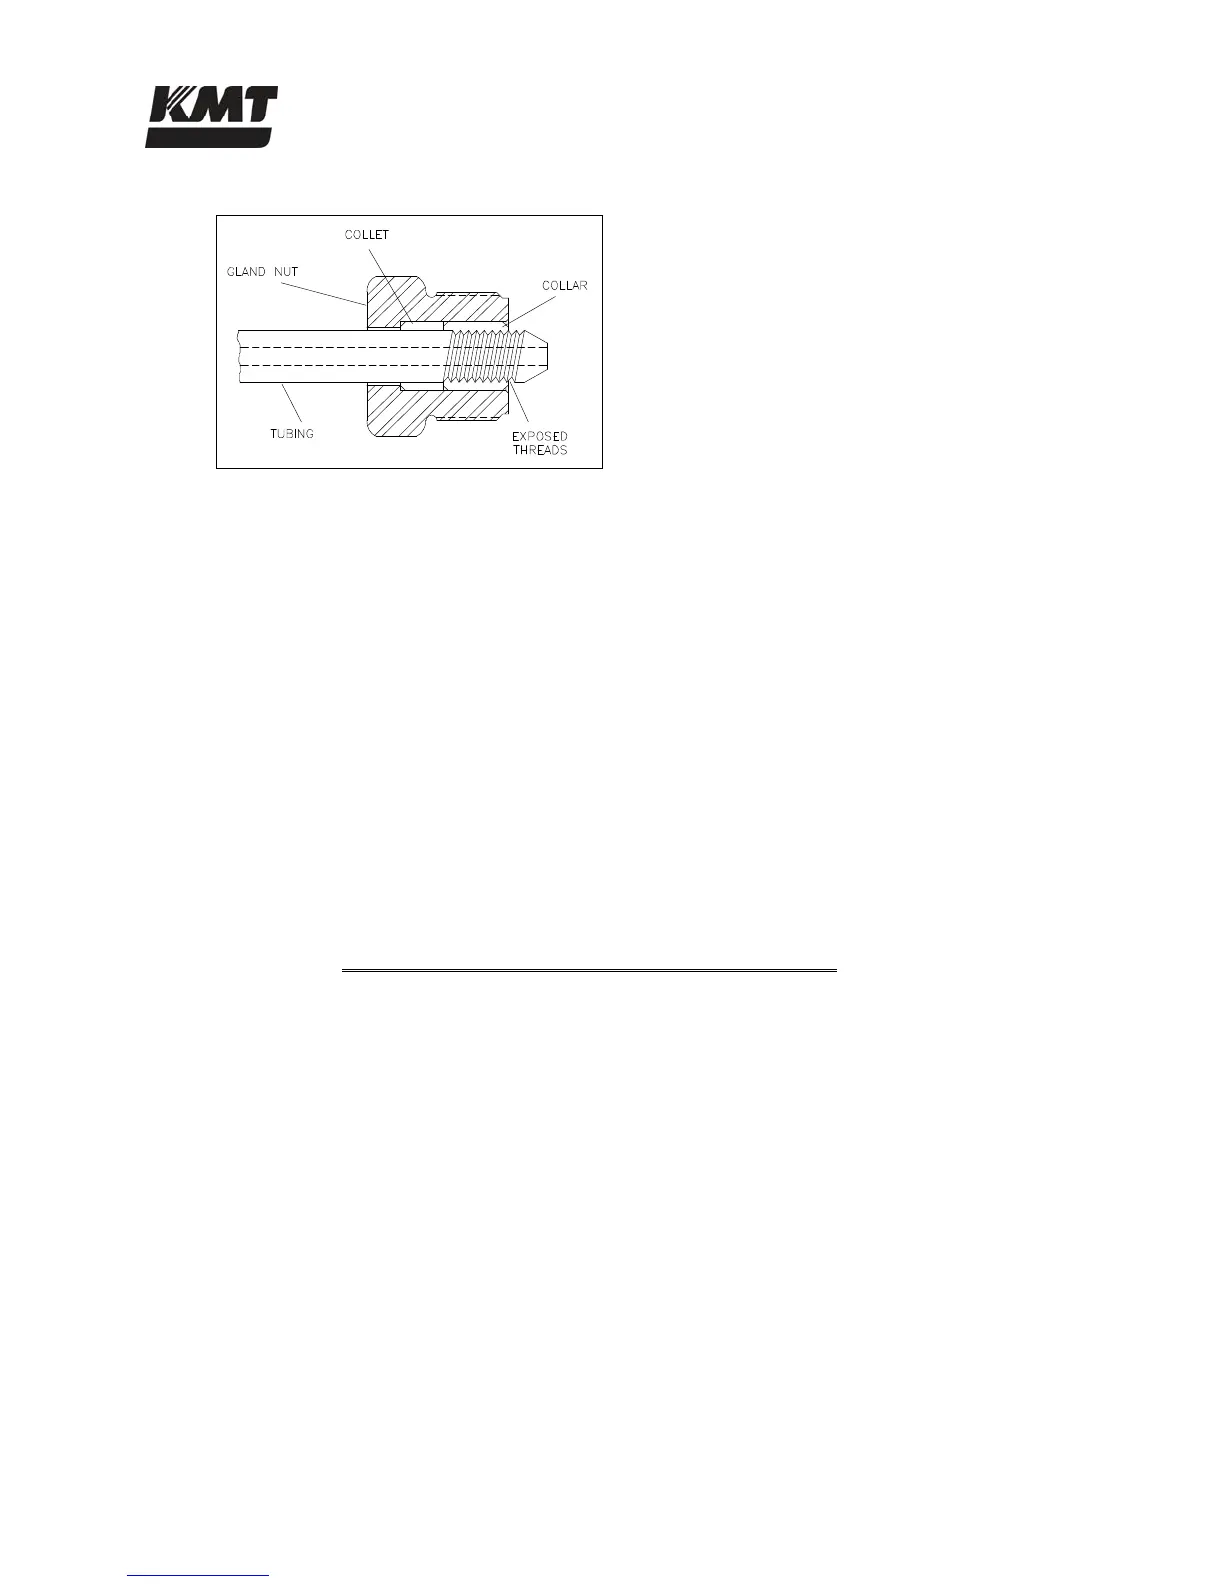
Figure 2-9: Anti-Vibration Connections
1. Deburr the tubing ID and thoroughly clean the tubing threads.
2. Slip the gland nut and the collet onto the tubing.
3. Apply Pure Goop to the threads on the tubing. Screw the collar onto the threaded end of
the tubing leaving 1-1/2 to 2-1/2 threads exposed on the tubing between the collar and the
coned tubing.
4. Apply Pure Goop to the male threads on the gland nut and insert the tubing into the
connection. Engage the gland nut and tighten finger tight.
5. Tighten the gland nut to the torque specifications in Table 2-12.
When a flexible whip is used to allow cutting nozzle movement, anti-vibration fittings and proper
supports and guides must be provided to prevent failures from non-water related stresses. The
whip will only flex in a single plane without being subjected to torsional stress. The use of high
pressure swivels is strongly recommended.
Table 2-11
Torque Specifications
High Pressure Connections
1/4” Tubing 25 ft-lb (34 Nm)
3/8” Tubing 50 ft-lb (68 Nm)
9/16” Tubing 110 ft-lb (149 Nm)
2.9 Commissioning
When the machine has been positioned, all service connections installed, and the high pressure
plumbing has been installed to the cutting area, the machine is ready to be commissioned.
The following procedure is used for the initial startup and testing of the machine.
1. Check all areas in and around the pump for foreign objects and debris. Remove all tools,
parts, etc. from the area.
2. Check the hydraulic fluid level. The hydraulic system is pre-filled prior to shipping. If
the hydraulic fluid is low or empty due to leakage during transit, the system must be filled.
Follow the instructions and specifications in Section 6, Recirculation System.
3. Open the shutoff valves on the service connections and check for leaks.
 Loading...