SERVICE MANUAL
22 18NOV97 – SM5440-1
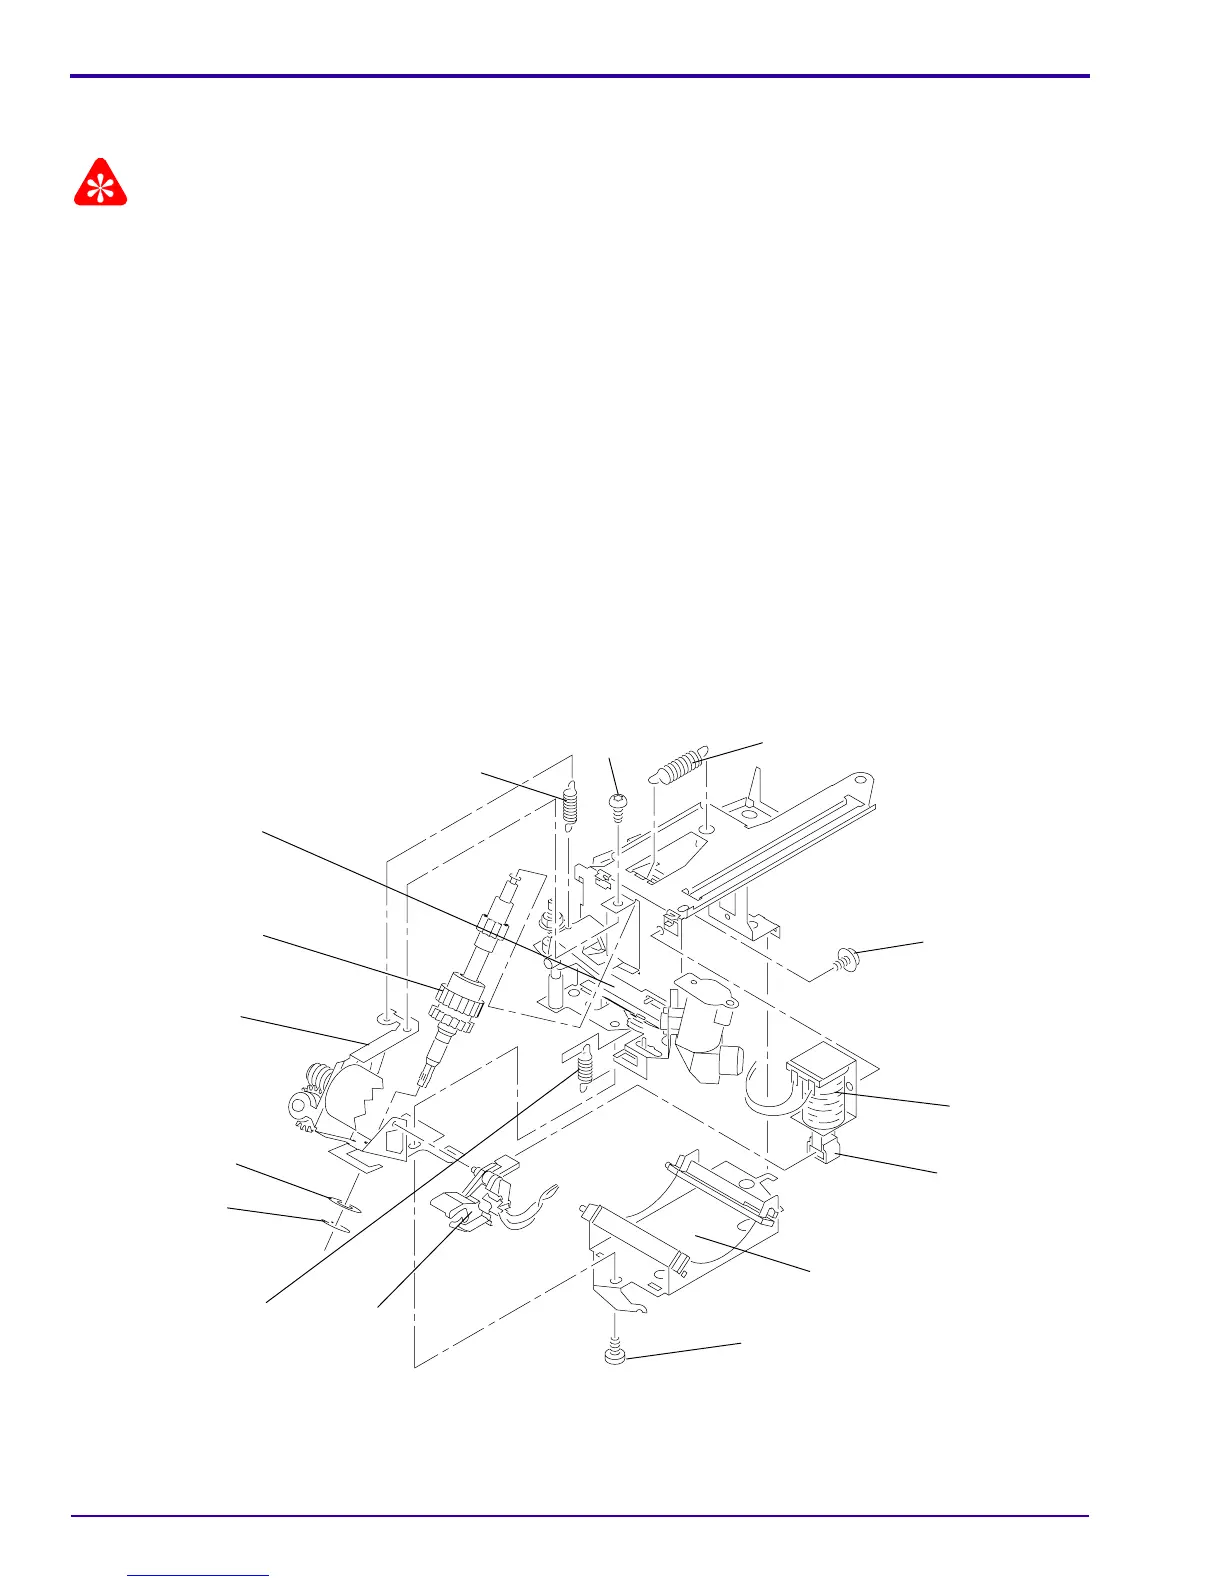
[2] Do the replacement procedure for the LOWER HOUSING ASSEMBLY.
[3] Remove the FOCUS KNOB.
Important
It is necessary to push the AUTO-FOCUS BRACKET backward and forward to allow access to the SCREWS on the
LENS MOUNT ASSEMBLY.
[4] Remove the 3 SCREWS from the LENS MOUNT ASSEMBLY.
[5] Lift and remove the LENS MOUNT ASSEMBLY.
[6] Remove the FOCUS SHAFT SPRING from the LENS MOUNT BRACKET.
[7] Remote models only: Remove the SPRING from the CLAMP LEVER on the LENS MOUNT BRACKET.
[8] Remove the SPRING from the PHOTOCELL BRACKET.
[9] Remove the E-RING and SPACER from the FOCUS SHAFT ASSEMBLY.
[10] Remove the SCREW from the LENS SUPPORT BRACKET.
[11] Lift and remove the LENS SUPPORT BRACKET.
[12] Remote models: Remove the AUTO-FOCUS SWITCH ASSEMBLY.
[13] Remote models: Remove the SCREW from the RACK SOLENOID ASSEMBLY.
[14] Remote models: Remove the RACK SOLENOID ASSEMBLY and PLUNGER.
[15] Remote models: Remove the SCREW from the FOCUS MOTOR BRACKET ASSEMBLY.
[16] Remove the FOCUS MOTOR BRACKET ASSEMBLY.
[17] Push the RACK LEVER away from the FOCUS SHAFT ASSEMBLY.
[18] Remove the FOCUS SHAFT ASSEMBLY.
A091_4029HA
SPRING
BRACKET
PHOTOCELL
FOCUS MOTOR
BRACKET
SPACER
E-RING
ASSEMBLY
AUTO-FOCUS
SWITCH
(not shown)
RACK LEVER
FOCUS SHAFT
SPRING
CLAMP LEVER
LENS SUPPORT BRACKET
SCREW
A091_4029HCA
SOLENOID
PLUNGER
RACK
FOCUS SHAFT
SCREW
SPRING
SCREW