EasyManuals Logo

Kodak Carousel 4200 User Manual

Kodak Carousel 4200
51 pages
To Next Page IconTo Next Page
To Previous Page IconTo Previous Page
Page #33 background imageLoading...
Page #33 background image
Adjustments
SM5440-1 – 18NOV97 33
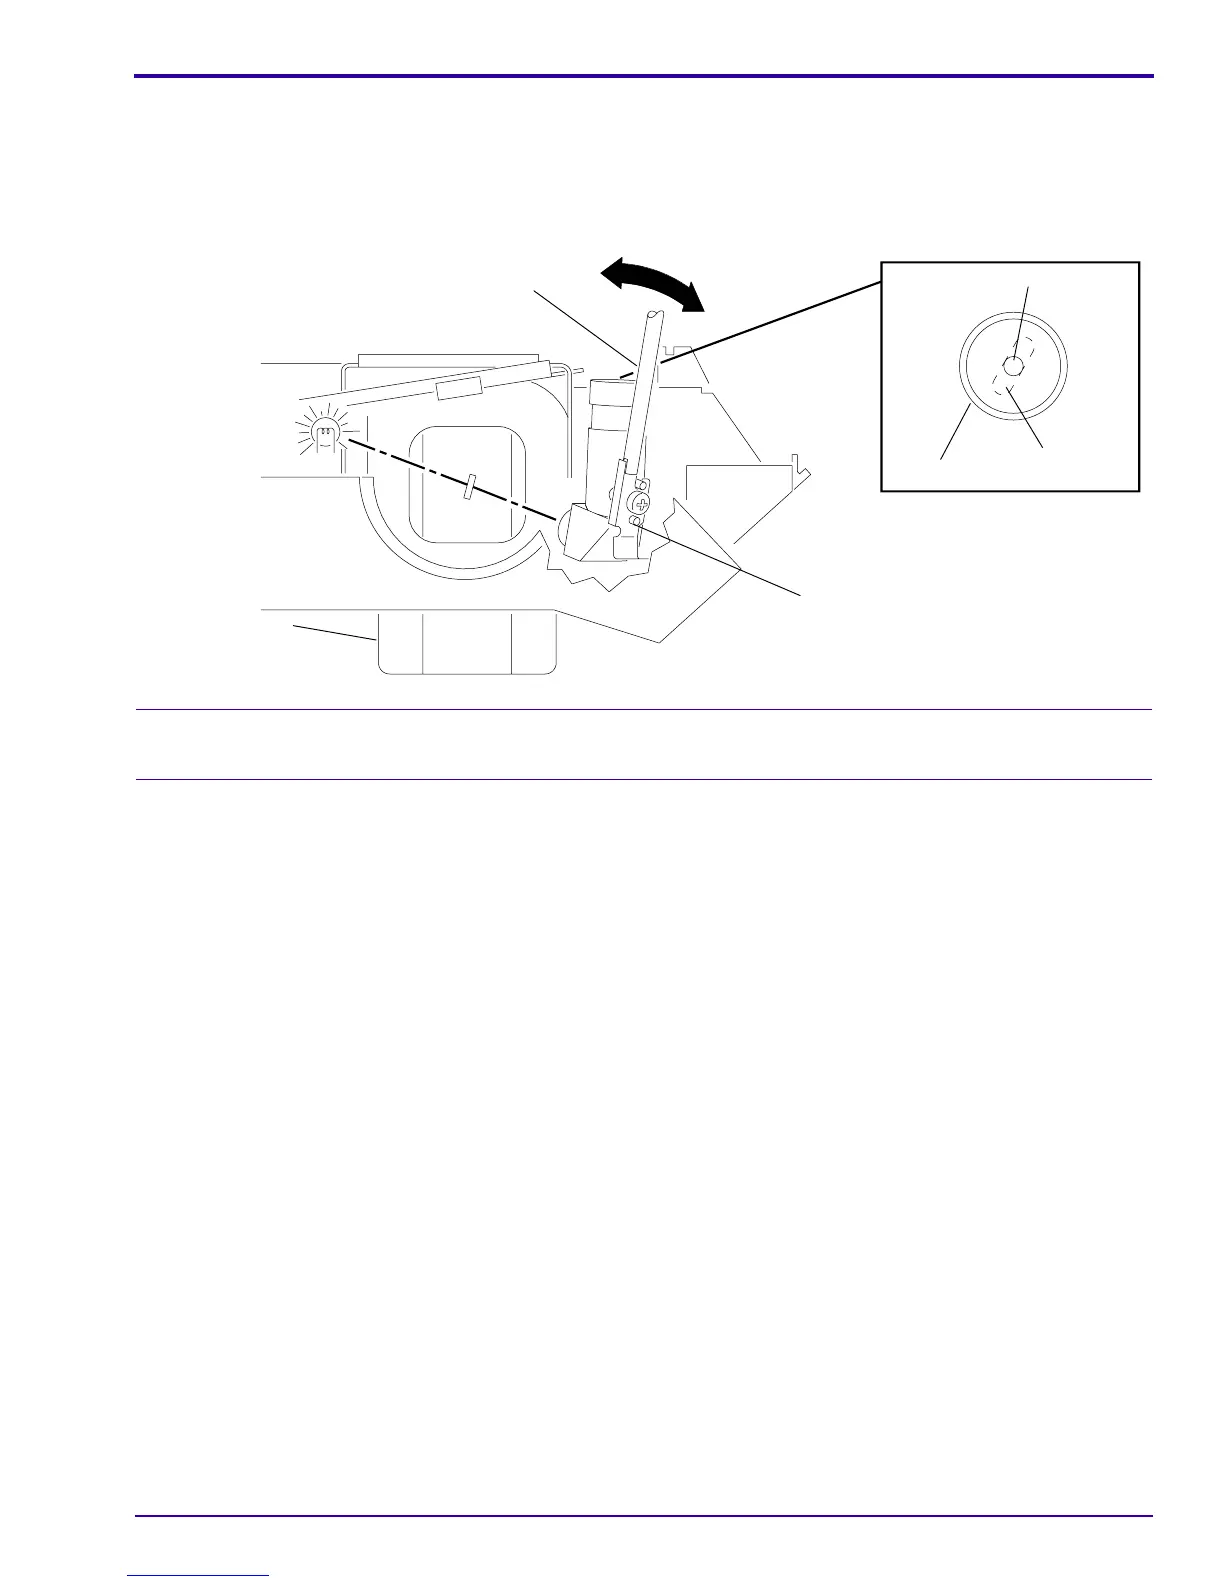
[16] Set the projector to the LO-LAMP position.
[17] Observe the image of the focus light path on the bottom of the FAN CAP; the light path should be in the center
of the hole in the FAN CAP.
[18] Bend the CLAMP PAD ASSEMBLY until the image is in the center of the hole in the FAN CAP.
[19] Assemble the PHOTOCELL MASK, FILTERS and PHOTOCELL BOARD.
Adjustment Specification
Use TL-1744 to check that the CLAMP PAD ASSEMBLY moves forward and backward.
A091_4030BA
AUTO-FOCUS
TARGET SLIDE
TL-3002
T-BAR TL-3003
light image
FAN CAP
CLAMP PAD
ASSEMBLY
A091_4030BCA
hole

Table of Contents

Other manuals for Kodak Carousel 4200

Questions and Answers:

Question and Answer IconNeed help?

Do you have a question about the Kodak Carousel 4200 and is the answer not in the manual?

Kodak Carousel 4200 Specifications

General IconGeneral
BrandKodak
ModelCarousel 4200
CategoryProjector
LanguageEnglish

Related product manuals