KV3000 Kinematic Viscosity Bath
Operation and Instruction Manual
KV3000-Manual
-11-
2. Check labeling for correct orientation of
instrument. (e.g. This Side Up)
3. Carefully open top of box with box cutter and
remove packing foam.
4. Look inside bath from top of box, to verify
that the Glass Bath Jar is in tact.
5. Make two additional vertical cuts, using box
cutter, along length of two sides of the box
and remove packing foam.
6. Extract instrument and place on suitable cart
for transportation to work area / lab bench.
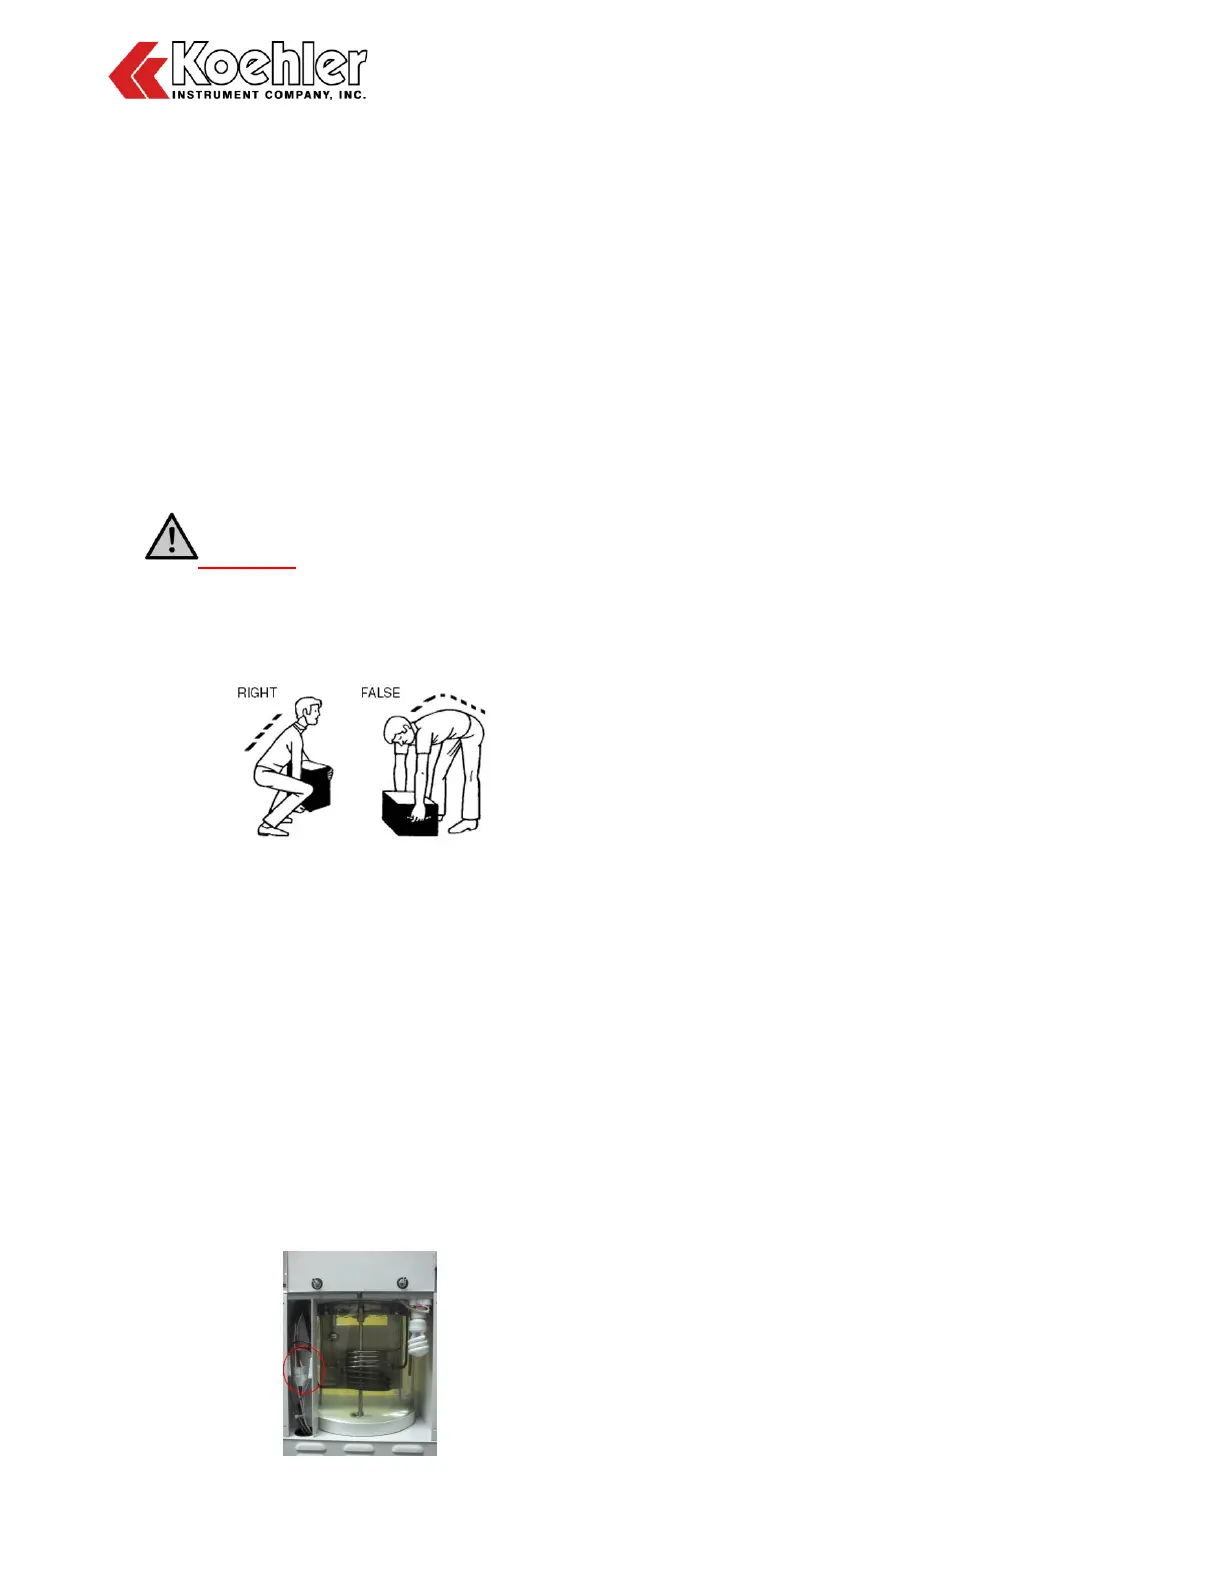
WARNING: Be sure two or more
individuals are available for extracting and lifting
instrument from box to cart and from cart to
bench. Individuals must lift in accordance to
proper technique. See Figure below.
7. Lift instrument from cart and place on bench.
8. Remove foam insert Borosilicate Glass Jar
as per steps 9 thru 19.
9. Using a flat head screwdriver, remove the
four (4) silver screws located at the four
corners of the back panel.
10. Remove the back panel plate and set aside.
11. A collection of wires runs from the lower
control panel up the left side, while looking
at the back of the bath. Halfway up the
wiring are three points where the wires can
be disconnected. See Figure below:
12. There are a total of three joints to
disconnect. First disconnect the single large
cluster of wires by pressing in the sides of
the lower plastic piece then pulling the top
plastic piece.
13. Then disconnect the two smaller joints. Each
side of the joint is labeled with an identical
number one (1) or number two (2). This
makes for easy connection when re-
assembling the instrument.
14. Once the wiring is completely disassembled
it is safe to remove the top assembly of the
bath.
15. Remove the six (6) screws lining the two
sides of the top assembly with a Philips
head screw driver.
16. Make sure there is sufficient space with
cleaning clothes to place the top assembly
when lifted off the bath.
17. Lift the top assembly with one hand on the
back side and one hand on the front side of
the top assembly. Place top plate assembly
on flat surface with the back side of the top
plate assembly and the heating coils on the
surface.
18. With the top plate assembly now removed
from the main instrument it is now easy to
access the bath jar to remove the protective
foam insert.
19. Re-assemble the instrument
20. Ensure that all parts listed on the packing list
are present. Inspect the unit and all
accessories for damage. If any damage is
found, keep all packing materials and
immediately report the damage to the
carrier. We will assist you with your claim, if
requested. When submitting a claim for
shipping damage, request that the carrier
inspect the shipping container and
equipment. Do not return goods to Koehler
without written authorization.