HAPTER
2 - I
NSTALLATION
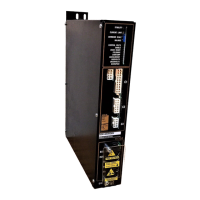
BDS4
2-6
2.7.3 Connecting the AC Input
Voltages
The Main AC Input Voltage, either single- or three-
phase, should be connected at L
a
, L
b
, and L
c
on the
power terminal block located on the front of the
PSR4/5 unit. The PSR4/5 is not line-phase sensitive.
When using the 12 or 20 amp PSR4/5 with single-
phase main power, the input lines may be connected
to any two (2) terminals L
a
, L
b
, or L
c
.
The Control AC input voltage should be wired to
Connector C1 - Pins 2 and 3 on the PSR4/5 and from
Connector C1 - Pins 5 and 6 of the PSR4/5 to
Connector C4 - Pins 1 and 2 (fan units only) on the
BDS4.
NOTE
Connector C4 is present only
on BDS4 Amplifiers that have
continuous ratings of 20 amps
and above.
2.7.4 Connecting the PSR4/5 Fault
Output Contact (Connector C1)
Pins 1,4 Fault Contact
The Fault Output Contact closes when power is
applied to the PSR4/5. This contact opens on a fault
condition within the PSR4/5 only.
The pinouts for C1 are listed in Figure 2.2. Refer to
Note 2 of the BDS4 Wiring Diagram (A-93231) for
further information concerning the PSR4/5 Fault
Output Contact.
2.7.5 Connecting the Unregulated DC
Voltage to the BDS4 (Connector C3)
The wiring between the BDS4 Connector C3 and the
PSR4/5 Connector C2 (unregulated voltage) is in
Table 2.2 and the pinouts are in Figure 2.3.
2.7.6 Connecting the Main DC Bus
Voltage
Refer to notes 4 and 6 on BDS4 Wiring Diagram A-
93231 for details concerning the hook-up of the Bus
+ and Bus - circuits between the PSR4/5 and the
BDS4 amplifiers.
WARNING
Failure to observe correct
polarity will result in damage
to the PSR4/5 and BDS4.
2.7.7 Connecting the External
Regeneration Resistor(s)
If an external regeneration resistor is specified,
connecting points are provided on the PSR4/5 Power
Supply Unit (refer to Notes 3 and 10 on BDS4
Wiring Diagram A-93231).
Artisan Technology Group - Quality Instrumentation ... Guaranteed | (888) 88-SOURCE | www.artisantg.com
 Loading...