bizhub C759/C659, AccurioPrint C759 6-3
6.1 Main messages and remedies
6
Troubleshooting Chapter 6
Check the following items:
- Check for any pieces of paper left in the back of the section indicated on the Touch Panel. If the paper
cannot be easily removed, do not continue; instead contact your service representative.
- Once again, open and close the door at the section with the location number indicated on the Touch
Panel. This action may clear the message.
Contact your service representative if the paper jam indication persists even after you have checked.
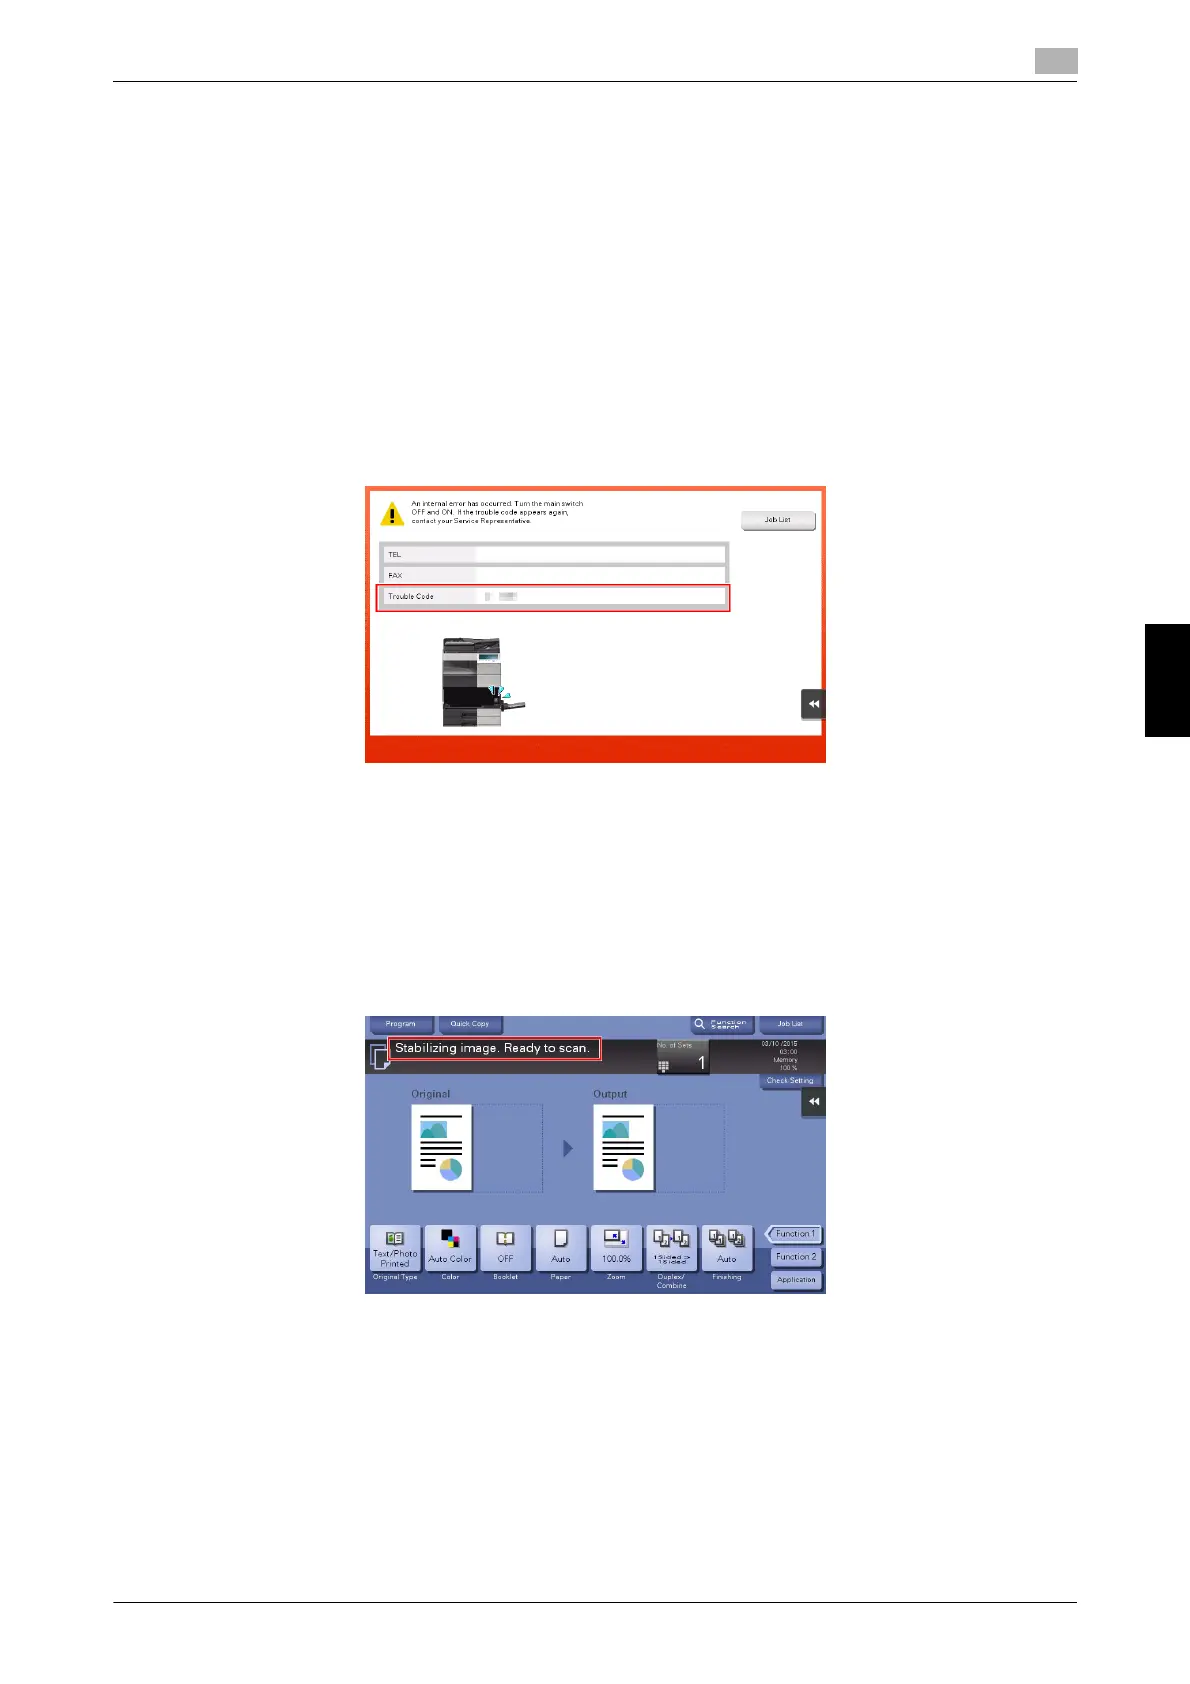
6.1.3 When an error message appears
When an error is detected, the following message appears. Take the appropriate action according to the
message displayed on the screen. If you cannot resolve the error, write down the [Trouble Code], and contact
your service representative with the power plug disconnected from the power outlet.
In normal circumstances, the phone number and fax number for your service representative appear in the
center of the screen.
NOTICE
If a defective part can be separated in order to be able to continue operations after a problem has been de-
tected, [Continue] or [Recover Data] is displayed. To continue operations, select any key. However, the prob-
lem has not been resolved, so contact your service representative immediately.
6.1.4 When [Stabilizing image.] appears
This automatically performs a function to adjust printing quality in order to maintain a certain level of color
reproduction quality. This "printing quality adjustment" is referred to as "image stabilization".
Image stabilization is performed while a large number of copies are being output or the temperature or hu-
midity inside the machine has changed.
Upon completion of image stabilization, printing is automatically resumed. Wait for a moment.
In case image stabilization does not finish after a short while, contact your service representative.
NOTICE
You cannot interrupt or prohibit image stabilization.
dReference
To perform image stabilization on a voluntary basis, refer to the User's Guide CD.
 Loading...