
J
jennifer35Aug 2, 2025
How to fix a blank LCD screen on Konica Minolta CM-M6?
- DDeborah ThomasAug 2, 2025
If the LCD screen is blank, ensure that the power is properly supplied. Connect the AC adapter or correctly insert the battery.
How to fix a blank LCD screen on Konica Minolta CM-M6?
If the LCD screen is blank, ensure that the power is properly supplied. Connect the AC adapter or correctly insert the battery.
What to do if Konica Minolta Measuring Instruments data cannot be input to a PC?
If you're unable to input data to a PC or commands are not being accepted, verify that the USB cable is correctly connected from the instrument’s USB connecting terminal to the computer’s USB port, using the USB cable supplied with the instrument. Also, check the Bluetooth module to ensure that Bluetooth communication has been established correctly.
Why is printing not possible with Konica Minolta CM-M6 Measuring Instruments?
If printing is not possible, ensure the connection cable is correctly connected from the instrument’s USB connection terminal to the printer using the USB cable supplied with the instrument. Also, verify that Bluetooth communication has been established correctly by checking the Bluetooth module.
What to do if measurement results are abnormal on Konica Minolta CM-M6 Measuring Instruments?
If the measurement results are abnormal, make sure that the specimen is securely placed in the instrument to prevent light leakage. Also, perform white calibration using correct white calibration data.
What to do if the measurement key/button is not effective on Konica Minolta Measuring Instruments?
If the measurement key/button is not effective, wait until any ongoing measurement is complete before pressing the button again. Ensure that a screen where measurement is possible is displayed, such as the Calibration, Target, or Sample screen, when you press the measurement button.
Why do measurement results fluctuate with Konica Minolta CM-M6 Measuring Instruments?
Measurement results may fluctuate if the instrument and specimen are not kept stationary during measurement. Ensure that neither the instrument nor the specimen moves while a measurement is in progress.
How to fix Konica Minolta CM-M6 when measurement data disappears immediately?
If measurement data or settings are not held in memory, the instrument’s backup battery may be low, especially after purchase or prolonged non-use. Turn the instrument ON to charge the backup battery. The backup battery will be fully charged in 7 days under this condition.
Defines safety symbols used in the manual for warnings and notes.
Critical safety instructions to prevent hazards like fire, electric shock, and injury.
Guidelines for operating the instrument in suitable environments and general usage notes.
Procedures for cleaning, storing, transporting, and maintaining the instrument.
Information on proper disposal of the instrument and manual reading conventions.
Details on standard and optional accessories like AC adapter, battery, and cables.
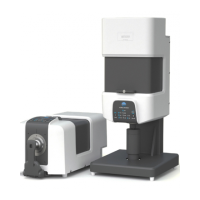
Visual overview of how the instrument connects to various devices and accessories.
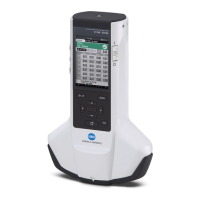
Identification and description of each physical component of the instrument.
Instructions for attaching the hand strap, inserting batteries, and connecting the AC adapter.
Procedures for using the White Calibration Cap and Zero Calibration Box.
How to turn the instrument on/off and select the display language.
Explanation of the LCD screen layout, status icons, and control keys.
Information on the instrument's capacity and method for saving measurement data.
A guide to the sequence of operations for taking measurements.
Steps for performing zero and white calibration to ensure measurement accuracy.
Instructions on how to set up and execute a measurement on a sample.
Setting target colors and checking for color differences between samples.
Defining and applying tolerances for automatic pass/fail assessment of measurements.
How to navigate and interpret measurement data shown on the LCD screen.
Overview of the instrument's menu system and general navigation.
Operations for managing target data, including editing, deleting, and protecting.
Procedures for managing sample measurement data, such as printing and deleting.
Configuring measurement parameters like angle, averaging, and observer/illuminant.
Setting default data, calibration intervals, and instrument setup options.
Customizing user type, language, date/time, and screen brightness settings.
Instructions for establishing connections with PCs via USB or Bluetooth.
Configuring USB host, PIN code, and Bluetooth settings for device communication.
How to connect to printers via USB or Bluetooth and manage printing options.
A compilation of error and warning messages with troubleshooting guidance.
Common issues, their causes, and recommended solutions for instrument problems.
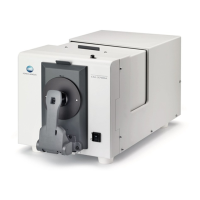
Key technical specifications and features of the spectrophotometer.
Diagrams illustrating the physical size and measurements of the instrument.
| Light Source | Pulsed Xenon lamp |
|---|---|
| Type | Spectrophotometer |
| Measurement Method | Reflectance |
| Measurement Area | Approx. Ø8 mm |
| Sensor | Silicon photodiode array |
| Measurement Time | Approx. 1.5 seconds |
| Display | LCD |
| Power Supply | Four AA alkaline batteries |
| Operating Temperature | 5 to 40°C |
| Storage Temperature | -20 to 45°C (-4 to 113°F), 80% RH or less (no condensation) |