Chapter 5 Disassembly and Assembly
5-130
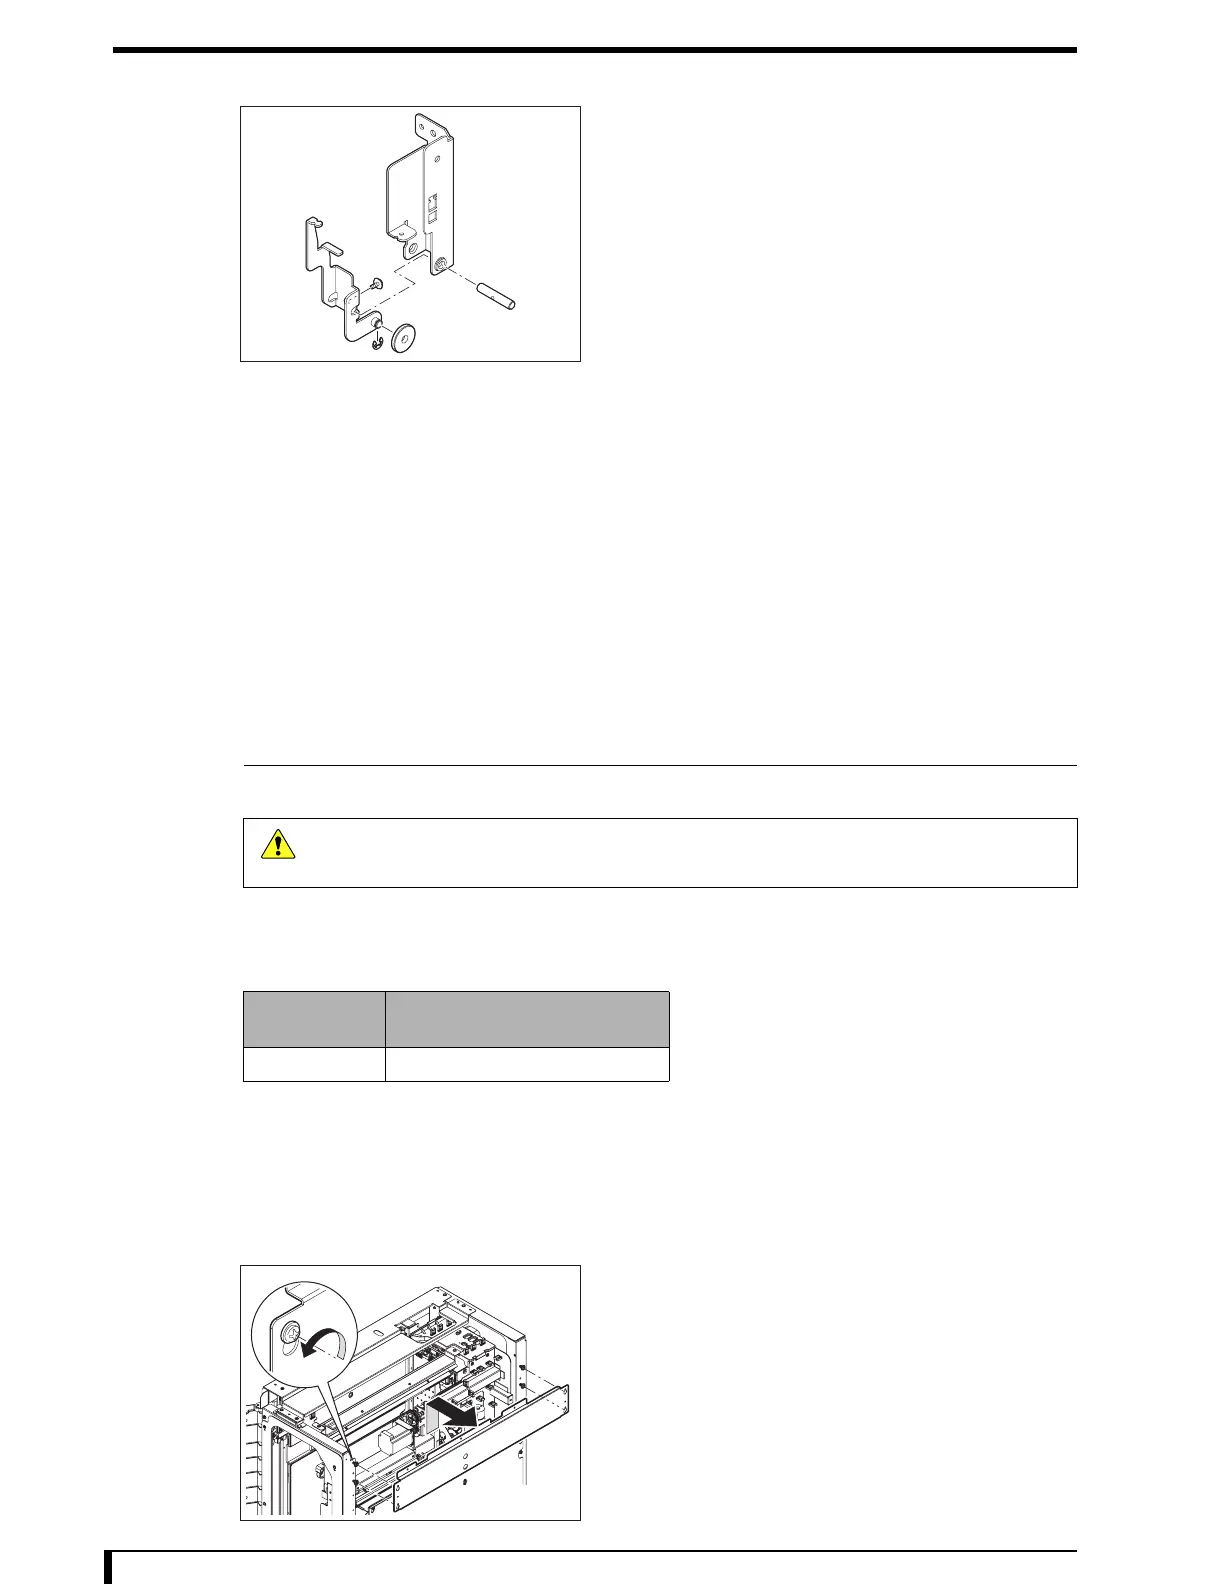
6 Replace the parts.
The spring will be installed later in Step 9 after installed
on the main unit.
7 See Step 5 to install the back plate detection unit.
•
1 screw (M4 x 8)
8 Install the back plate absorption detection sensor
that was removed in Step 4.
9 See Step 2 to install the spring on the back plate
detection unit.
10 See " Installation Procedures (Page 5-8)" in "5.2.3 Removing/Installing the Exterior Panel
and Insertion Unit" to install the first front back panel.
Now, you have finished with the procedures to replace the back plate detection unit.
5.10.11Replacing the Cleaning Unit
This section describes the instructions on how to replace the cleaning unit.
Work outline
Listed below are the number of people and the rough standard of work hours required for performing the
works described in this section.
Requirements
The works in this section can be performed using only the standard tools.
1 See " Removal Procedures (Page 5-6)" in "5.2.3 Removing/Installing the Exterior Panel and
Insertion Unit" to remove the exterior panel and insertion unit.
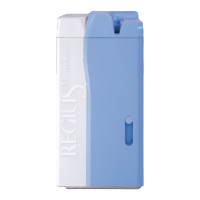
2 Remove the exterior frame (front).
•
4 screws (M4 x 8)
Loosen all screws.
Caution
Be sure to turn off the power supply circuit breaker and unplug the power cable from the
equipment whenever you disassemble/assemble the equipment.
Personnel
Number
Work Hours (steps 2 to 8)
1
First Front Side