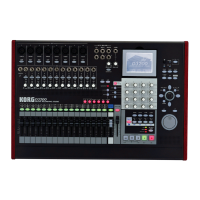
54
3 Select the playback tracks.
Press the [TRACK STATUS] keys of the tracks that you
want to hear, and set them to PLAY (LED lit green).
4 Select the recording track.
Press the [TRACK STATUS] key of the track that you
want to record, to set it to REC (LED blinking red).
5 Mute tracks that you do not want to use.
For each track that you do not want to play or record,
press the [TRACK STATUS] key to set it to MUTE (LED
dark), so that no sound will be output by tracks that you
are not using.
6 Adjust the recording level of the input device, and
record.
Refer to “1-1. Analog input” (→p.35).
Trigger recording procedure
Trigger recording is a function that initiates recording
when the input volume reaches a specified level.
1 Connect your input device, select a track for recording,
and adjust the recording level. Refer to “1-1. Basic
recording” (→p.53).
2 Access the [TRIGGER] “Trigger” tab page, and turn
“TriggerRec” “On” (the [TRIGGER] key will light).
3 Press the [REC] key to select record-ready mode (LED
blinking).
4 Begin playing your instrument.
When the input signal exceeds the threshold level
(“Threshold”), recording will begin automatically.
5 When you are finished playing, press the [STOP] key to
stop recording.
1-4. Re-recording a specific area: Punch-in/out
If you make just one mistake in a recorded performance, or
are not satisfied with a portion of the performance, you can
use “punch-in/out” recording to fix just that portion with-
out having to re-record from the beginning of the song.
“Punch-in” is the action of switching the song from the play-
back to the record mode, and “punch-out” is the action of
switching from the record mode back to the playback mode.
Manual punch-in/out
Here’s how you can punch-in and punch-out manually.
During playback, press the [REC] key or an optional PS-1
foot switch to begin recording, and then press the [REC] key,
[PLAY] key, or foot switch to stop recording.
1 Connect your input device, select a track for recording,
and adjust the recording level. Refer to “1-1. Basic
recording” (→p.53).
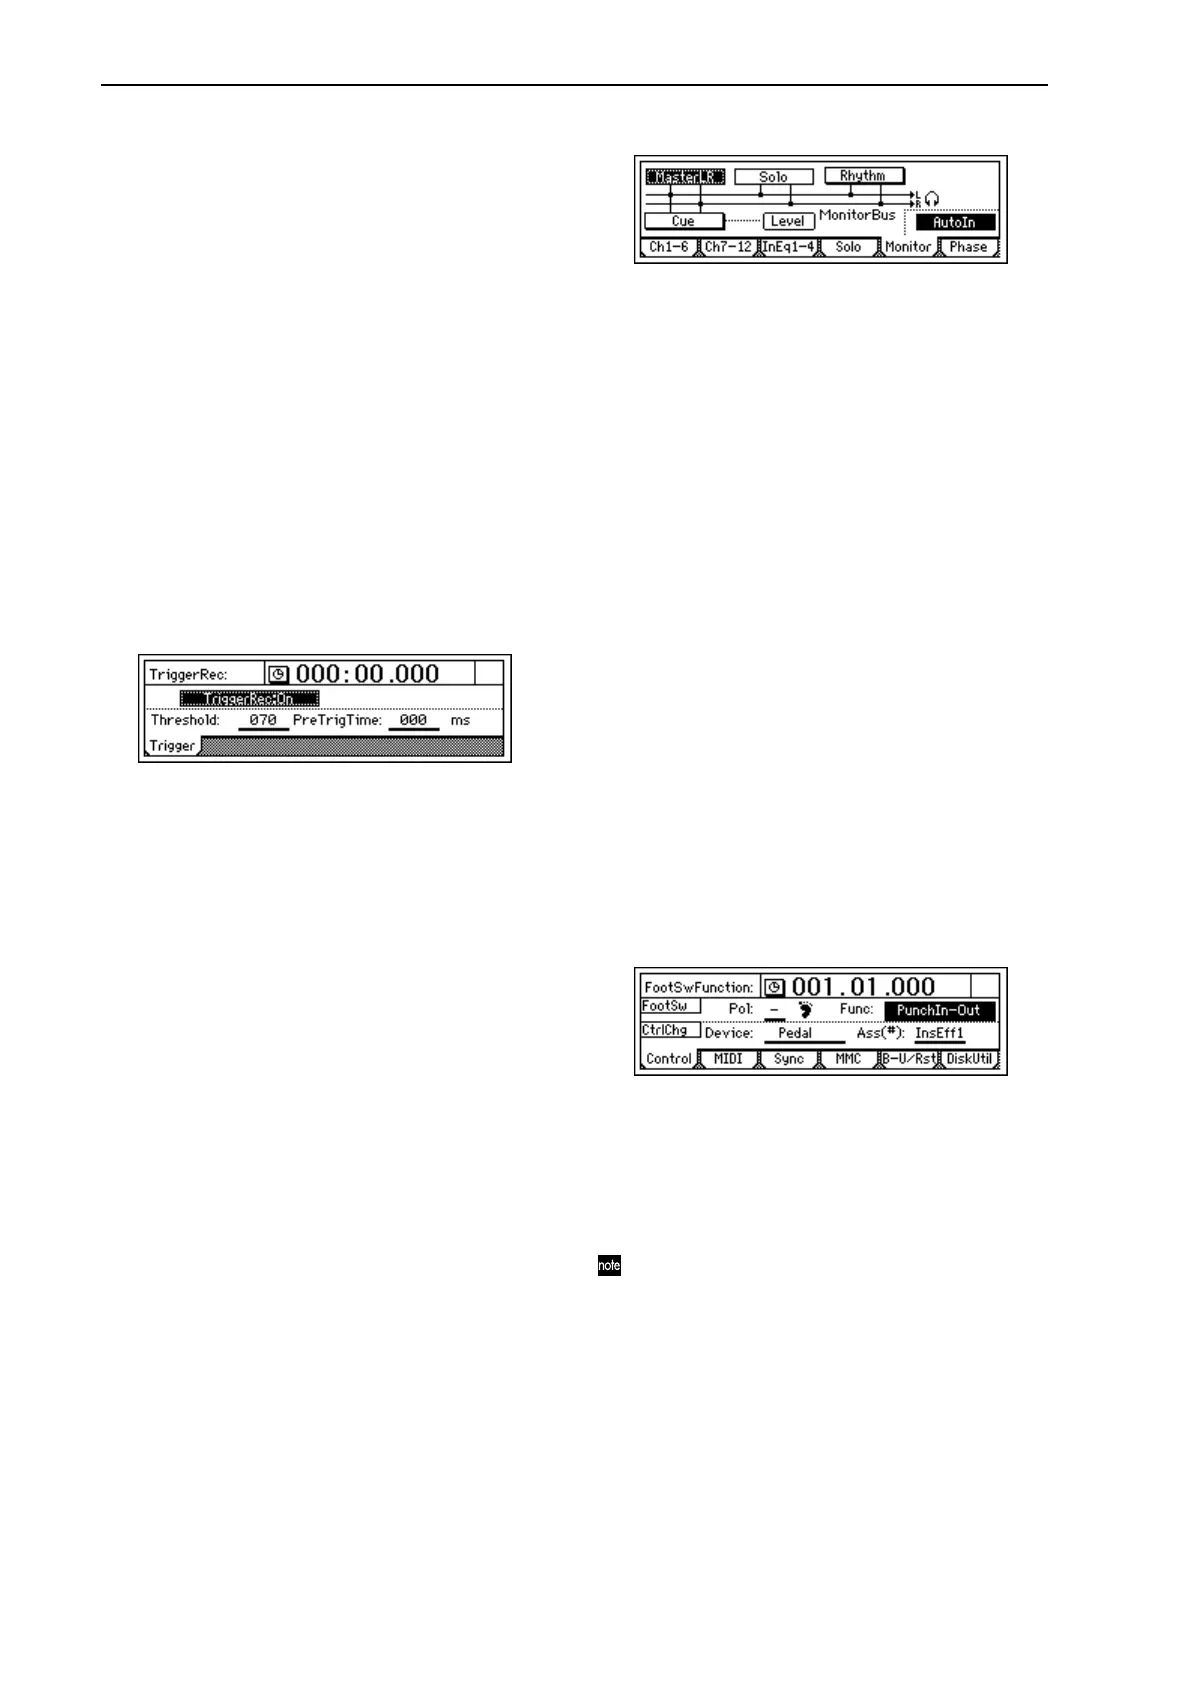
2 Specify the monitor output.
• Access the [INPUT/OUTPUT/SOLO] “Monitor” tab
page.
• Select the signal that you want to monitor.
•Turn on the “AutoIn” button.
3 Move the counter to a location slightly before the point
where you want to begin re-recording. (→p.32)
4 Press the [PLAY] key to begin playback. You will hear
the recorded tracks play, including the recording-desti-
nation track.
5 At the point you want to begin re-recording, press the
[REC] key.
Recording will begin (manual punch-in). Now you will
hear the external input source.
6 At the point you want to stop re-recording, press the
[REC] key or [PLAY] key.
Recording will stop, and playback will resume (manual
punch-out). Now you will again hear the track play-
back.
7 Press the [STOP] key to stop.
When you have finished recording, move the current
location to a point slightly earlier than where you began
recording, and listen to the re-recorded performance.
Using a foot switch for manual punch-in/out
You can switch between playback and recording by
pressing a PS-1 foot switch (sold separately).
This lets you punch-in/out while you perform, or when
the D1200 is located at a distance.
1 Connect a foot switch to the [FOOT SWITCH] jack.
2 Access the [SYSTEM/USB] “Control” tab page.
3 Specify the function of the foot switch.
Set “Func (FootSwFunction)” to “PunchIn-Out.”
4 Perform steps 5 and 6 of “Manual punch-in/out,” but
press the foot switch instead of the [REC] key. (You may
use the foot switch and [REC] key in conjunction with
each other.)
You can also use the foot switch to record from the be-
ginning of the song. To do so, set “Func” in step 3 to
“Play/Stop.”
At the beginning of the song, press the [REC] key (the
LED will blink), and then press the foot switch to begin
recording.
Auto punch-in/out
The auto punch-in/out function automatically performs a
punch-in and punch-out at pre specified locations.
1 Access the [AUTO PUNCH] “AtPunch” tab page. In the
[AUTO PUNCH] “AtPunch” tab page, select the “Auto
Punch” button, and press the [ENTER] key to turn it