Introduction
12
1. [VOLUME] knob
This adjusts the volume of the (MAIN OUTPUT)
L/MONO, R jacks, as well as the volume of the
headphone jack.
2. REALTIME CONTROLS
[SELECT] button
[1]–[4] knob
Use the [SELECT] button to choose one of the real-
time controller modes - A/B/C - and use knobs
[1]–[4] to control the tone, effects, MIDI control
changes, and arpeggiator etc. while you perform.
(☞p.43, 92)
When you turn the [EXT. CONTROLLER] button
on (lit), External Control will be on, and the REAL-
TIME CONTROLS [1]–[4] knobs will transmit
MIDI messages to external MIDI devices. (☞p.111)
3. Arpeggiator
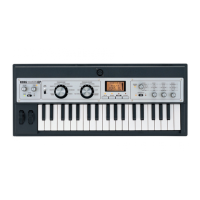
The microX’s arpeggiator is a polyphonic arpeg-
giator.
[ARP ON/OFF] button
This button turns the arpeggiator on/off. When
on, the button will light. (☞p.91)
The LED located above the [ARP ON/OFF] button
blinks at quarter-note intervals of the tempo.
In REALTIME CONTROLS C-mode, you can use
the [1], [2], [3], and [4] knobs to vary the arpeggio
pattern in realtime.
4. External
You can use the REALTIME CONTROLS [1], [2],
[3], and [4] knobs to transmit MIDI messages.
[EXT. CONTROLLER] button
This switches the external function on/off. When
on, the button will light. (☞p.111)
When this is on, you can use the [SELECT] button
to select the MIDI messages assigned to the knobs,
and operate the REALTIME CONTROLS [1], [2],
[3], and [4] knobs to transmit these MIDI messages
to an external MIDI device.
5. MODE/BANK Select
Use these buttons to select banks and enter modes.
The microX has four modes. (☞p.19)
PROGRAM [A], [B], [C], [D], [E], [GM] but-
ton
COMBINATION [A], [B], [C] button
[GLOBAL] button
[MULTI] button
6. Display
You can select a page, tab, or parameter in the dis-
play, and specify its value. (☞p.15)
7. CATEGORY
You can select programs, multisamples, combina-
tions, timbre/track programs, effects, or drum
samples by category.
[CATEGORY] button
Press this button to access the category menu, and
choose a program etc. from the list. The category
menu will appear if you have selected an appro-
priate mode, page, or parameter. (☞p.38, 45, 82,
108)
8. AUDITION, Demo Song Player
[AUDITION] button
In Program mode when you press the [AUDI-
TION] button (the button will light), a riff (phrase)
appropriate for the preloaded or preset program
will play. (This is called the Audition function.) To
stop auditioning, press the [AUDITION] button
once again.
Demo song player
When you hold down the [CATEGORY] button
and press the [AUDITION] button, the Demo
Song Player page will appear.
Select a song and press the [AUDITION] button to
begin playback. Press the [AUDITION] button
once again to stop playback.
To exit from this mode, press the [EXIT/CANCEL]
button. (☞p.8)
9. VALUE controller
The [VALUE] dial is used to set the value of the
selected parameter. (☞p.20)
[VALUE] dial
 Loading...


