3-1
3-2
4-1
4-2
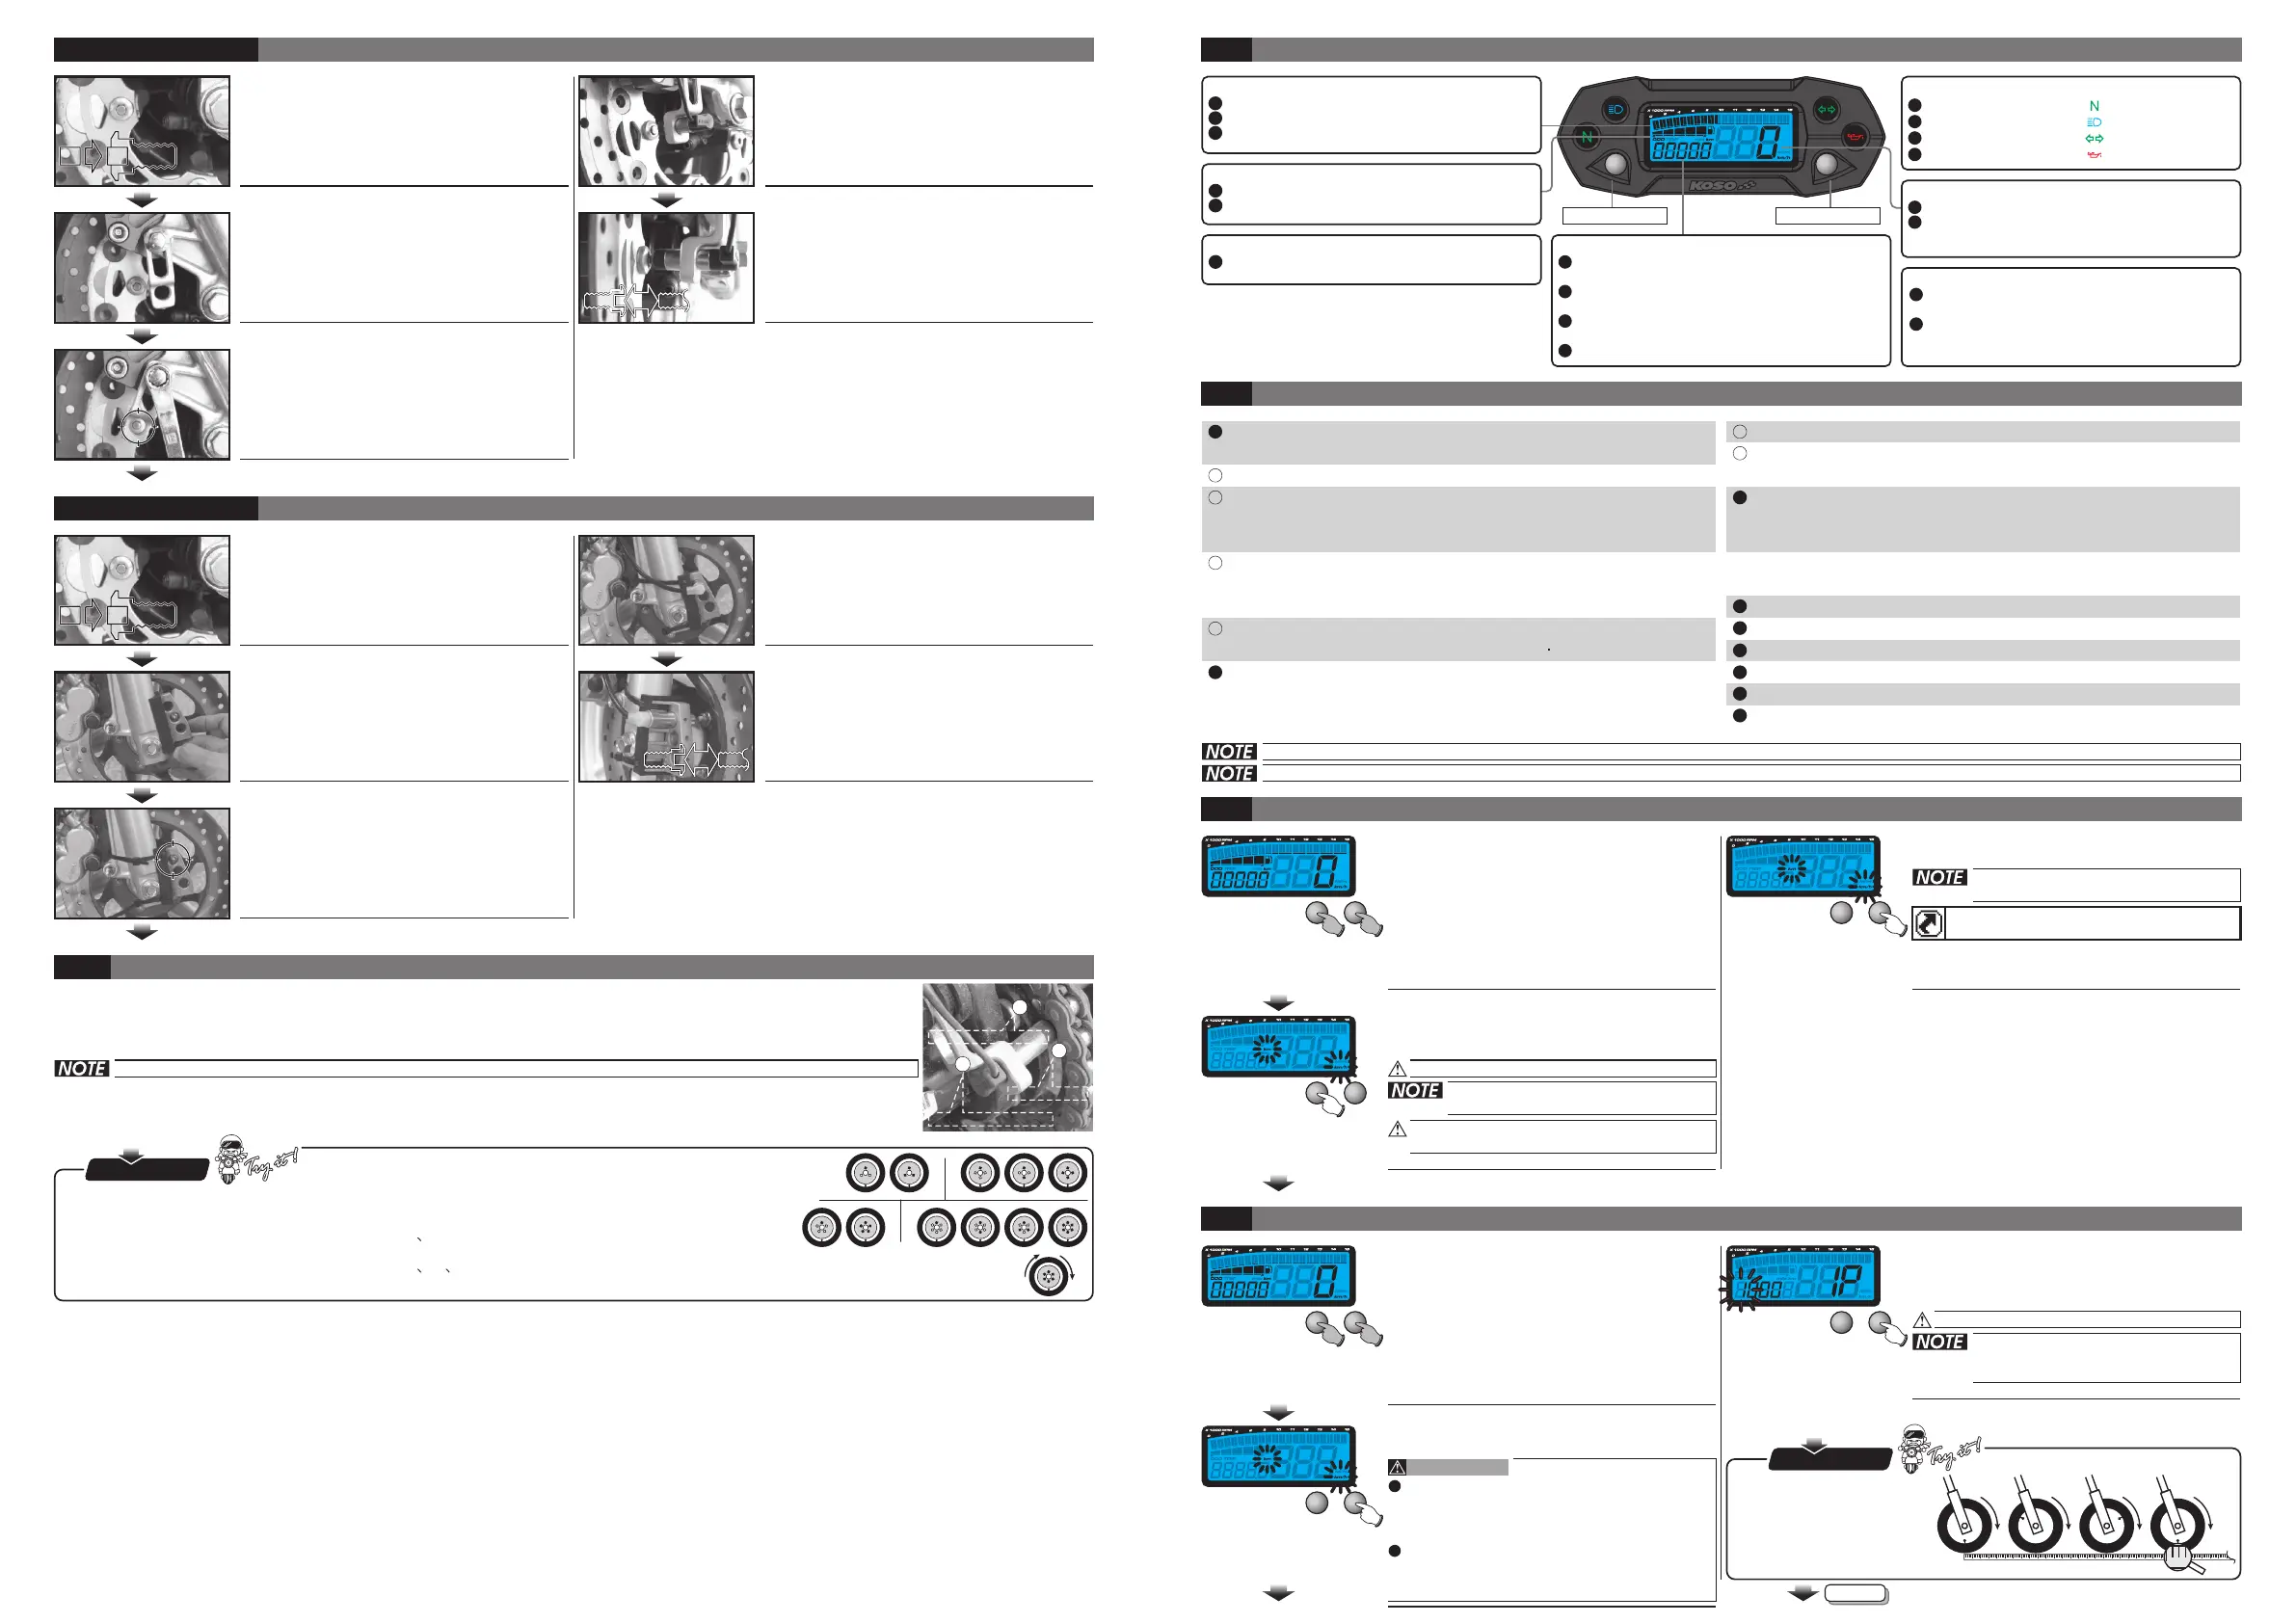
Put the magnet into the brake disc screw
hole.
Put the magnet into the brake disc screw
hole.
Install the s type sensor bracket.
Adjust the sensor bracket position to make
sure that the sensor could face the magnet
to prevent bad speed signal or no signal!
Install the speed sensor on the bracket.
Install the speed sensor on the bracket.
Adjust the distance between sensor and
magnet. We suggest you to make sure the
distance is under 8 mm for catching good
speed signal.
Adjust the distance between sensor and
magnet. We suggest you to make sure the
distance is under 8 mm for catching good
speed signal.
MOTO / SCOOTER
speed
sensor
speed
sensor
below
8mm
below
8 mm
S type speed sensor bracket instruction
MOTO / SCOOTER
speed
sensor
speed
sensor
below
8mm
below
8 mm
L type speed sensor bracket instruction
Please install the L bracket and the anti-slip
rubber on the front fork and adjust it to the
proper height and angle.
Please use the cable tie to fix the bracket on
the front fork. Please make sure the disc
screw could pass the hole on the bracket for
you to install the sensor into the same hole for
catching the speed signal.
ATV
S type speed sensor bracket instruction
1
2
3
Magnet (for speed signal)Magnet (for speed signal)
Speed sensorSpeed sensor
S type sensor bracketS type sensor bracket
About the setting, please refer to 4-7 tire circumference and sensor point setting.
1. Put the magnet into the brake disc screw hole.
2. Install the s type sensor bracket. Adjust the sensor bracket position to make sure that the sensor could face the
magnet to prevent bad speed signal or no signal!
3. Install the speed sensor on the bracket. Adjust the distance between sensor and magnet. We suggest you to make
sure the distance is under 8 mm for catching good speed signal.
EX. 1 EX. 2
EX. 3
EX. 4
The more magnet sensor points are, the less the display interval is. when installing the magnet, please
put the magnet with N-mark side face the outside and put them averagely to avoid wrong signal.
EX. 1: If your disk has 3 screws, you could install 1 or 3 magnets to catch the speed.
EX. 2: If your disk has 4 screws, you could install 1 2 or 4 magnets to catch the speed.
EX. 3: If your disk has 5 screws, you could install 1 or 5 magnets to catch the speed.
EX. 4: If your disk has 6 screws, you could install 1 2 3 or 6 magnets to catch the speed.
After finishing the magnet installation and sensor point setting, please move your tire to test the speedometer work or not.
P.S.P.S.
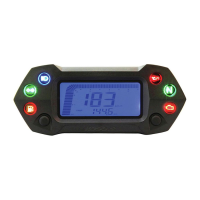
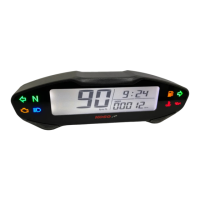
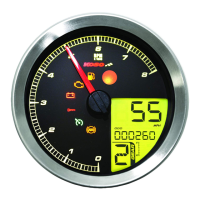
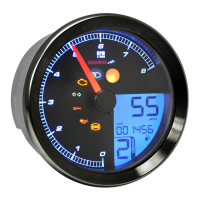
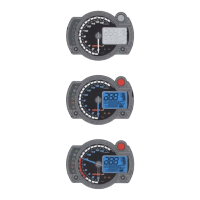
Basic function instruction
Function, setting instruction
Adjust button
In the main screen, to press the Adjust button
to switch between odometer and trip meter.
In the trip meter screen, to press down the
Adjust button for 3 seconds to reset the trip
meter.
Odo meter
Display range: 0~99999 km (mile), reset
automatically after 99999 km (mile).
Display unit: 1 km (mile).
Trip meter
Display range: 0~999.9 km (mile), reset
automatically after 999.9 km (mile).
Display unit: 0.1 km (mile).
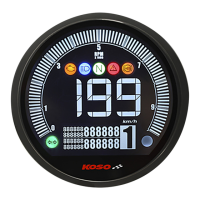
Speedometer
Display range: 0~360 km/h (0~223 MPH).
Display unit: km/h or MPH.
Select button
Adjust button
Direction light (Green)
High beam light (Blue)
Oil temperature (Red)
Neutral light (Green)
Indicator lights
JIS D 0203 S2
119.8 X 44 X 49.5 mm
Display internal
Trip meter A/B
Odometer
<0.5 second
Tachometer
Stroke / piston setting
<0.5 second
Display internal
2 Stroke: 1, 2, 3, 4 pistons
4 Stroke: 1, 2, 3, 4, 5, 6, 8, 10, 12 pistons
Display range: 0~360 km/h (0~223 MPH)
Speedometer
Display unit: km/h & MPH for alternative
Display unit: 0.1 km (mile)
Display unit: 0.1 km (mile)
Display range: 0~99999.9 km (mile), reset
Display range: 0~999.9 km (mile), reset
Setting unit: 1 mm Sensitive point: 1~60
Tire circumference
Setting range: 300~2,500 mm
Display range: 0~15,000 RPM
Display unit: 500 RPM (0~10,000 RPM)
Display unit: 250 RPM (10,000~15,000 RPM)
automatically after 99999.9 km (mile).
automatically after 999.9 km (mile)
o
-10~+60 C
Effective voltage
Indicator light color
DC12V
Effective temperature range
Meter standard
Meter size
Meter weight
Around 90 g
Neutral-green, High beam-blue,
Display range: 5 levels
Display unit: Each level represents 20 %
Fuel meter
Repeater-green, Oil-red
Setting range: 100 Ù, 510 Ù, no display
Design and specification are subject to change without notice!
If you enter the setting screen for 30 seconds and don't press the button, it will back to the main screen automatically.
Speed unit setting
Press the Adjust button to choose the speed
unit.
EX. Now the setting is km/h.
You could choose km/h or MPH in
the speed unit setting screen.
Now the speed unit is flashing!
The odometer & trip meter will change
together with the speed unit.
In main screen, press down the S
to enter the speed unit
setting.
elect &
Adjust X 3 seconds
In main screen, press down the S
to enter the speed unit
setting.
elect &
Adjust X 3 seconds
Press the Select button to continue the
function setting.
When you leave this screen, the
setting is finished.
If you just want to make this function setting, you
could hold down the Select button for 3 seconds to
back to the main screen.
Press the S button to enter the Tire
circumference setting
elect
Please measure the tire circumference (the tire
you will install the sensor on) and make sure the
number of magnet sensor point (You could install
the magnet into the disc screw or the sprocket
screw.)
The speed displayed on the meter will be
affected by the setting, please make sure the
setting number is correct before you make the
setting.
CAUTION!
Tire circumference and sensor point setting
EX. The tire circumference is 1,300 mm.
Press the Select button to move to the digit
you want to set.
EX. Now the original setting is 1,000 mm.
Now the 1 is flashing!
The tire circumference setting range
: 300~2,500 mm, and the digit you
set is from left to right in order.
130 cm
You could define the valve
as the starting point and the
terminal point to measure
the wheel circumference
with a measuring tape.
P.S.P.S.
Next page
Tachometer
Display range: 0~15,000 RPM.
Display unit: 500 RPM (0~10,000 RPM)
Display unit: 250 RPM (10,000~15,000 RPM)
Fuel meter
Display range: 5 levels.
Display unit: Each level represents 20 %.
Insufficient fuel warning
The fuel symbol will flash when the fuel is
less than 20 %
Insufficient fuel warning
The fuel symbol will flash
when the fuel is less than 20 %
Display range:
wh018ba000-1
 Loading...