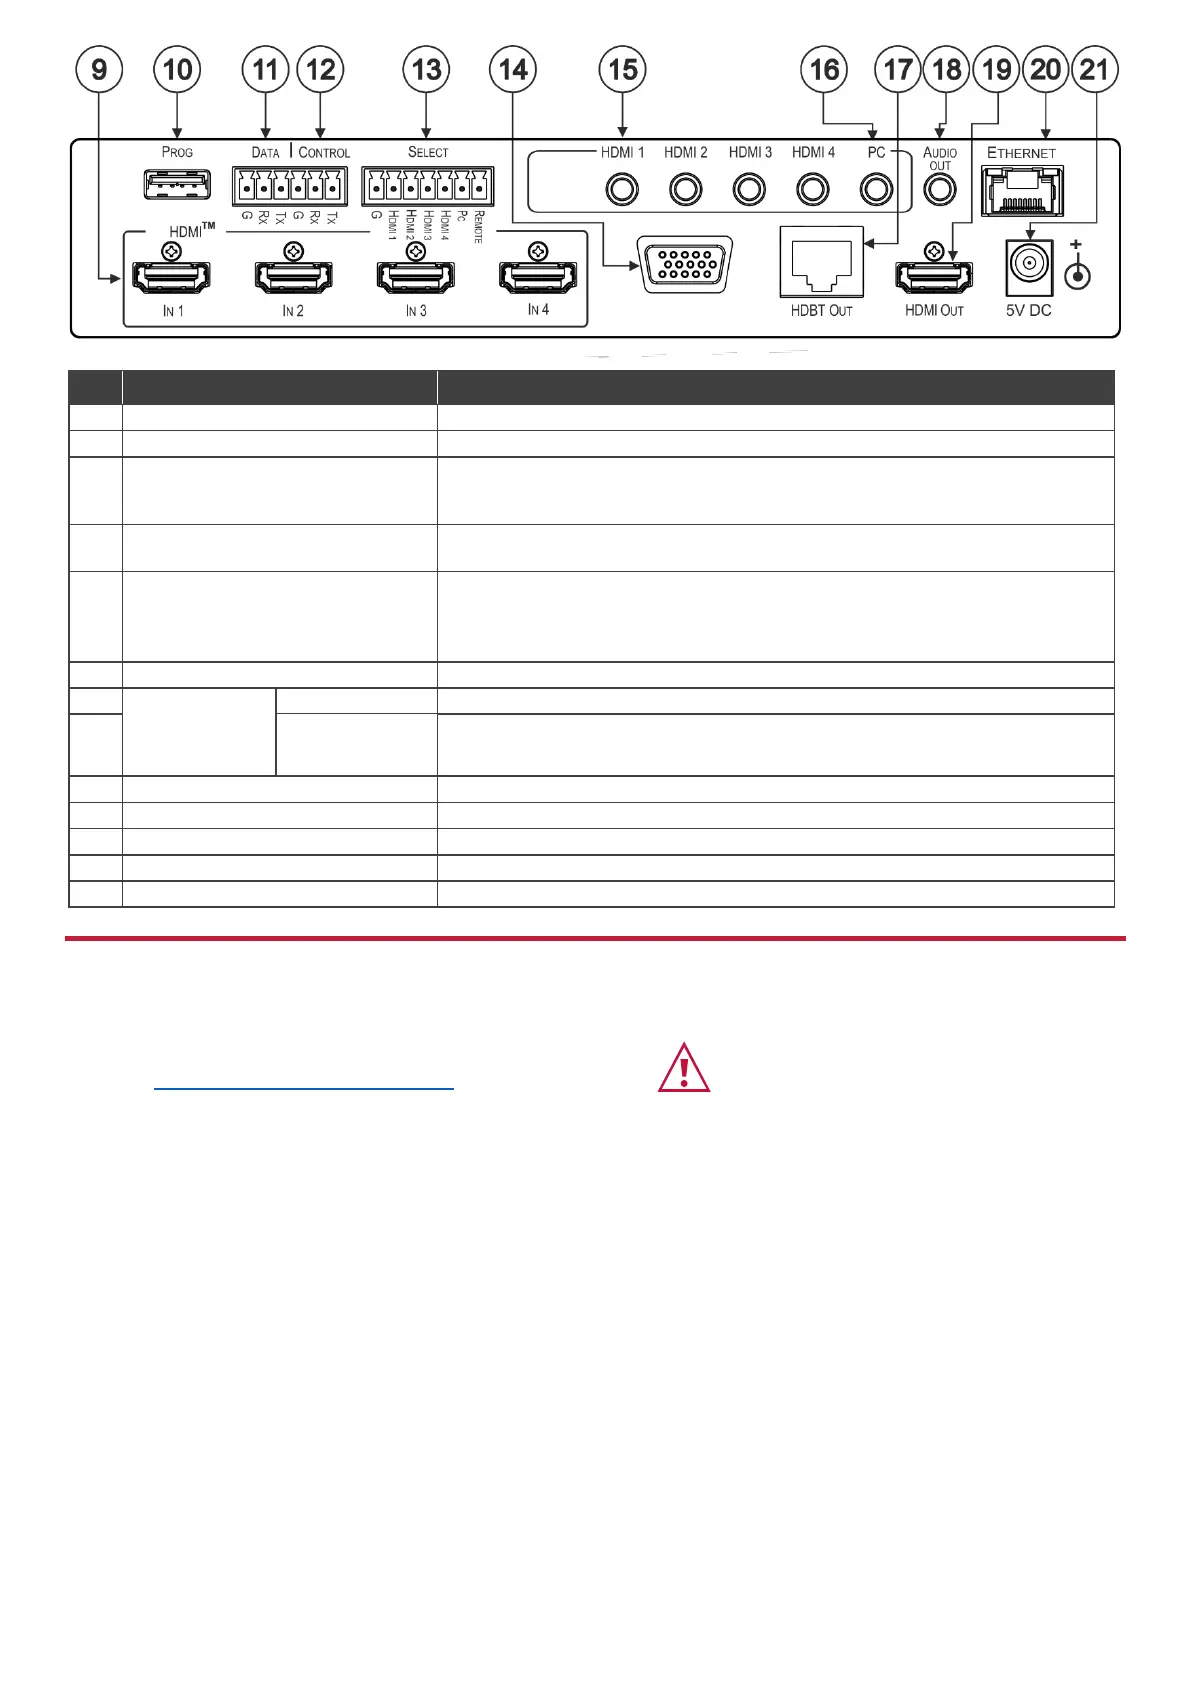
Connect to an HDMI source (from 1 to 4).
PROG USB Type A Connector
Use to upgrade the firmware.
DATA (Tx, Rx, GND) Terminal Block
Connectors
Connect to a PC to Extend RS-232 signals via the HDBT OUT port, for example,
to control peripheral devices that are connected to the HDBT RECEIVER (e.g. a
projector connected to TP-780Rxr) via a PC or a serial controller.
CONTROL (Tx, Rx, GND) Terminal
Block Connector
Connect to a PC or serial controller to control the VP-440X or control the output
display (configurable).
SELECT 7-pin Terminal Block
Connector
HDMI 1 to HDMI 4 and PC: connect to contact closure switches (by momentary
contact between the desired pin and G pin) to select an input.
REMOTE: momentarily connect the pin to G, or connect an occupancy detector to
turn on/off the display (configurable for edge or for level triggering).
PC IN 15-pin HD Connector
Connect to the computer graphics source.
AUDIO INPUT
Unbalanced
Stereo 3.5 Mini
Jack
Connect to the analog audio HDMI source (from 1 to 4).
Connect to the analog audio computer graphics source.
Connect to an HDBT receiver (for example, TP-780Rxr).
Connect to an unbalanced stereo audio acceptor.
Connect to the HDMI acceptor.
Connects to the PC or other controller through computer networking.
+5V DC connector for powering the unit.
Install VP-440X using one of the following methods:
• Attach the rubber feet and place the unit on a flat surface.
• Mount the unit in a rack using the recommended rack adapter
(see www.kramerav.com/product/VP-440X).
• Ensure that the environment (e.g., maximum ambient temperature &
air flow) is compatible for the device.
• Avoid uneven mechanical loading.
• Appropriate consideration of equipment nameplate ratings should be
used for avoiding overloading of the circuits.
• Reliable earthing of rack-mounted equipment should be maintained.
• Maximum mounting height for the device is 2 meters.

 Loading...