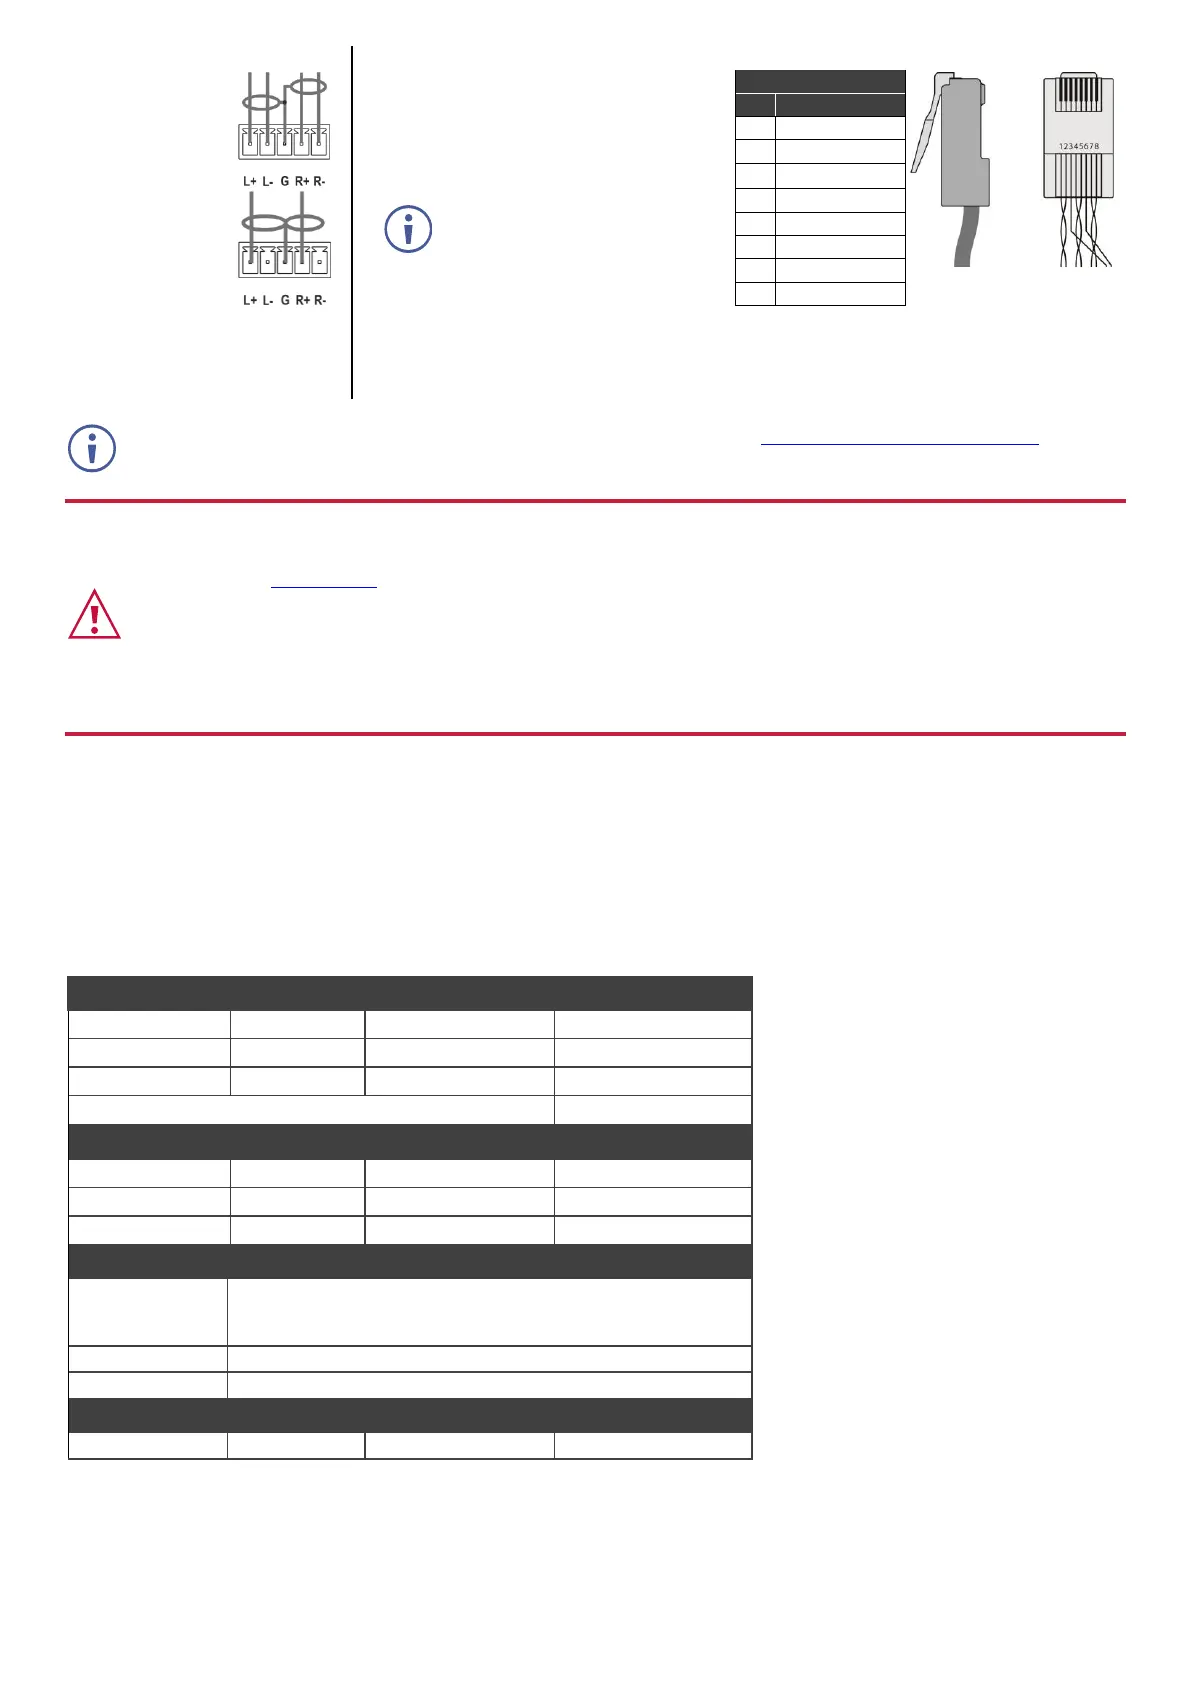
Connecting the audio output
Wiring the RJ 45 Connectors
To a balanced
stereo audio
acceptor:
This section defines the TP pinout, using
a straight pin-to-pin cable with RJ 45
connectors.
To an unbalanced
stereo audio
acceptor:
For HDBT cables, it is recommended
that the cable ground shielding be
connected/soldered to the connector
shield.
For optimum range and performance use the recommended Kramer cables available at www.kramerav.com/product/VS-88H2A.
Using third-party cables may cause damage!
Step 5: Connect the power
Connect the power cord to VS-88H2A and plug it into the mains electricity.
Safety Instructions (See www.kramerav.com for updated safety information)
Caution:
• For products with relay terminals and GPI\O ports, please refer to the permitted rating for an external connection, located next to the terminal or in the User Manual.
• There are no operator serviceable parts inside the unit.
Warning:
• Use only the power cord that is supplied with the unit.
• Disconnect the power and unplug the unit from the wall before installing.
• Do not open the unit. High voltages can cause electrical shock! Servicing by qualified personnel only.
• To ensure continuous risk protection, replace fuses only according to the rating specified on the product label which located on the bottom of the unit.
Step 6: Operate the VS-88H2A
Via the front panel buttons:
The 7-segment display shows the status of VS-88H2A during normal operation and displays device information.
Use the front panel buttons as follows:
• To switch an input to an output, press an output button and then an input button to switch to that output.
• Press ALL to perform an action on all outputs (for example setting Mute mode, Pattern mode and so on).
Example (Route input 1 to output 1):
Front panel buttons: power off the device, press and hold the
LOCK, EDID and STO buttons simultaneously for 3 seconds
while powering the device, and then release.
In the Device Settings page, click Reset.

 Loading...