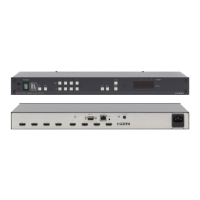
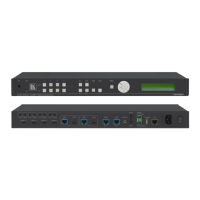
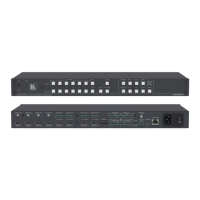
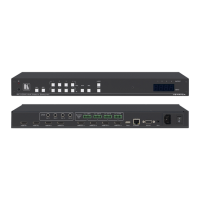
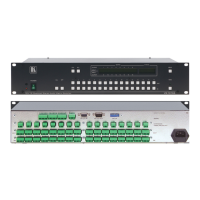
PROG/RS-485 TERM
DIP Switches
PROG DIP switch enables microcontroller firmware upgrade.
RS-485 TERM DIP switch terminates the RS-485 line with a 120Ω load.
RS-485 Terminal Block Port
Connect to a RS-485 control device (see Step 4).
Connects to a PC or other serial controller through computer networking LAN.
Use the set the Machine number of the unit (see Step 4).
Press to reset to factory default definitions:
IP number − 192.168.1.39, Mask – 255.255.0.0, Gateway – 0.0.0.0
Connect to the serial digital video acceptors.
REMOTE IR 3.5mm Mini Jack
Connect to an external IR receiver unit for controlling the machine via an IR remote control
(instead of using the front panel IR receiver).
Power Connector with Fuse
Connect to the electricity mains using the power cord.
Turns the power to the unit ON and OFF.
To rack mount the machine, attach both rack ears
(by removing the screws from each side of the
machine and replacing those screws through the
rack ears) or place the machine on a table.
• Ensure that the environment (e.g., maximum ambient temperature &
air flow) is compatible for the device.
• Avoid uneven mechanical loading.
• Appropriate consideration of equipment nameplate ratings should be
used for avoiding overloading of the circuits.
• Reliable earthing of rack-mounted equipment should be maintained.
Step 4: Connect inputs and outputs
Always switch OFF the power on each device before connecting it to your VS-88HDxl.
RS-232 Connection:
Use a 9-wire straight cable and connect only pin 2 to pin 2, pin 3 to pin 3, and pin 5 to pin 5 to the RS-232 9-pin D-sub port on
your PC. Note: A null-modem adapter/connection is not required.
RS 485 Connection:
You can operate the VS-88HDxl via the RS-485 port from a distance of up to 1200m (3900ft).
To connect a control device with a RS-485 port to the VS-88HDxl:
1. Set the VS-88HDxl RS-485 machine number and bus termination.
2. Connect the A (+) pin, B (–) pin, and G pin on the RS 485 port of the PC to the corresponding pins on the RS 485 port
on the rear panel of the VS-88HDxl. Note: Pin G may be connected to the shield, if required.
 Loading...