4
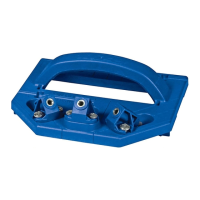
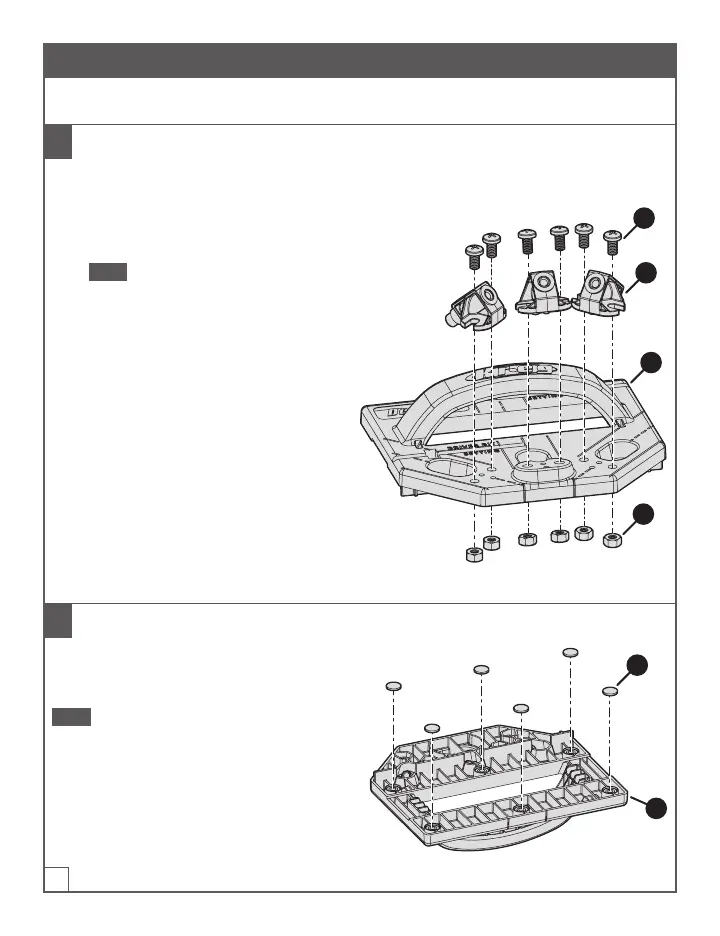
Jig Assembly
1
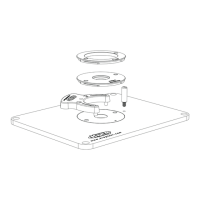
Attach the Drill Guides to the Deck Jig
The Deck Jig includes three drill guides. Each drill guide attaches to a pair of mounting holes on
the Deck Jig.
a. Turn the Deck Jig (A) upside down and
locate a pair of mounting holes for a
drillguide.
Note There are three pairs of mounting
holes (one pair per drill guide).
b. Insert two drill-guide nuts (D) into the pair
of mounting holes on the bottom of the
DeckJig(A).
c. Holding the drill-guide nuts (D) in place,
turn the Deck Jig (A) right-side up and
place a drill guide (B) into position over
those two mounting holes.
d. Insert a drill-guide screw (C) into each
of the two mounting holes and use a #2
Phillips screwdriver to tighten the screws
rmly.
e. Repeat these steps to attach the two
remaining drill guides (B) to the Deck
Jig(A).
C
B
D
A
2
Adhere the Rubber Feet to the Deck Jig
Remove rubber feet (E) from the backing
sheet and adhere them to the six designated
locations on the bottom of the jig (A).
Note The rubber feet help prevent the jig from
slipping on the boards.
A
E