EasyManua.ls Logo

KTM 620 2001 User Manual

KTM 620 2001
41 pages
To Next Page IconTo Next Page
Page #1 background imageLoading...
Page #1 background image
OWNERS HANDBOOK
2001
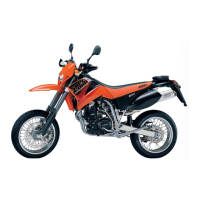
620 SC, SUPERMOTO
BEDIENUNGSANLEITUNG
Art.Nr. 3.205.91 10/2000

Questions and Answers:

KTM 620 2001 Specifications

General IconGeneral
BrandKTM
Model620 2001
CategoryMotorcycle
LanguageEnglish

Summary

IMPORTANT SAFETY INSTRUCTIONS

General Warnings

Emphasizes reading the manual and paying attention to notices marked WARNING or CAUTION for safety.

Consumer Information for Australia

Prohibits tampering with noise control systems and using modified vehicles.

Introduction

Manual Usage and Importance

Read manual for operation, features, and maintenance advice for safe and proper bike use.

Maintenance and Parts

Recommends authorized dealer service and KTM-approved parts for safety and performance.

Rider Safety and Responsibility

Stresses wearing protective gear and responsible riding practices for a fun experience.

SERIAL NUMBER LOCATIONS

Chassis Number Location

Chassis number stamped on the right side of the steering head tube.

Engine Number Location

Engine number and type stamped on the right side of the engine below the chain sprocket.

OPERATION INSTRUMENTS

Clutch Lever Operation

Details clutch lever play (1-3mm) and risks of no play, causing clutch slip and overheating.

Hand Decompression Lever Use

Used for stalled engines or push-starting; requires regular cable play checks.

Hand Brake Lever Function

Actuates the front wheel brake; warns of 'spongy' feel indicating a problem.

Indicator Lamps

Turn Indicator Lamp

Green lamp flashes in rhythm with the turn indicator.

High Beam Indicator

Blue lamp illuminates when the high beam is active.

Speedometer Functions

Digital Speedometer Displays

Shows speed, trip distance (TRP), stopwatch (STP), total distance (DST), and clock (CLK).

Analog Speedometer & Lamps

Mileage indicator (D), turn indicator lamp (5), and high beam lamp (6) shown.

Combination Switches

Standard Combination Switch

3 positions for lights (off, low, high beam) plus engine stop and horn buttons.

Australian Market Switch

2 positions for lights (low, high beam) plus engine stop and horn buttons for AUS models.

Flasher Switch Operation

Flasher Switch Mounting

Mounted on left handlebar; turn indicator system can be dismounted without affecting other electrics.

Fuel Filler Cap Operation

Fuel Filler Cap Usage

Instructions for opening (counter-clockwise) and closing (clockwise) the fuel filler cap.

Fuel

Fuel Type and Octane Requirements

Requires premium gasoline (95 octanes); using lower octane may damage the engine.

Fuel Handling Safety

Warnings about gasoline flammability, toxicity, and safe refueling practices.

Fuel Tap

Fuel Tap Positions Explained

Explains OFF (closed), ON (normal flow), and RES (reserve) positions.

Fuel Tap Parking Caution

Advise to lock the fuel tap when parked to prevent carburetor overflow.

Choke Operation

Choke Lever Function

Lever for cold starts to enrich fuel-air mixture; requires 2mm play when closed.

Choke Cable Play Caution

Lack of play can cause high fuel consumption, uneven running, and engine wear.

Hot-start device

Hot-Start Button Usage

Used to facilitate starting a hot engine by lifting the throttle valve; must be returned after starting.

Shift Lever and Gear Positions

Shift Lever Location

Located on the left engine side; neutral is between first and second gear.

Kickstarter Safety

Kickstarter Operation Warnings

Emphasizes using sturdy boots and kicking briskly without throttle to avoid injury.

Foot Brake Pedal

Foot Brake Pedal Function

Located on the right foot rest; basic position can be adjusted.

Handlebar Lock

Handlebar Lock Mechanism

Located on the control head; instructions for locking and caution about leaving the key inserted.

Fork Suspension Adjustment

Fork Compression Adjustment

Adjusts reaction during compression using screws at the bottom of fork legs (clockwise to increase).

Fork Rebound Adjustment

Adjusts reaction during rebound using knob (clockwise to increase).

Shock Absorber Adjustment

Shock Absorber Compression

Adjusted via knob (counter-clockwise to increase damping).

Shock Absorber Rebound

Adjusted via wheel (left to increase damping); warnings about making small adjustments.

DRIVING INSTRUCTIONS

Pre-Ride Checks

Check oil level, fuel, chain, tires, brakes, cables, cooling fluid, electrical system, and luggage security.

Rider Safety and Defensive Driving

Emphasizes wearing protective gear, avoiding alcohol, using lights, and KTM-approved accessories.

Running-in Procedure

Details initial 1000km break-in procedure, limiting engine speed to 4800 rpm.

Super Competition Models

Important instructions for single-rider models and awareness of noise levels.

Starting Instructions

Starting Engine When Cold

Steps for cold start: fuel tap, side stand, neutral, choke, kickstarter without throttle.

Starting Engine When Warm

Steps for warm start: fuel tap, side stand, neutral, kickstarter without throttle.

Starting Engine When Hot

Steps for hot start: fuel tap, side stand, neutral, hot-start button, kickstarter.

Handling a Flooded Engine

Procedure for a flooded engine: decompression lever, full throttle, kickstarter.

Starting Off

Initial Ride Take-off

How to start moving: clutch lever, first gear, release clutch, add throttle.

Shifting/Riding

Gear Shifting Procedure

Instructions for upshifting and downshifting, and managing choke and throttle.

Shifting Down and Braking

Downshifting Technique

How to downshift using brakes and clutch, and avoiding engine over-revving.

Defensive Driving Principles

Observe traffic, drive defensively, adapt speed, avoid abrupt load changes.

Stopping and Parking

Parking Procedures

How to stop the engine, park on firm ground, and lock the motorcycle.

Parking Safety Precautions

Warnings about parking on solid surfaces, hot parts, and fire hazards.

Braking

Braking Technique

Using hand and foot brakes, especially on slippery surfaces; using engine braking downhill.

Braking System Warnings

Cautions about wet/dirty discs, heat effects, and potential brake failure.

PERIODIC MAINTENANCE SCHEDULE

Engine & Carburetor Checks

Scheduled maintenance for engine oil, spark plugs, carburetor settings, and fuel system.

Chassis & Brakes Maintenance

Scheduled checks for fork, shock absorber, brake fluid, pads, and chassis components.

Wheels & Electrical System

Scheduled maintenance for wheels, chain, tires, and electrical system components.

SUPPLEMENTARY MAINTENANCE PROCEDURES

Fork, Suspension & Lever Service

Involves complete fork, suspension strut, and reversing lever maintenance.

Carburetor & Electrical System Care

Includes carburetor cleaning, contact treatment, and brake fluid change.

VITAL CHECKS AND CARE PROCEDURES

Pre-Ride Checks

Essential checks before each start: oil, brake fluid, pads, lights, horn, cables, tires, coolant.

Periodic Care Procedures

Checks after cleaning, for cross-country use, and annually: chain, air filter, fuel lines, brakes.

Corrosion Protection

Treating exposed metal parts with anti-corrosion agents.

Ignition/Steering Lock Care

Treating ignition/steering lock and light switch with contact spray.

MAINTENANCE WORK ON CHASSIS AND ENGINE

General Maintenance Warnings

Requires specialist knowledge for starred operations; use KTM dealer for security.

Cleaning Precautions

Avoid high-pressure cleaners, unplug exhaust, dry thoroughly, oil parts.

Removal of Seat

Instructions for removing the seat using the quick-release fastener.

Tool Set Location

The tool set is accommodated in the tool compartment behind the seat.

Front Fork Maintenance

Front Fork Breather Plug

Slacken plugs for racing use to relieve pressure; check periodically for street use.

Telescopic Fork Dust Sleeve Cleaning

Remove dirt from fork tube bellows, clean, oil, and slide back into place.

Steering Head Bearing

Steering Head Bearing Play Check

Check for play by moving fork; adjust by loosening triple clamp screws and tightening steering stem bolt.

Steering Head Bearing Lubrication

Annual smearing with waterproof grease is recommended.

Handlebar Position Adjustment

Handlebar Position Options

Readjustable by 22mm using upper triple clamp bores for 4 different positions.

Digital Speedometer Battery Replacement

Speedometer Battery Replacement Procedure

Procedure for replacing the speedometer battery after approximately 2 years.

Digital Display Settings

Setting Total Mileage (DST)

Instructions for setting total mileage using the right and left buttons.

Setting the Clock (CLK)

Instructions for setting the time using buttons on the back of the speedometer.

Wheel Circumference Setting

Setting Wheel Circumference (WS)

Procedure for setting wheel circumference using buttons, including formula and standard sizes.

Magnetic Sensor Distance Check

Ensures 2-4mm distance between magnet and sensor for correct speedometer function.

Rear Suspension Maintenance

Rear Suspension Linkage Lubrication

Grease the lubricating nipple in the link lever at regular intervals.

Shock Absorber Spring Preload

Adjusting spring preload based on rider weight for optimal shock absorber performance.

Rear Shock Absorber Rubber Ring Check

Measure distance between discs (min 2.5mm); replace if compacted due to wear.

Chain Tension and Maintenance

Chain Tension Check Procedure

How to check chain slack (distance A) and ensure it's not too high or too loose.

Chain Tension Warnings

Warns of damage from high tension and loss of control from excessive slack.

Chain Adjustment and Wear

Adjusting Chain Tension

Loosen nuts, adjust screws, align wheel, and tighten collar nut to 80 Nm.

Chain Cleaning and Lubrication

How to clean and lubricate O-ring and non-O-ring chains using specific products.

Chain Lubrication Warnings

Caution against lubricant reaching tires or brake discs.

Checking Chain Wear

Measure chain slack (10-15kg pull) and replace if wear limit (272mm) is reached.

Sprocket Replacement Advice

Recommendation to replace sprockets when mounting a new chain.

General Information About KTM Disc Brakes

Brake Caliper Mounting

Describes the 'floating' mount of brake calipers for maximum contact.

Brake Pad Type-Coding

Motorcycles are delivered with sintered pads suitable for most applications.

Brake Disc Wear Limits

Instructions for checking brake disc thickness and replacing if worn beyond 0.40mm.

Brake Fluid Reservoir Level

Level should not drop below MIN; indicates leak or worn pads.

Brake Fluid

Recommended Brake Fluid

KTM uses Shell Advance Brake DOT 5.1; DOT 4 is acceptable if DOT 5.1 is unavailable.

Hand Brake Lever Adjustment

Hand Brake Lever Free Travel

Adjust free travel to at least 3mm to prevent pressure build-up and brake failure.

Front Brake Fluid Level Check

Front Brake Fluid Level Monitoring

Check level in inspection glass; should be kept completely full.

Front Brake Fluid Refill

Front Brake Fluid Refill Procedure

Instructions for refilling reservoir to 5mm below rim with DOT 5.1 fluid.

Brake Fluid Handling Warnings

Never use DOT5, avoid skin/eye contact, keep away from children, and prevent contact with paint.

Front Brake Pad Inspection

Front Brake Pad Wear Limit

Linings must be at least 1mm thick; warn of failure if worn too thin.

Brake Pad Replacement Caution

Warns that worn pads can damage the brake disc.

Replacing Front Brake Pads

Front Brake Pad Replacement Steps

Steps to replace pads, clean caliper, check guide bolts, and reassemble.

Brake Disc Contamination Warning

Keep brake discs free from oil and fatty matters for optimal braking effect.

Rear Brake Pedal Adjustment

Rear Brake Pedal Position Adjustment

Adjust end stop roller and push rod for 3-5mm free play.

Brake Pedal Clearance Caution

Lack of clearance causes brake rub, overheating, and potential failure.

Rear Brake Fluid Level Check

Rear Brake Fluid Level Monitoring

Check reservoir level; low level indicates a leak or worn pads.

Rear Brake Fluid Refill

Rear Brake Fluid Refill Procedure

Refill reservoir to MAX mark using DOT 5.1 fluid.

Brake Fluid Handling Precautions

Warnings about DOT5 fluid, skin irritation, and contact with paint.

Rear Brake Pad Inspection

Rear Brake Pad Wear Limit

Linings must be at least 1mm thick; warn of failure if worn too thin.

Brake Pad Replacement Caution

Warns that worn pads can damage the brake disc.

Replacing Rear Brake Pads

Rear Brake Pad Replacement Steps

Steps to remove caliper, guide pin, pads, and reassemble.

Brake Disc Contamination Warning

Keep brake discs free from oil and fatty matters for optimal braking effect.

Front Wheel Removal and Mounting

Front Wheel Removal Procedure

Jacking the bike, loosening nuts/screws, removing spindle and wheel.

Front Wheel Mounting Procedure

Reassembling the front wheel, including spindle, drive, and caliper.

Front Wheel Spindle Torque

Specifies torque for collar nut (40 Nm) and clamping screws (10 Nm).

Front Wheel Handling Precautions

Warns against operating brake lever without wheel, keeping disc on top, and avoiding oil on disc.

Rear Wheel Removal and Mounting

Rear Wheel Removal Procedure

Jacking the bike, loosening nut, removing spindle, and taking wheel out.

Rear Wheel Mounting Procedure

Reassembling rear wheel, ensuring chain tensioners are aligned.

Rear Wheel Spindle Torque

Specifies torque for collar nut (80 Nm).

Rear Wheel Brake Warning

Keep operating rear brake until pressure point returns; avoid oil on brake disc.

Rear Hub Shock Absorber Check

Rear Hub Shock Absorber Rubber Check

Check play of rear sprocket (max 5mm); replace all 6 rubbers if worn.

Rear Hub Rubber Replacement Advice

Caution against replacing single rubbers; damage to hub can occur.

Tires and Air Pressure

Tire Condition and Pressure Checks

Check tire condition, pressure, and tread depth regularly for safety and performance.

Approved Tire Usage

Use only KTM-approved tires and ensure front/rear tires have the same tread.

Tire Pressure Warnings

Low pressure causes abnormal wear and overheating; worn tires affect performance.

Spoke Tension

Spoke Tension Importance

Correct tension is vital for wheel stability and safety; check regularly.

Spoke Tension Check Method

Tap spokes for a clear tone; dull tones indicate loose spokes.

Spoke Tension Repair

Have loose spokes retightened and wheels centered by a KTM dealer.

Loose Spokes Warning

Riding with loose spokes can cause them to tear, leading to unstable handling.

Cooling System

Coolant Circulation and Radiators

Explains coolant circulation, radiator function, and the role of the radiator cap.

Cooling System Safety Warnings

Precautions when opening hot radiator cap, handling hot coolant, and toxicity of coolant.

Coolant Level Check

Coolant Level Check Procedure

Check level when engine is cold (10mm above fins); fill and bleed system if drained.

Coolant Level Warning

Low level indicates leak or requires topping up; warnings about hot coolant and toxicity.

Air Filter Cleaning

Air Filter Cleaning Procedure

Remove seat/cover, filter holder, wash in special fluid, dry, and oil with filter oil.

Air Filter Cleaning Warnings

Do not use fuel/petroleum; never run without filter; ensure correct fit.

Exhaust System Maintenance

Exhaust System Component Replacement

Replacing glass fiber yarn in silencers; renew O-rings.

Exhaust System Heat Warning

Exhaust system gets very hot; allow to cool before working.

Carburetor Float Chamber Draining

Float Chamber Draining Procedure

Drain to remove water after cleaning; close fuel tap, unscrew plug.

Fuel Handling Safety Warning

Extreme caution with fuel due to flammability and toxicity.

CARBURETOR – Adjust Idling

Idling Adjustment Procedure

Adjust throttle stop and mixture control screws for correct idling speed.

Carburetor Adjustment Notes

Tips on adjusting for competitive use and potential causes for poor adjustment.

Carburetor Wear and Replacement

Parts subject to wear after 10,000 km; may cause malfunction.

Hot Start Device Adjustment

Hot Start Device Re-adjustment

Re-adjust hot start device after cleaning carburetor; adjust engine revs.

Float Level Check

Float Level Check Method

Check float level diagonally at 60° with spring not pressed.

Float Axial Play Check

Float Axial Play Measurement

Ensure 0.8mm axial play for proper float function; abrade if necessary.

Throttle Cable Adjustment

Throttle Cable Play Adjustment

Ensure 3-5mm play; adjust screw and check for engine speed change.

Choke Cable Adjustment

Choke Cable Play Adjustment

Ensure approx. 2mm play; adjust screw for correct cable movement.

Clutch Cable Adjustment

Clutch Cable Play Adjustment

Adjust 1-3mm play at the clutch lever for cold engines.

Decompression Cable Adjustment

Decompression Cable Adjustment Check

Check for 25mm operation of deko-lever; adjust screw if needed.

Decompression Cable Caution

No play in deko-lever can result in engine damage.

Engine Oil

Recommended Engine Oil Specifications

Use synthetic high-quality oils meeting API SG or SH standards.

Engine Oil Quality Warning

Poor oil quality or quantity leads to premature engine wear.

Engine Oil Level Check

Engine Oil Level Check Procedure

Check level after engine warms up and cools; ensure it's between MIN and MAX marks.

Engine Oil Level Warnings

Do not overfill or underfill; cold checks give false readings.

Oil Circuit Explanation

Engine Oil Flow Path

Diagram and explanation of the oil pump, filter, and circulation path.

Changing the Engine Oil

Engine Oil Change Procedure

Drain warm oil, clean plugs, refill with 1.45L, check level, and for leaks.

Hot Engine Oil Warning

Engine oil is very hot; take precautions to avoid burns.

Microfilter Maintenance

Microfilter Replacement and Bleeding

Replace microfilter, bleed system by running engine and observing oil flow.

Oil Filter Replacement

Oil Filter Replacement Procedure

Replace oil filter, cover, and O-ring; ensure correct gasket fit and torque.

TROUBLE SHOOTING

Engine Will Not Start Troubleshooting

Covers operating errors, fuel supply issues, flooded engine, and spark plug faults.

Engine Will Not Idle Troubleshooting

Addresses water in carburetor, improper fit, and idling jet blockage.

Engine Does Not Rev High Troubleshooting

Covers carburetor adjustment, ignition system, and fuel level issues.

Engine Will Not Reach Full Power Troubleshooting

Addresses fuel supply, air filter, and exhaust leaks.

Engine Performance Troubleshooting

Engine Power and Valve Gap Issues

Addresses issues like valve gap, decompression cable, and ignition timing.

Engine Stops or Splutters

Covers insufficient fuel, air intake issues, and cooling system problems.

High Oil Consumption Causes

Addresses issues related to gearing ventilation hose and engine oil level/viscosity.

Electrical System Faults

Troubleshooting blown lamps due to capacitor or voltage regulator failure.

CLEANING PROCEDURES

General Cleaning Methods

Use warm water, detergent, and sponge; avoid high-pressure cleaners.

Cleaning Precautions and Warnings

Warns about water ingress into electrical parts and toxicity of cleaning agents.

CONSERVATION FOR WINTER OPERATION

Winter Storage Precautions

Protect against salt spray with wax-based anti-corrosion agent; keep away from brake discs.

STORAGE GUIDELINES

Long-Term Storage Procedure

Clean bike, change oil, fill tank with oil, set piston to compression, and correct tire pressure.

Storage Environment Recommendations

Store in a dry place, away from temperature fluctuations; use breathable cover.

RE-INITIATION AFTER TIME OF STORAGE

Post-Storage Motorcycle Setup

Fill tank with fresh fuel, perform pre-ride checks, and take a short test ride.

TECHNICAL SPECIFICATIONS – ENGINE

Engine General Specifications

Details on engine design, displacement, bore/stroke, fuel, valve timing, and camshaft.

Engine Lubrication and Cooling Specs

Specifications for engine oil, quantity, cooling system, and coolant.

Carburetor Basic Settings

Provides settings for carburetor model, jets, needle, and mixture screw.

ENGINE ASSEMBLY CLEARANCE AND WEAR LIMIT

Crankshaft and Bearing Clearances

Specifies axial play and run-out for crankshaft and clearances for connecting rod bearing.

Piston and Valve Wear Limits

Specifies assembly clearance for piston and wear limits for piston rings and valves.

Oil Pump and Bypass Valve Specs

Details clearances for oil pump rotors and minimum spring length for bypass valve.

ENGINE TIGHTENING TORQUES

Engine Component Tightening Torques

Lists torque values for various engine fasteners like nuts, screws, and bolts.

TECHNICAL SPECIFICATIONS - CHASSIS

Chassis Frame and Fork Specifications

Details on frame material, fork type, wheel travel, and brake system components.

Tire and Wheel Specifications

Covers tire sizes, air pressure, fuel tank capacity, final drive ratio, and steering angle.

Chassis Standard Adjustments

Standard settings for fork compression/rebound and shock absorber preload/spring.

CHASSIS TIGHTENING TORQUES

Chassis Component Tightening Torques

Lists torque values for chassis fasteners including axles, calipers, and triple clamps.

Related product manuals