FS-9120DN/9520DN
1-6-12
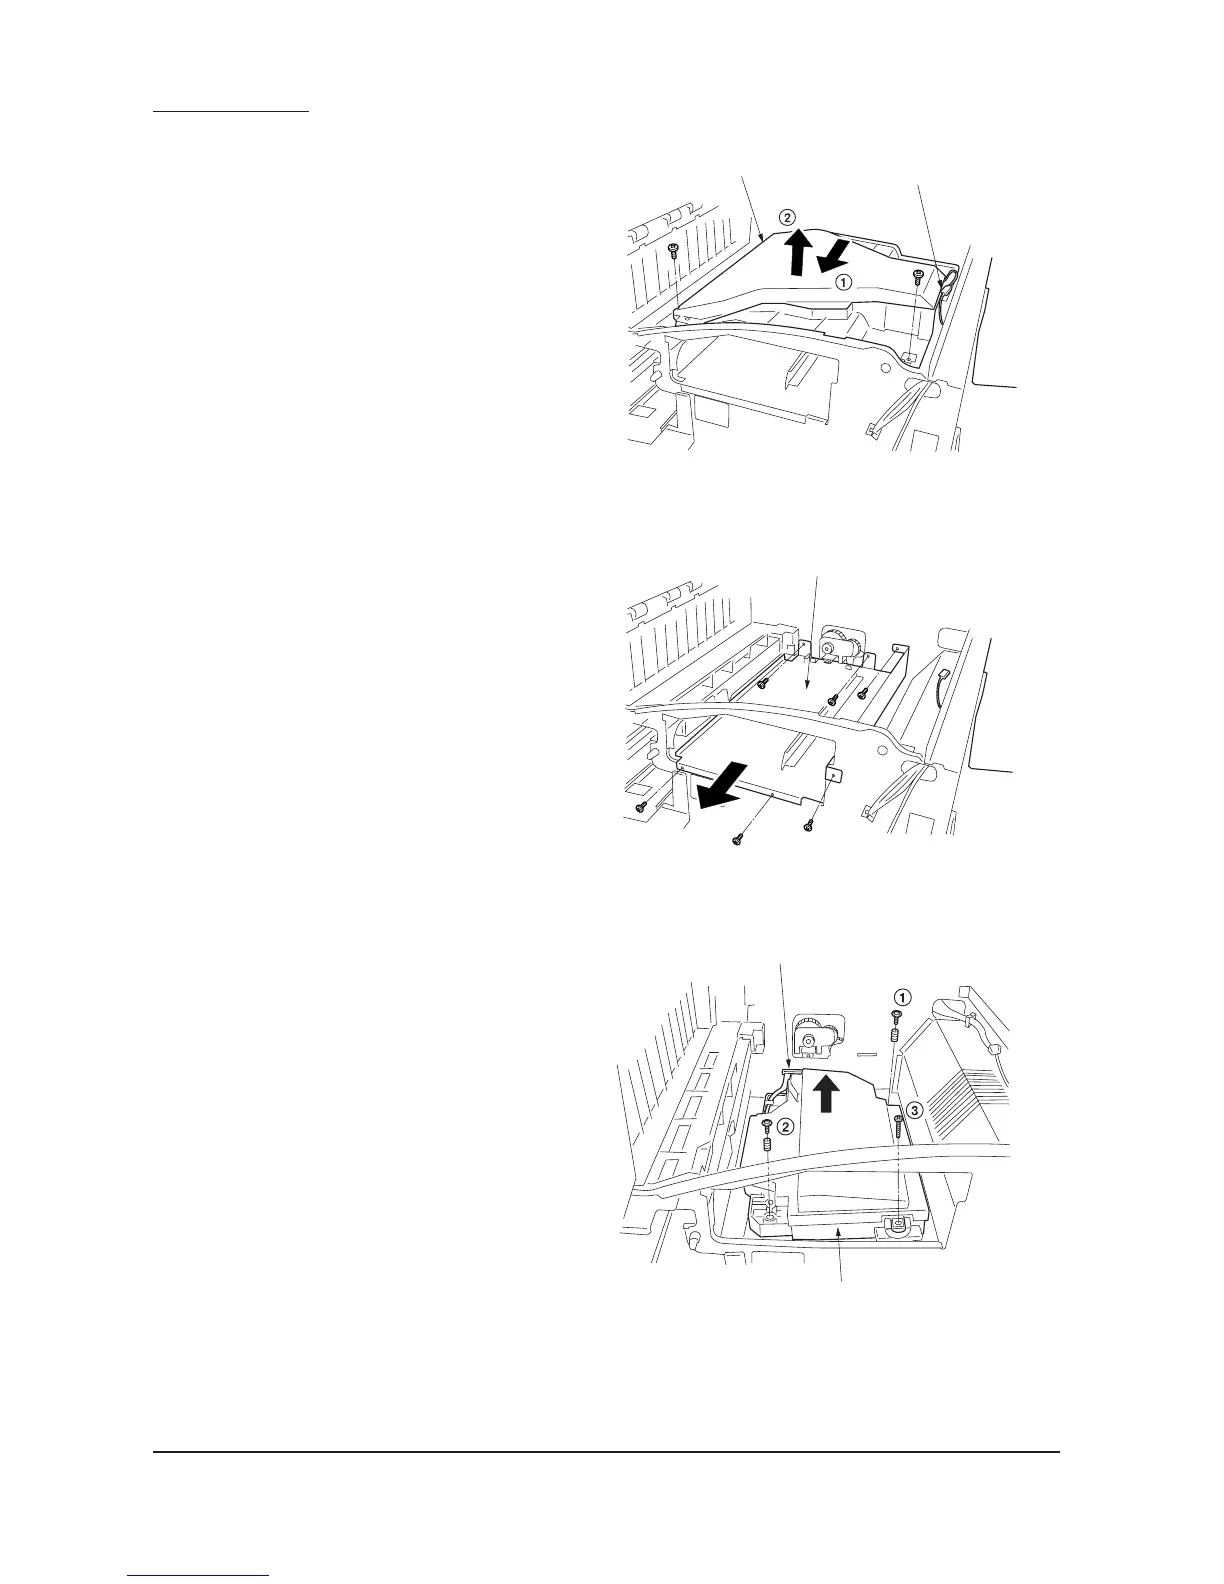
5. Remove the two screws and detach the
connector and then remove the fan duct.
Figure 1-6-27
6. Remove the six screws holding the toner
container retainer and then the retainer.
Figure 1-6-28
7. Remove the three screws and detach the
connector and then remove the laser scanner
unit.
8. Replace the laser scanner unit and refit all
the removed parts.
When installing the laser scanning unit,
tighten the screws in the order of 1 to 3
shown in the illustration.
9. Enter the maintenance mode and run U274
Setting LSU type (See page 1-4-25).
Figure 1-6-29
Fan duct
Connector
Toner container retainer
Laser scanner unit
Connector
 Loading...