—
11
—
Fig 3
4. Release the test button. Press the test button and ensure the display
reads zero before proceeding. While using the Continuity null function,
"
" appears on the LCD. The null value will be stored even if power off
the instrument. The memorized null value can be cancelled by
disconnecting the test leads and pushing the AUTO NULL SWITCH with
the test button pressed or locked. CAUTION-before taking any
measurements always check the leads have been zeroed.
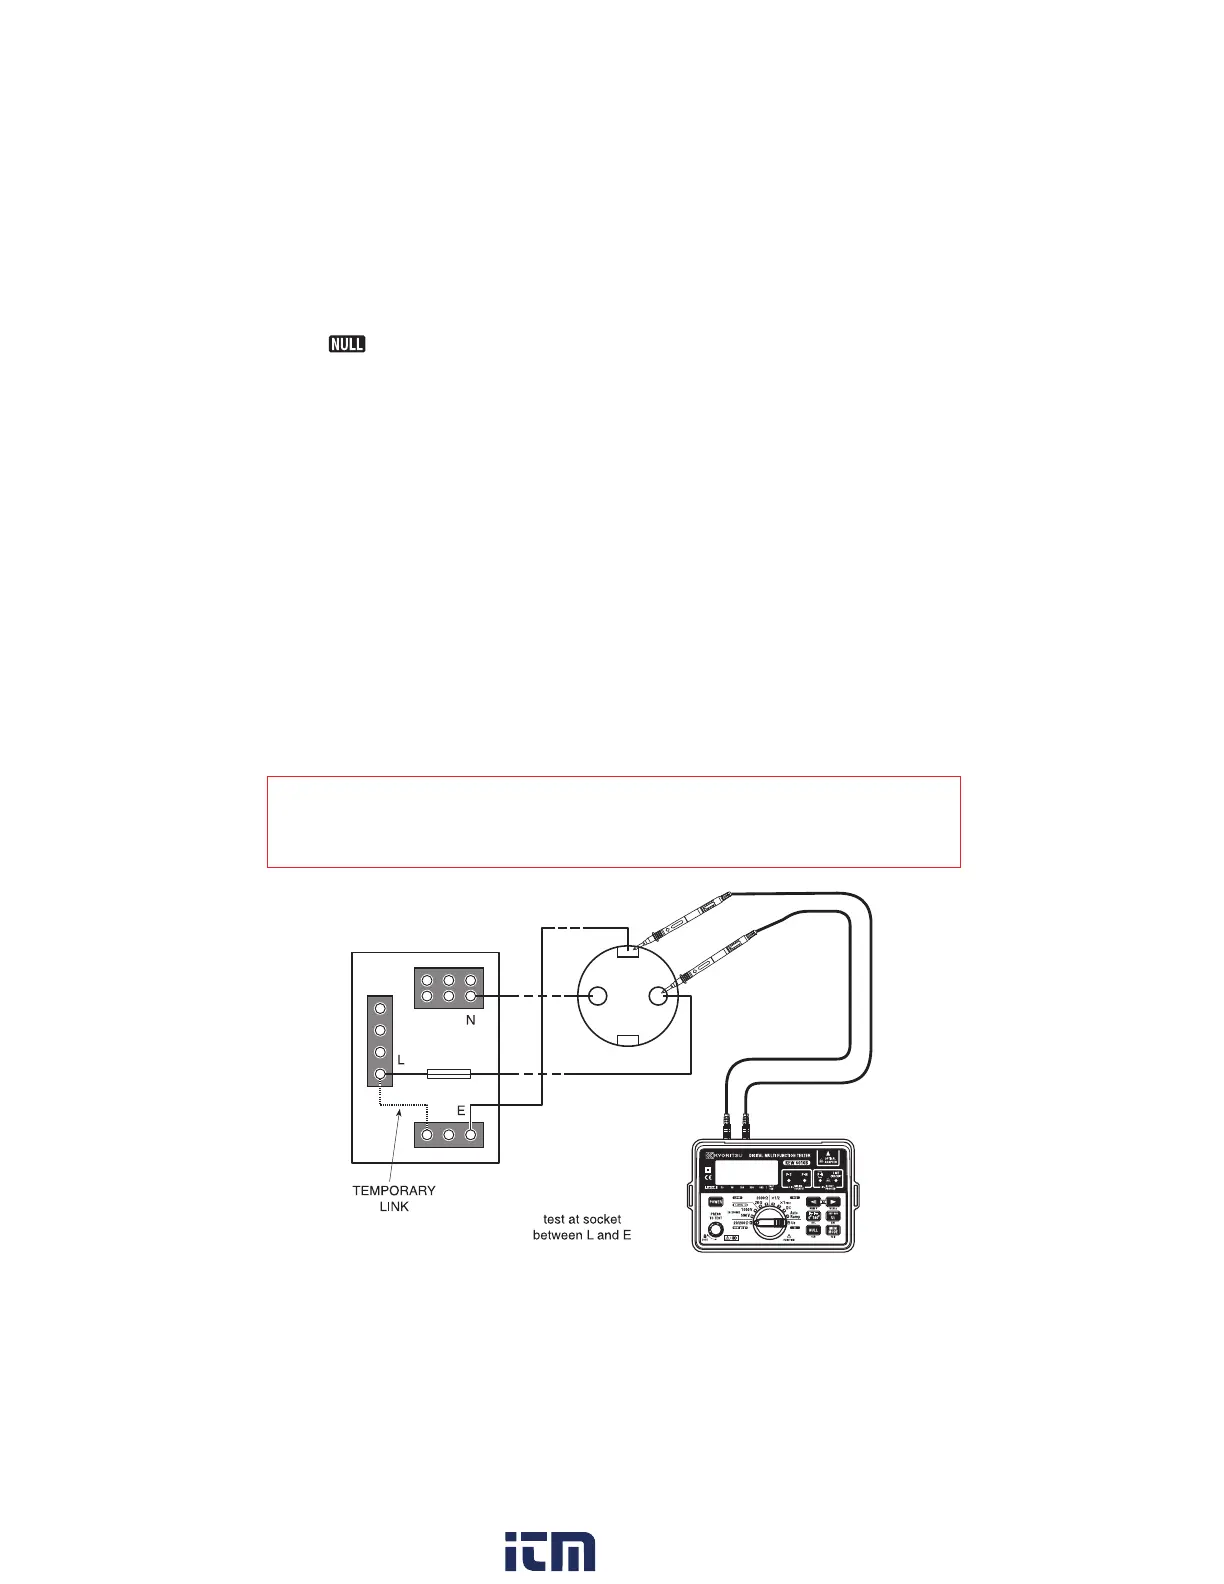
5. Connect the test leads to the circuit whose resistance is required (see Fig
3 for a typical connection arrangement). Having first made sure that the
circuit is not live. Note that the live circuit warning LED will illuminate
if the circuit is live - but check first anyway!
6. Press the test button and read the circuit resistance from the display. The
reading will have the test lead resistance already subtracted.
Note:
● If the circuit resistance is greater than 20Ω the instrument will autorange to
the 200Ω, and is greater than 200Ω the overrange symbol "OL" will remain
displayed.
#
Warning:
Measurements may be adversely affected by impedances of connected
circuits in parallel or transient currents.
w ww. .com
information@itm.com1.800.561.8187
 Loading...