Disassembly and Reassembly procedures
D/R 004 bis – FRONT HANDLE
Tools
Disassembly procedure
This procedure describes how to remove the FRONT HANDLE from an LA4X amplified controller.
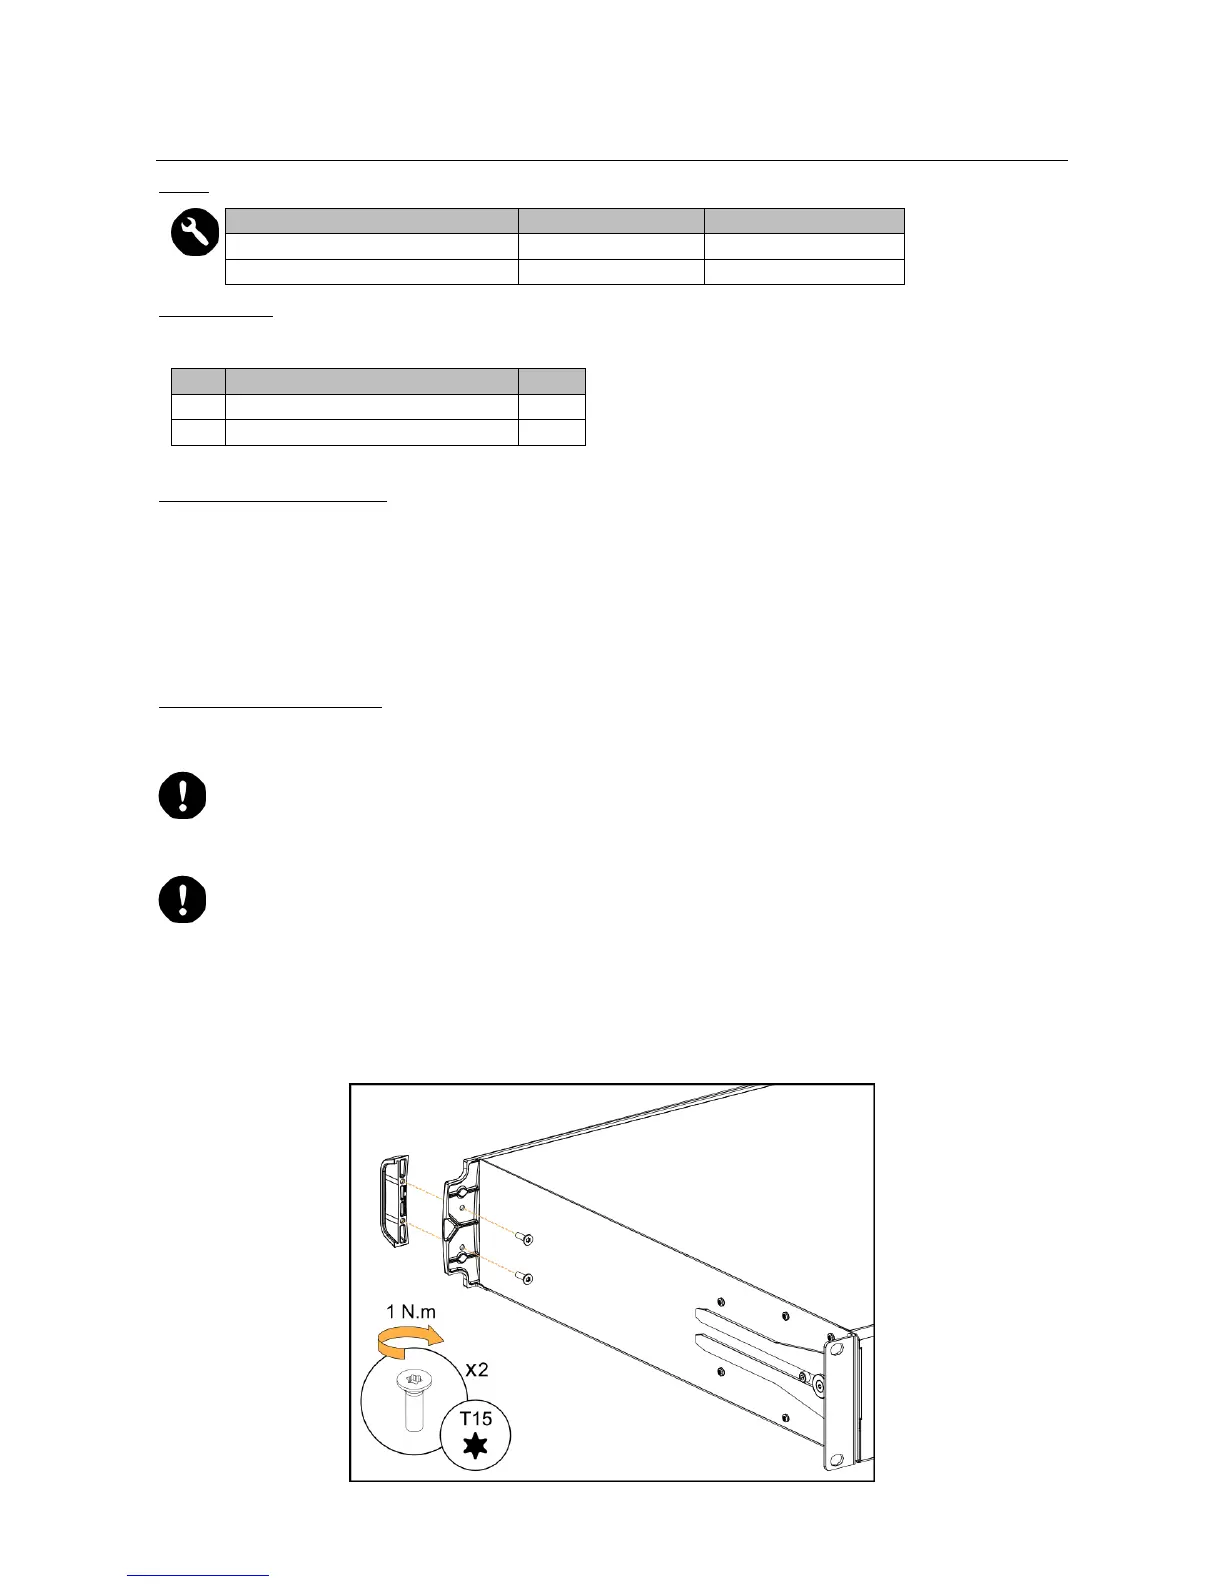
1. Undo the two Torx
®
screws from the locations indicated in Figure 6.
Use the electric screwdriver with the Torx
®
T15 bit.
2. Remove the FRONT HANDLE from the controller.
3. Repeat these steps for the other FRONT HANDLE.
Reassembly procedure
This procedure describes how to mount a FRONT HANDLE to an LA4X amplified controller.
FRONT HANDLES can only be mounted on compatible FRONT STRUCTURE.
To upgrade a controller with a non-compatible FRONT STRUCTURE, contact your L-Acoustics
representative.
For safety reasons, always reassemble new FRONT HANDLES.
1. Position a FRONT HANDLE on the controller.
2. Drive two Torx
®
screws to the locations indicated in Figure 6.
Use the electric screwdriver with the Torx
®
T15 bit. Torque to 1 N.m
3. Repeat these steps for the other FRONT HANDLE.
Figure 6: Mounting a FRONT HANDLE
 Loading...