EasyManua.ls Logo

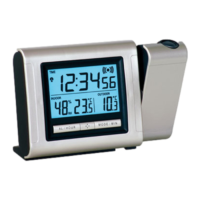
La Crosse Technology WT-5442 User Manual

La Crosse Technology WT-5442
18 pages
To Next Page IconTo Next Page
Page #1 background imageLoading...
Page #1 background image
QUICK SET-UP GUIDE
1) Insert two AA batteries into the remote transmitter.
2) Insert three AA batteries into the projection alarm and/or plug into wall.
Note: When starting or restarting your projection alarm the remote transmitter
must be started first and then your alarm. After power is supplied (either battery
or AC) ensure that no buttons are pressed for 10 minutes. This will allow time for
the projection alarm to communicate with the remote transmitter as well as
receive the WWVB signal.
Note: When using the AC adaptor, plug into the projection alarm first and then
into the electrical outlet (this will help avoid pressing any buttons inadvertently).
3) Wait 10 minutes for WWVB reception and remote temperature.
4) If there is no WWVB reception, manually set the time and date (instructions
in the Program Mode).
5) Program the settings.
6) Mount the WT-5442 in a suitable location, where WWVB and transmitter
signals can be received.
7) Mount the transmitter where remote temperature measurement is desired (on
the North side of a house for example).
Note: The remote transmitter is weather resistant but not water proof. High
humidity and mist will not damage the transmitter but direct rain will. The
maximum range between the transmitter and projection alarm is 80ft. open air (no
obstructions). Any resistance (i.e. walls, furniture, etc) between the two will
decrease the effective operating range.
8) The projector will activate and remain on if the alarm clock is plugged in. If
only batteries are used, the projector will only be activated when a button is
pressed.
9) See the “Features” section III. for instructions on projection direction, etc.
Questions and Answers:

La Crosse Technology WT-5442 Specifications

General IconGeneral
Display TypeLCD
Alarm FunctionYes
Alarm TypeBeep
Snooze FunctionYes
Snooze Duration5 minutes
Temperature DisplayYes
Temperature Units°F / °C
Weight0.5 lbs
TypeAlarm Clock
Time Format12/24 Hour
Power SourceBattery

Summary

Quick Set-Up Guide

Inventory of Contents

Features of Projection Alarm

About WWVB (Radio Controlled Time)

Detailed Set-Up Guide

Battery Installation

Covers installing batteries in the remote sensor and projection alarm.

Program Mode

Guide to entering and operating the programming functions.

Programming Sequence

Lists the order of settings to program for the projection alarm.

Function Buttons

Identifies and describes the purpose of the projection alarm's function buttons.

Time Zone Setting

Instructions for selecting the correct time zone for the device.

DST (Daylight Saving Time) Setting

Explains how to enable or disable Daylight Saving Time.

Adjustable Snooze Time

Details on customizing the duration of the alarm's snooze function.

Time Setting

Manual procedure for setting the alarm clock's time.

Date Setting

Manual procedure for setting the alarm clock's date and weekday.

12/24-Hour Setting

How to switch between 12-hour and 24-hour time formats.

Features & Operations

Radio-Controlled Time and Date

Explanation of how the alarm receives time and date signals.

Projection of Time and/or Remote Temperature

How to use the projection feature for time or temperature display.

EL Backlight

Information about the projection alarm's EL backlight functionality.

Indoor Temperature

Details on how the alarm measures and displays indoor temperature.

Remote Temperature

How to set up and read the remote outdoor temperature sensor.

Time Alarm

How to set, activate, and deactivate the dual alarms.

Changing Display Mode

How to cycle through different display modes for date, seconds, and temperature.

Weather Forecast

Explanation of the weather forecasting feature and its accuracy.

Weather Icons

Description of the three weather icons displayed on the forecast LCD.

Mounting the Remote Temperature Sensor

Mounting With Screws

Step-by-step guide for mounting the sensor using screws.

Mounting With Adhesive Tape

Instructions for attaching the sensor using adhesive tape.

Maintenance & Care

Troubleshooting

Specifications for WT-5442

Warranty Information

Related product manuals