ASSEMBLY INSTRUCTION PAGE 9
ASSEMBLY STAGE # 2
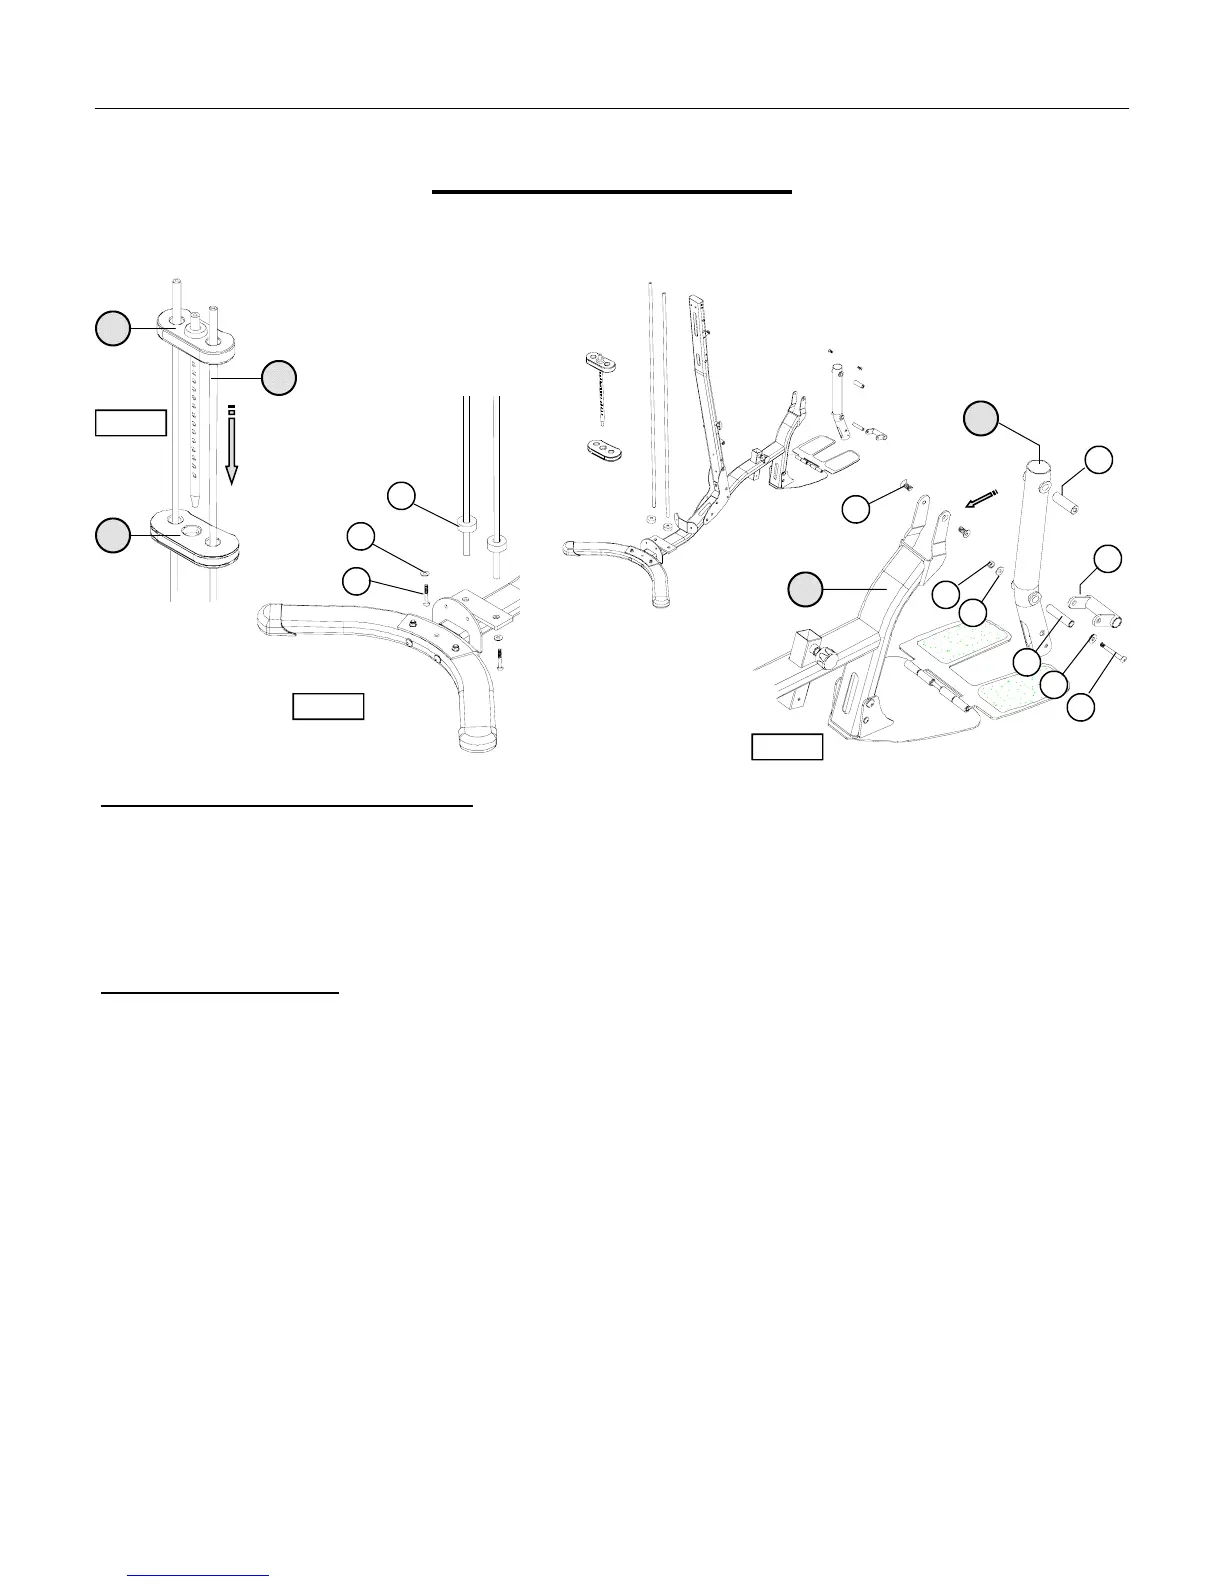
Add Weight Plates, Guide Rods, & Leg Extension Arm
Assembly Hardware Required:
#29 Threaded Shaft Qty. 1 #47 Flat Head Allen Screw Qty. 2
#30 Sleeve Qty. 1 #48 Flat Washer Qty. 2
#36 Button Head Allen Screw Qty. 1 #50 Flat Washer Qty. 2
#44 Button Head Allen Screw Qty. 2 #54 Nylon Nut Qty. 1
Assembly Description:
A) Align the Guide Rods (#19) with the rear mounting bracket of the Base Frame (#1) and secure the rods in place
using 2-Button Head Allen Screws (#44) and 2-Flat Washers (#50). (Reference Figure #2)
B) Slide a Bumper (#59) onto each Guide Rod (#19) and carefully slide each one of the Weight Plates (#63) over the
guide rods. (Reference Figure #2 & #3) Assembly Note: Before adding the weight plates, make sure you have
positioned the gym in the desired usage location.
C) Once all the weight plates have been loaded, carefully slide the Selector / Top Plate Assembly (#26) over the guide
rods and insert the Selector Pin (#51 not shown) into one of the middle plate positions. This will help stabilize the
weight stack during the ongoing assembly process.
D) Slide Threaded Shaft (#29) through the upper pivot-boss of the Leg Extension Arm (#2). Align the upper pivot
bushing of the Leg Extension Arm with the mounting bracket of the Base Frame (#1) and secure the arm in place
using 2-Flat Head Allen Screws (#47). (Reference Figure #4)
E) Slide Sleeve (#30) through lower pivot-boss of the Leg Extension Arm (#2) and attach the Roller Pad Pivot (#11)
in place using 1-Button Head Allen Screw (#36), 2-Flat Washers (#48), and 1-Nylon Nut (#42). (Figure #4)
♦ Assembly Stage # 2 completed
50
59
44
19
36
47
2
48
29
11
48
54
30
26
1
Figure #3
Figure #2
Figure #4