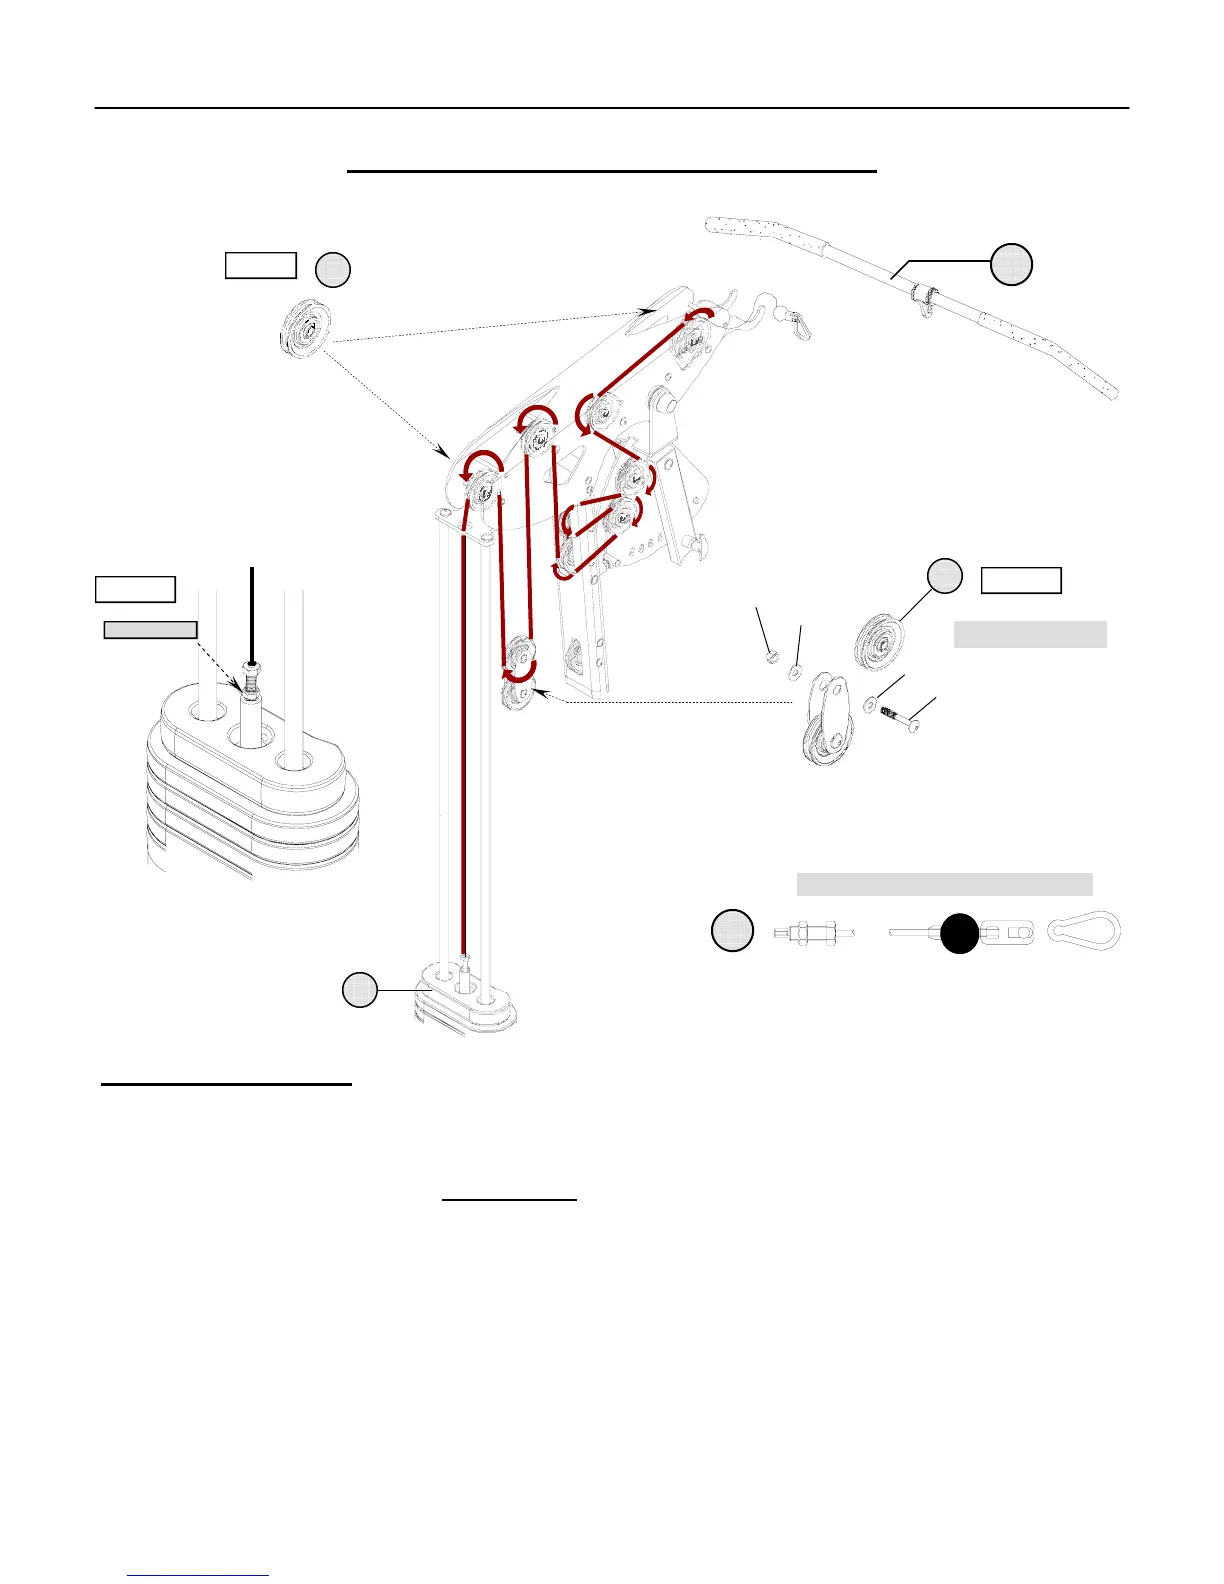
CABLE ROUTING INSTRUCTION
Routing Description:
A) Route the Lat / Press Arm Cable Assembly (#72) from the front of the Lat Bar Holder (#6) through the series of
upper pulleys and down to the Selector / Top Plate Assembly (#26). In most cases the installed pulleys most be
removed in order to route the cable. Assembly Note
: The 4.5 inch Pulleys (#71) must be placed in the correct
assembly locations. (Reference Figure # 9)
B) Assemble the (threaded) cable termination into the Selector / Top Plate (#26). Do not fully tighten the locking nut or
make cable adjustments until all the cable assemblies have been properly routed.. (Reference Figure #10)
C) Loop the Floating Pulley Assembly over the cable section and tighten the pulley mounting hardware. (Reference
Figure #11)
D) Check the routing and make sure the cable is properly tracking in the V-groove of all the pulleys.
E) (May be preinstalled on cable assembly) Add a Snap Link (#76) onto the front cable termination and attach the Lat
Bar (#15). Rest the Lat Bar on top of the bar holder and avoid letting it hang down during non-usage.
72
151.58 inches Lat / Press Arm Cable
LAT / PRESS ARM CABLE ROUTING
15
4.5 inch Cable Pulley Placement
71
26
Figure #9
Figure #10
Figure #11
LOCK NUT
42
50
55
50
71
Floating Pulley