EasyManua.ls Logo

Lamona LAM1625 - User Manual

Lamona LAM1625
22 pages
Print Icon
To Next Page IconTo Next Page
Loading...
User & Installation Guide
LAM1625
Ceramic 5 Zone
Touch Control Hob
Question and Answer IconNeed help?

Do you have a question about the Lamona LAM1625 and is the answer not in the manual?

Summary

General Safety Precautions

Appliance Heat Warnings

Advisories regarding hot surfaces and safe use by children and persons with reduced capabilities.

Fire Hazard Warnings

Precautions against fire risk from unattended cooking, fat, oil, and improper fire extinguishing.

Mains Supply Safety

Instruction not to disconnect the appliance from the mains supply during use for safety.

Electrical and Appliance Safety Warnings

Electrical Shock Precautions

Advice on preventing electric shock, including turning off power and unplugging.

Electrical Earthing Requirement

Mandatory requirement for the appliance to be properly earthed.

Heating Element Burn Warning

Caution about the extreme heat of the top element and avoiding contact.

Appliance Modification and Panel Safety

Prohibitions against modifying the appliance, its panels, or operating without the glass panel.

Gas Leak Detection Procedure

Instructions to follow if a gas smell is detected, emphasizing no ignition sources.

Induction Hob Specific Safety

Induction Hob Fire Safety

Safety advice for unattended cooking on induction hobs and fire extinguishing methods.

Cracked Hob Surface Hazard

Action to take if the hob surface is cracked, to avoid electric shock.

Pacemaker and Implant Safety

Advice for individuals with pacemakers or electrical implants regarding hob use.

Appliance Usage and Ventilation Safety

Pacemaker Compliance Requirements

Ensuring pacemakers are designed to comply with regulations for safe use near the appliance.

Unattended Pan Safety

Warning against leaving pans on the hob unattended, even for short periods.

Hob Surface Care and Electrical Safety

Mains Disconnection During Use Warning

Reiteration of not disconnecting the appliance from mains during operation due to safety impact.

Fire Safety and Emergency Procedures

Distraction and Unattended Cooking Warning

Advice to avoid distractions and leaving the hob unattended to prevent fires.

Leaving Hob When Called Away

Instructions to take pans off heat or switch off the hob if called away.

Kitchen Fire Evacuation Procedure

Procedure for handling kitchen fires: evacuate and call the fire brigade.

Fat and Oil Fire Safety

Warnings about cooking with fat/oil and using water to extinguish fires.

Pan Fire Response

Step-by-step guide on how to respond if a pan catches fire.

Deep-Fat Frying Dangers

Specific dangers and precautions associated with deep-fat frying.

Electrical Fire Response

Procedures for responding to electrical fires in the kitchen.

Using the Ceramic Hob

Ceramic Hob Operation Details

Troubleshooting Guide

No Power to Hob

Troubleshooting steps for when the hob has no power supply.

Hob Automatically Turned Off

Possible causes and solutions when the hob turns itself off unexpectedly.

Hob Error Code Display

Interpreting 'F' and letter displays on the hob as error codes.

Appliance Error Codes

General Appliance Error Descriptions

Details of internal appliance errors, their display codes, and recovery methods.

Radiant Heater Error Descriptions

Details of radiant heater errors, their display codes, and recovery methods.

Cleaning the Ceramic Hob

Ceramic Hob Cleaning Procedures

Recommended methods and products for cleaning the ceramic hob surface.

Safety Precautions During Cleaning

Essential safety measures to take before cleaning the hob, including switching off.

General Installation Information

Qualified Installer Requirement

Mandatory requirement for installation to be performed by a qualified professional.

Installation Clearance Dimensions

Detailed clearance requirements from side walls, rear wall, and overhead combustible materials.

Fitting the Hob into Worktop

Instructions for cutting the work surface and fitting the hob into the worktop.

Electrical Supply Connection

Instructions and warnings for connecting the hob to the mains electricity supply.

Mandatory Earthing Requirement

Critical warning that the appliance must be properly earthed for safety.

Connect Power Off

Instruction to connect the hob only when the mains power is switched off.

Minimum Installation Clearances

Importance of observing minimum distance requirements to surrounding units and appliances.

Connection Integrity Importance

Warning about potential overheating due to loose or incorrect electrical connections.

Connection by Competent Person

Recommendation for connection by a competent person adhering to local regulations.

Adherence to National Regulations

Installation must comply with applicable national regulations for this product type.

Overview

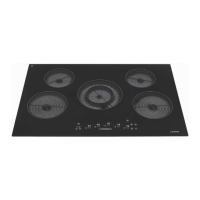
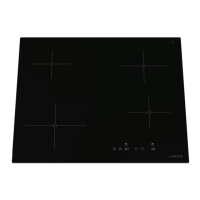
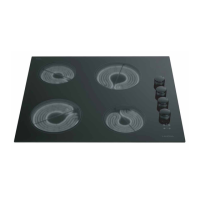
This document provides the user and installation guide for the Lamona Ceramic 5 Zone Touch Control Hob, model LAM1625. It covers essential information for safe operation, proper usage, and maintenance of the appliance.

Function Description

The Lamona Ceramic 5 Zone Touch Control Hob is a built-in electric cooking appliance designed for domestic use. It features five ceramic cooking zones controlled by a touch interface, allowing for precise and repeatable power settings. The hob is equipped with various safety features, including a key lock function, automatic shut-off, and residual heat indicators. It also includes a timer function that can be set independently for each cooking zone.

Usage Features

Touch Controls:

The hob's touch controls are designed for ease of use, responding to the flat of your finger without requiring pressure. The control area should always be kept clean, dry, and free from objects to ensure proper operation. A beeping sound will alert you if objects are detected on the control area.

Applying Power to the Hob:

Before initial use, ensure no bright lights (like a cooker hood) are directly above the hob and it's not in direct sunlight. This allows the electronic controls to calibrate their sensitivity to ambient lighting. Failure to do so may result in the hob not functioning correctly, displaying "FL."

Key Lock:

The hob always starts with the Key Lock activated. A red LED indicates when the key lock is active. To activate or deactivate, touch the Key Lock key for 1 second. When deactivated, the red LED switches off. If cook zones are ON, the key lock locks all keys except the ON/OFF key. If cook zones are OFF, all keys, including the ON/OFF key, are locked. The Key Lock automatically activates every time the electricity supply is switched off and back on. It is recommended to use this feature to prevent unintentional switching on, especially by children or pets.

Central On/Off Key:

This key activates the cook zone selection keys and allows all cooking zones to be switched off simultaneously with a single touch.

Switching On (Individual Cook Zone):

  1. Ensure the Key Lock is deactivated.
  2. Touch the On/Off Key for 1 second. A beep will sound, and the cook zone displays will illuminate.
  3. Touch the desired cook zone key; it will flash.
  4. While flashing, adjust the power level using the slider.
  5. Either touch the cook zone key again to confirm the setting, or wait 5-10 seconds for the hob to auto-set the power level, beep, and stop flashing.
  6. To adjust the power setting, follow steps 3-5.
  7. Repeat for other zones as needed. During cooking, elements will cycle on and off, which is normal.

Dual Zone (If Fitted):

The dual zone allows separate control of the inner ring of the heating element.

  • To operate: Select the appropriate cook zone and set the power level. While the heater display is flashing, press the central dual zone key. A red LED will illuminate next to the cook zone, indicating activation. The power level will stop flashing and be set.
  • To de-select: Touch the cook zone key (display will flash). While flashing, press the central dual zone key or return the power level to "0." The red LED will disappear, and the inner and outer elements will disconnect, leaving only the center element controlled.
  • Note: Only the inner ring can be operated on its own. The outer ring operates only with the inner ring. Match your pan size accordingly.

Switching Off (Individual Cook Zone):

Touch the required cook zone key until the zone display flashes, then return the power level to "0" using the slider.

Residual Heat Indicators:

If the glass surface is hot, an "H" will be displayed in the cook zone display until it has cooled sufficiently. "H" and "0" will flash alternatively if a cook zone is hot and another is in use.

Stop & Go (Pause) Function:

Touching the Pause key for more than 120 milliseconds temporarily pauses the cooking process. The Pause LED blinks, a pause sound is heard, and the hob stops. Actual power settings are stored, active heaters are set to 0, auto switch-off time is stopped, all running timers are stopped, and all keys except Pause and On/Off are locked. The timer displays nothing, and heater LEDs display 0.

Timer (All Cook Zones):

All 5 cooking zones can be timed independently for up to 99 minutes. When the set time expires, the timer will beep, and the cook zone will automatically switch off.

  • To Set:
    1. Set the desired power level for the cook zone.
    2. While the cook zone power level is flashing, touch the timer key. The timer will illuminate "00," and two red LEDs will illuminate; the first will flash to indicate the activated timed cook zone, and the second "00" indicates that the time can be adjusted.
    3. Set the required time using the "+" or "-" keys.
    4. To adjust the timer during operation, follow steps 2 and 3.
  • To Cancel: Return the time down to zero or switch off the cook zone.
  • Note: Once the time has elapsed, touch the timer key to cancel the alarm. If multiple cook zones are timed, touch the cook zone key to view the timer for that specific zone.

Safety Shut Down:

If the power level is not changed for a long period, the cook zone will automatically turn itself off. The maximum time a cook zone can stay on depends on the power level.

Cookware:

Cookware made of enamelled steel or with aluminum or copper bottoms can leave discolorations on the ceramic glass surface that are difficult or impossible to remove. Good cookware has thick and flat bottoms.

Maintenance Features

Cleaning the Ceramic Glass Hobs:

  • Before first use: Clean and wash the hob surface, then apply a thin coat of ceramic hob cleaner to help maintain and protect it.
  • Regular cleaning: Use a clean, damp cloth or kitchen paper. Avoid used dishcloths or sponges, as they can leave detergent film, leading to discoloration. Ensure elements are fully cooled to prevent steam burns.
  • Restoring the surface: A specialist ceramic cleaner can be used sparingly. Too much cream cleaner can cause discoloration. Polish with a dry, clean cloth.
  • Stubborn marks: Use a specialist hob scraper or cleaner.
  • Avoid: Steam cleaners or high-pressure cleaning equipment.
  • Prevent accumulation: Regular cleaning prevents salts or minerals from accumulating and discolouring the glass.
  • Spills: Wipe up any spillage as soon as possible.
  • Grease build-up: Clean the hob top regularly to prevent grease build-up, which can be a fire hazard.
  • Sugary foods: Foods with high sugar content (toffee, fruit juice, jam, etc.) that boil over or spatter must be immediately removed with a scraper, even if hot.

Safety when Cleaning:

  • The appliance must be switched off and cooled down before cleaning.
  • Be aware of the risk of burns from residual heat.

Installation:

Installation should only be carried out by a qualified installer or engineer. Wear protective gloves during installation to prevent injury from burrs or sharp edges. Observe minimum distances to other appliances and units. Wall surfaces and adhesives in the vicinity of the hob must be heat-resistant. Ensure adequate air circulation underneath and at the back of the hob for efficient cooling. Avoid installing near doors or windows to prevent hot cookware from being knocked off. Built-in appliances must be installed in suitable units and surfaces meeting required standards. A minimum worktop depth of 38mm is recommended, or a 25mm gap between the hob base and appliance if the worktop is less than 38mm deep.

Fitting into Worktop:

Cut a hole of the required size in a heat-resistant worktop. Apply a suitable sealant to the cut edge to protect it from moisture.

  • Self-adhesive seal: Apply the self-adhesive seal to the underside edges of the hob glass, as close to the edge as possible, trimming at corners for a neat join.
  • Conventional Installation: Place the hob in the aperture, ensuring the glass covers the worktop on all four sides. Align the front edge with the front of the worktop. Attach securing clamps and tighten screws to pull the hob down firmly against the worktop, ensuring a good seal.
  • Recessed Method: Recess the worktop to approximately 5mm depth, shaped to fit the hob (add 1mm to overall glass size). Insert the hob into the recess, ensuring the foam seal sits correctly. Attach securing clamps and tighten screws. Silicone sealant can be used to fill any gap between the hob top glass and the worktop surface, but DO NOT fit silicone sealant under the glass hob instead of the self-adhesive seal.

Installation Bracket Advice:

Secure the hob to the worktop using the provided brackets, considering the worktop thickness.

  • Installation pack 1: Includes 4 "U" shape installation brackets, 4 spire clips, and 4 No8 screws. Spire clips must be fitted to the hob base before brackets.
  • Installation pack 2: Includes 4 cranked installation brackets, 4 spire clips (for 70/77/90cm appliances only), and 4 No8 screws. If spire clips are not supplied, the brackets screw directly into the ported holes in the hob base.
  • Important: Do not modify this appliance.

Connecting to the Electricity Supply:

  • WARNING: This appliance must be earthed. Connect to the electrical mains terminal only with the power switched off, as the terminal is live.
  • Follow the terminal block connection schematic. Loose or inappropriate connections can cause the terminal to overheat.
  • Ensure the cable clamp is fitted correctly and securely.
  • The electrical installation must include a device allowing the appliance to be disconnected from the mains at all poles with a contact opening of at least 3mm.
  • It is recommended that a competent person who is a member of a "Competent Person Scheme" performs the connection, complying with local regulations.
  • Use a suitable cable.
  • Steps:
    1. Open the terminal block cover using a small flat-bladed screwdriver in the door release tabs.
    2. Remove the cable clamp screw and release the retaining arm (which has a ratchet mechanism on the right side).
    3. Strip the wires and connect them to the terminal block: BROWN/L1 to Live, BLUE/N to Neutral, GREEN/YELLOW/PE to Earth.
    4. Fit the cable clamp and secure with the screw.
    5. Close the terminal box, ensuring the cover is closed and all screws are tight.
  • Important: Route all mains electrical cables away from adjacent heat sources (e.g., oven or grill base).

Lamona LAM1625 Specifications

General IconGeneral
Number of zones4
Width590 mm
Depth520 mm
MaterialGlass
Voltage220-240 V
Frequency50 Hz
Hob typeElectric Ceramic

Related product manuals