3
Installation
The projector can be installed in any position, use diameter 10mm holes of the steel bracket to fix the projector.
Unscrew the side screws to adjust the projector body angle.
We suggest to install a supplementary safety steel chain or cable
The area exposed to the wind is 0.08 square meters.
Unscrew two upper screws to open the lid and have access to the display.
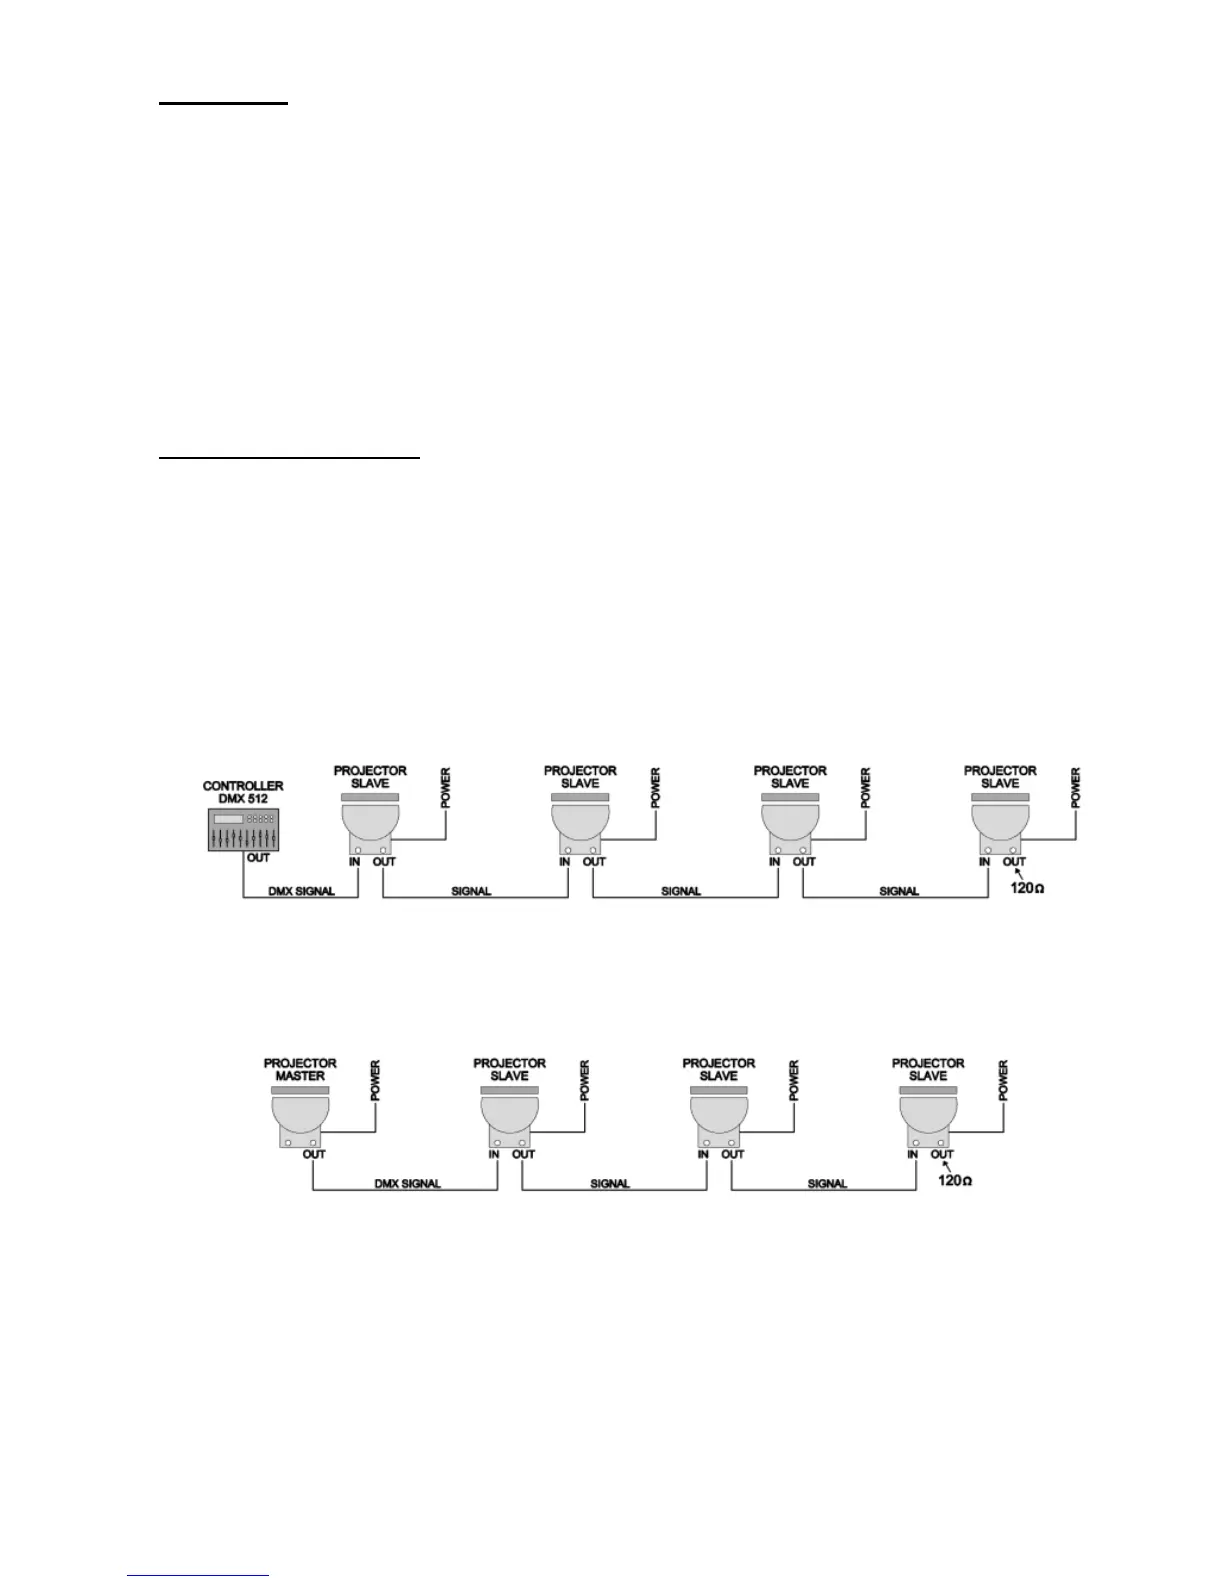
Example of installation
If only one projector is on stand alone mode the signal cable is not necessary.
If the projectors are driven by a DMX controller or projector Master drive other projectors Slave, they need to be connected
together, with DMX signal cable, following the instructions of this manual.
The DMX signal is generated by a DMX controller, the signal cable goes in and out from each projector up to the last one.
The projectors will execute the same scenes if the DMX addresses are the same (factory set is 1) or they can be driven one by
one if the DMX addresses are different from each other.
Default mode 7C d: each projector uses 8 DMX channels
Projector 1: DMX address 1 Projector 2: DMX address 9 Projector 3: DMX address 17………….
If the DMX controller is not switched on, the projectors can be in black-out mode, generate light at 15% (default setting) or
generate light at 100%. Change this parameter at – DM.DE of menu.
It is possible to use MASTER/SLAVE function: One projector (Master) functioning in stand alone mode with resident
programs and a group of projector (Slave) execute, thanks to dmx signal and signal cables, the same sequences of colours.
The projectors can be fed from different power sources, it is not necessary to switch on the projectors at the same time.