5
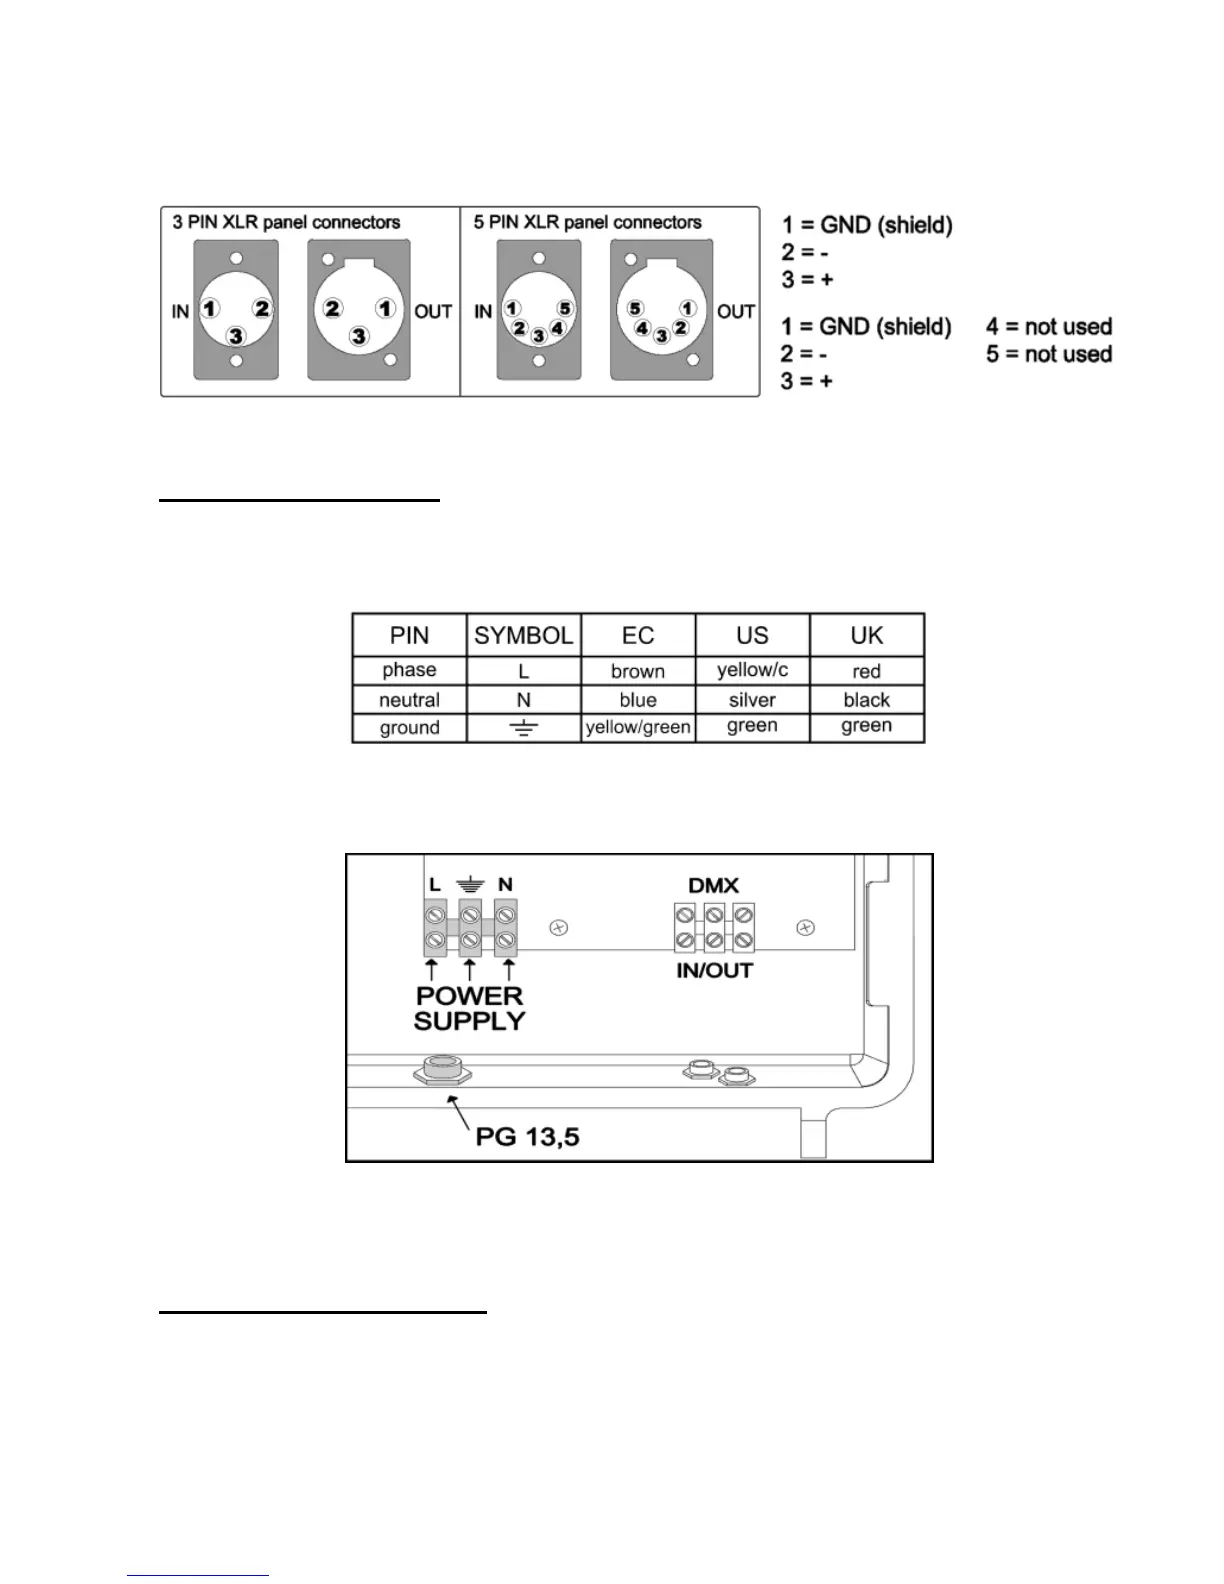
Always, use Male XLR 3 or 5 pin connector to connect the projectors to the DMX controller.
Solder on PIN 1 of the XLR connector the shield of the signal cable, on PIN 2 solder the negative (example: black wire of
cable) and on PIN 3 solder the positive (example: red or white wire of the cable). The sequences and the colours has to be the
same on the terminal connection blocks, do not change the sequences.
Power supply connection
It is advised to check the electric system before installation. From 85Vac to 265Vac (50 o 60 Hz).
Disconnect mains power supply before any operations.
Connect the fixture to the mains. See the table and the drawing for the colours of the connection cable.
Do not power the projector with a dimmer circuit
Protect the electric system with highly sensitive differential circuit breaker, 30mA.
When in doubt, consult a qualified electrician.
The cable’s diameter must be compatible with the cable clamp of the projector (PG 13.5), diameter from 6 to 12mm.
Projector is complete grounded, it is necessary to connect the middle terminal connection block at grounding system.
DMX signal cable connection
The IN and OUT signal cables must be connected directly to the terminal block inside the projector. Use the PG9 cable clamps
on the projector).
The external diameter of cable must be included between 4 and 7mm (PG9 cable clamps).