8
Chiller Installation
1. Install the unit onto the counter.
2. Remove the bonnet from the chiller by lifting up.
3. Route power cord from control box to outlet.
4. Route appropriate tubing from syrup pump location to inlets
according to the plumbing diagram located on page 16.
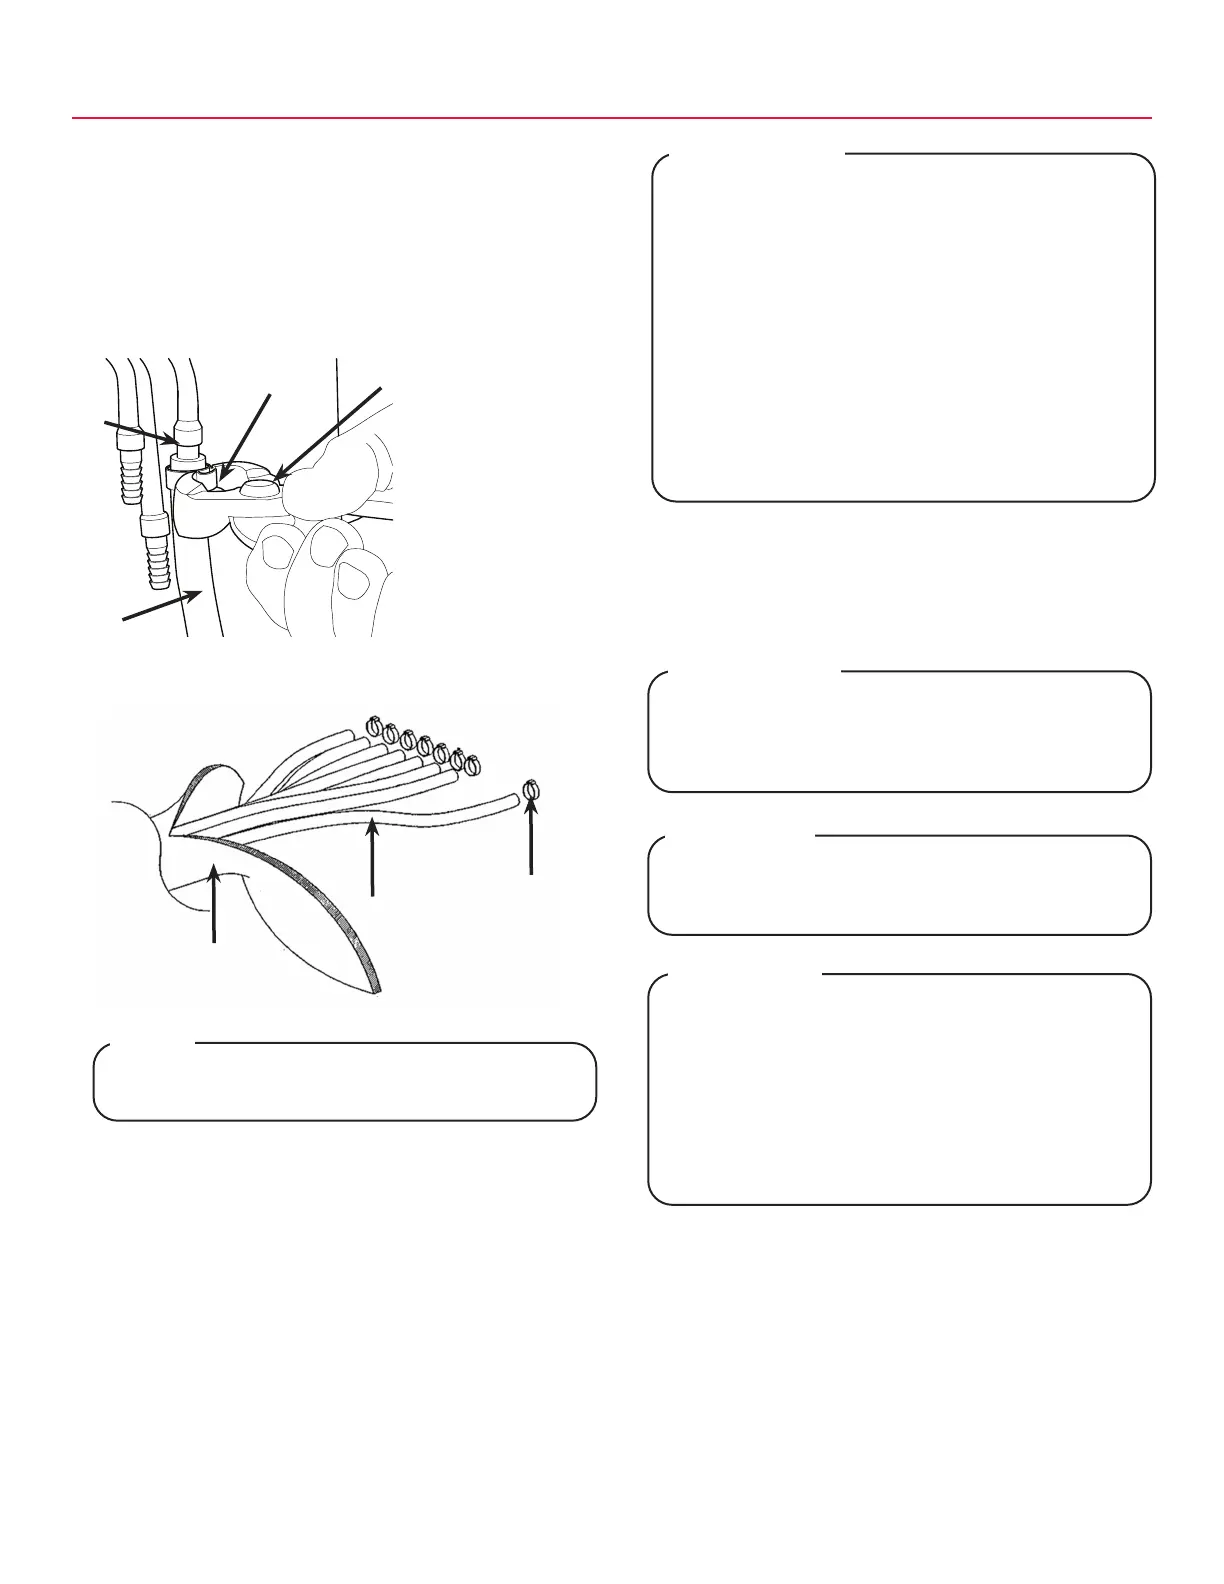
5. Connect tubing to inlet using Oetiker pliers and clamps.
Repeat for all connections.
6. Route and connect insulated tubing from chiller outlets to
dispenser.
A
B
C
A. Oetiker Pliers
B. Fitting
C. Tubing
D. Syrup/Water
Inlet
D
Carefullyreadthisbeforellingthewaterbathtank.
In order to optimize the maximum performance of the
chiller, the following steps and warnings MUST be ad-
hered to.
Toensureproperfunctionoftheelectronicicebankcontrol
a total dissolved solids (TDS) of 100-300 ppm or an E.C.
measurement between 156 and 468 µS/cm is required.
Below100ppmor156µS/cm,thecompressorwillnotwork
properly and above 300 ppm or 468 µS/cm could cause the
lines to freeze.
The necessary TDS may be achieved using tap water;
however, Lancer recommends using a mixture of 1 tbsp of
bakingsodaforevery5gals.(19L)ofdistilledwater.
! ATTENTION
Makesuretheoverowtubeisnotcoveredtoallow
waterfromthewaterbathtanktoescapeasneeded.
NOTE
8. Carefully pour water into the water bath tank until water
ows out of the overow tube at the front of the unit, then
replace the cap.
9. Plug unit power cord into a grounded electrical outlet to
power on and begin building an ice bank.
Thewaterbathcompartmentmustbelledwithwater
before connecting the unit, otherwise the compressor
fan may not operate properly. DO NOT use Reverse Os-
mosis(RO)orpuriedwater.
! ATTENTION
Never energize the machine if there is any trace of
damage. Contact Lancer Customer Service for
assistance.
! WARNING
The chiller must be properly electrically grounded
toavoidseriousinjuryorfatalelectricalshock.The
power cord has a three-prong grounded plug. If a
three-hole grounded electrical outlet is not available,
use an approved method to ground the unit. Follow all
localelectricalcodeswhenmakingconnections.Each
chiller must have a separate electrical circuit. Do not
use extension cords. Do not connect multiple electri-
cal devices on the same outlet.
! WARNING
A. Oetiker Clamp
B. Syrup/Water Line
C. Python Line
A
B
C
7. Remove cap from ll hole and insert a funnel into the ll hole.